
Bye Bye . Website Builders– How to Convert any Design to a Landing Page with OpenAI Codex
Convert Any Design to a Live Website with Codex O3 / O4 (In Under 10 Minutes)
Let’s be honest — traditional website builders are slow, bloated, and limiting. You drag. You drop. You fight with blocks. Not anymore.
With OpenAI Codex (O3 / O4), you can instantly turn — from Figma, Dribbble, Freepik, Pinterest, or even your hand-drawn sketch — into a fully-functional website, landing page, or even a small web app. No boilerplate. No setup hell. Just pure speed and AI magic.
This article shows you step-by-step how to set up Codex and start building modern websites using only prompts.
Step 1: Install Node.js + npm
First, you need to install Node.js and npm:
👉 Download from: https://nodejs.org/en/download
👉 Guide: https://docs.npmjs.com/downloading-and-installing-node-js-and-npm
Codex requires them to run globally.
Step 2: Windows? Install WSL
If you're using Windows 11, install WSL with:
wsl --install
For older Windows versions, use a virtual Linux or WSL manually.
Then, inside your Linux terminal (WSL), install Node again:
sudo apt update
sudo apt install -y curl
curl -fsSL https://deb.nodesource.com/setup_20.x | sudo -E bash -
sudo apt install -y nodejs
node -v
npm -v
You must run Codex inside WSL because CMD can’t handle the project structure Codex creates.
Step 3: Install Codex CLI
Once Node is ready, install Codex globally:
npm install -g @openai/codex
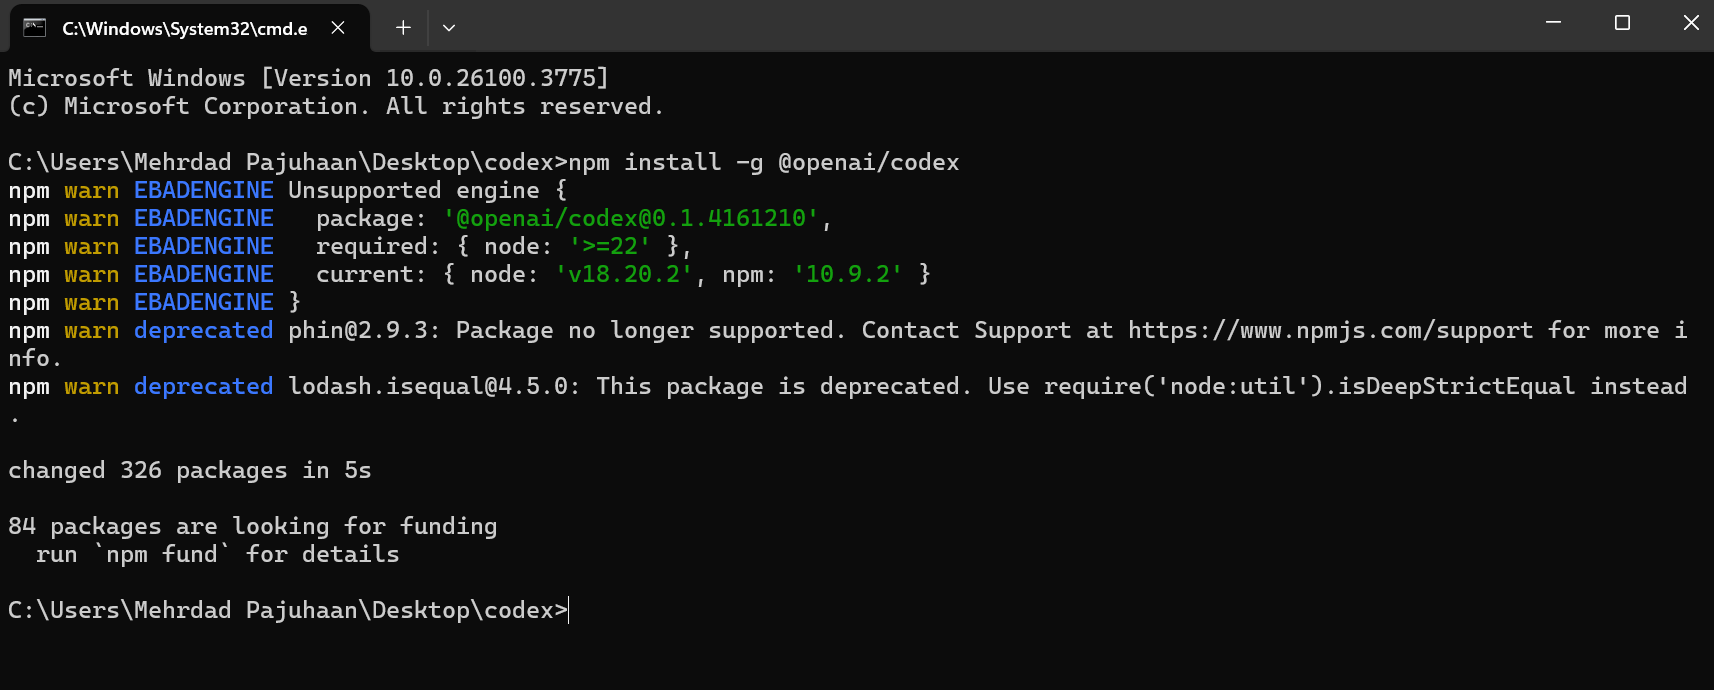
Now Codex is available in your terminal globally.
Step 4: Get Your OpenAI API Key
Go to: https://platform.openai.com/api-keys
Click . Copy the key.
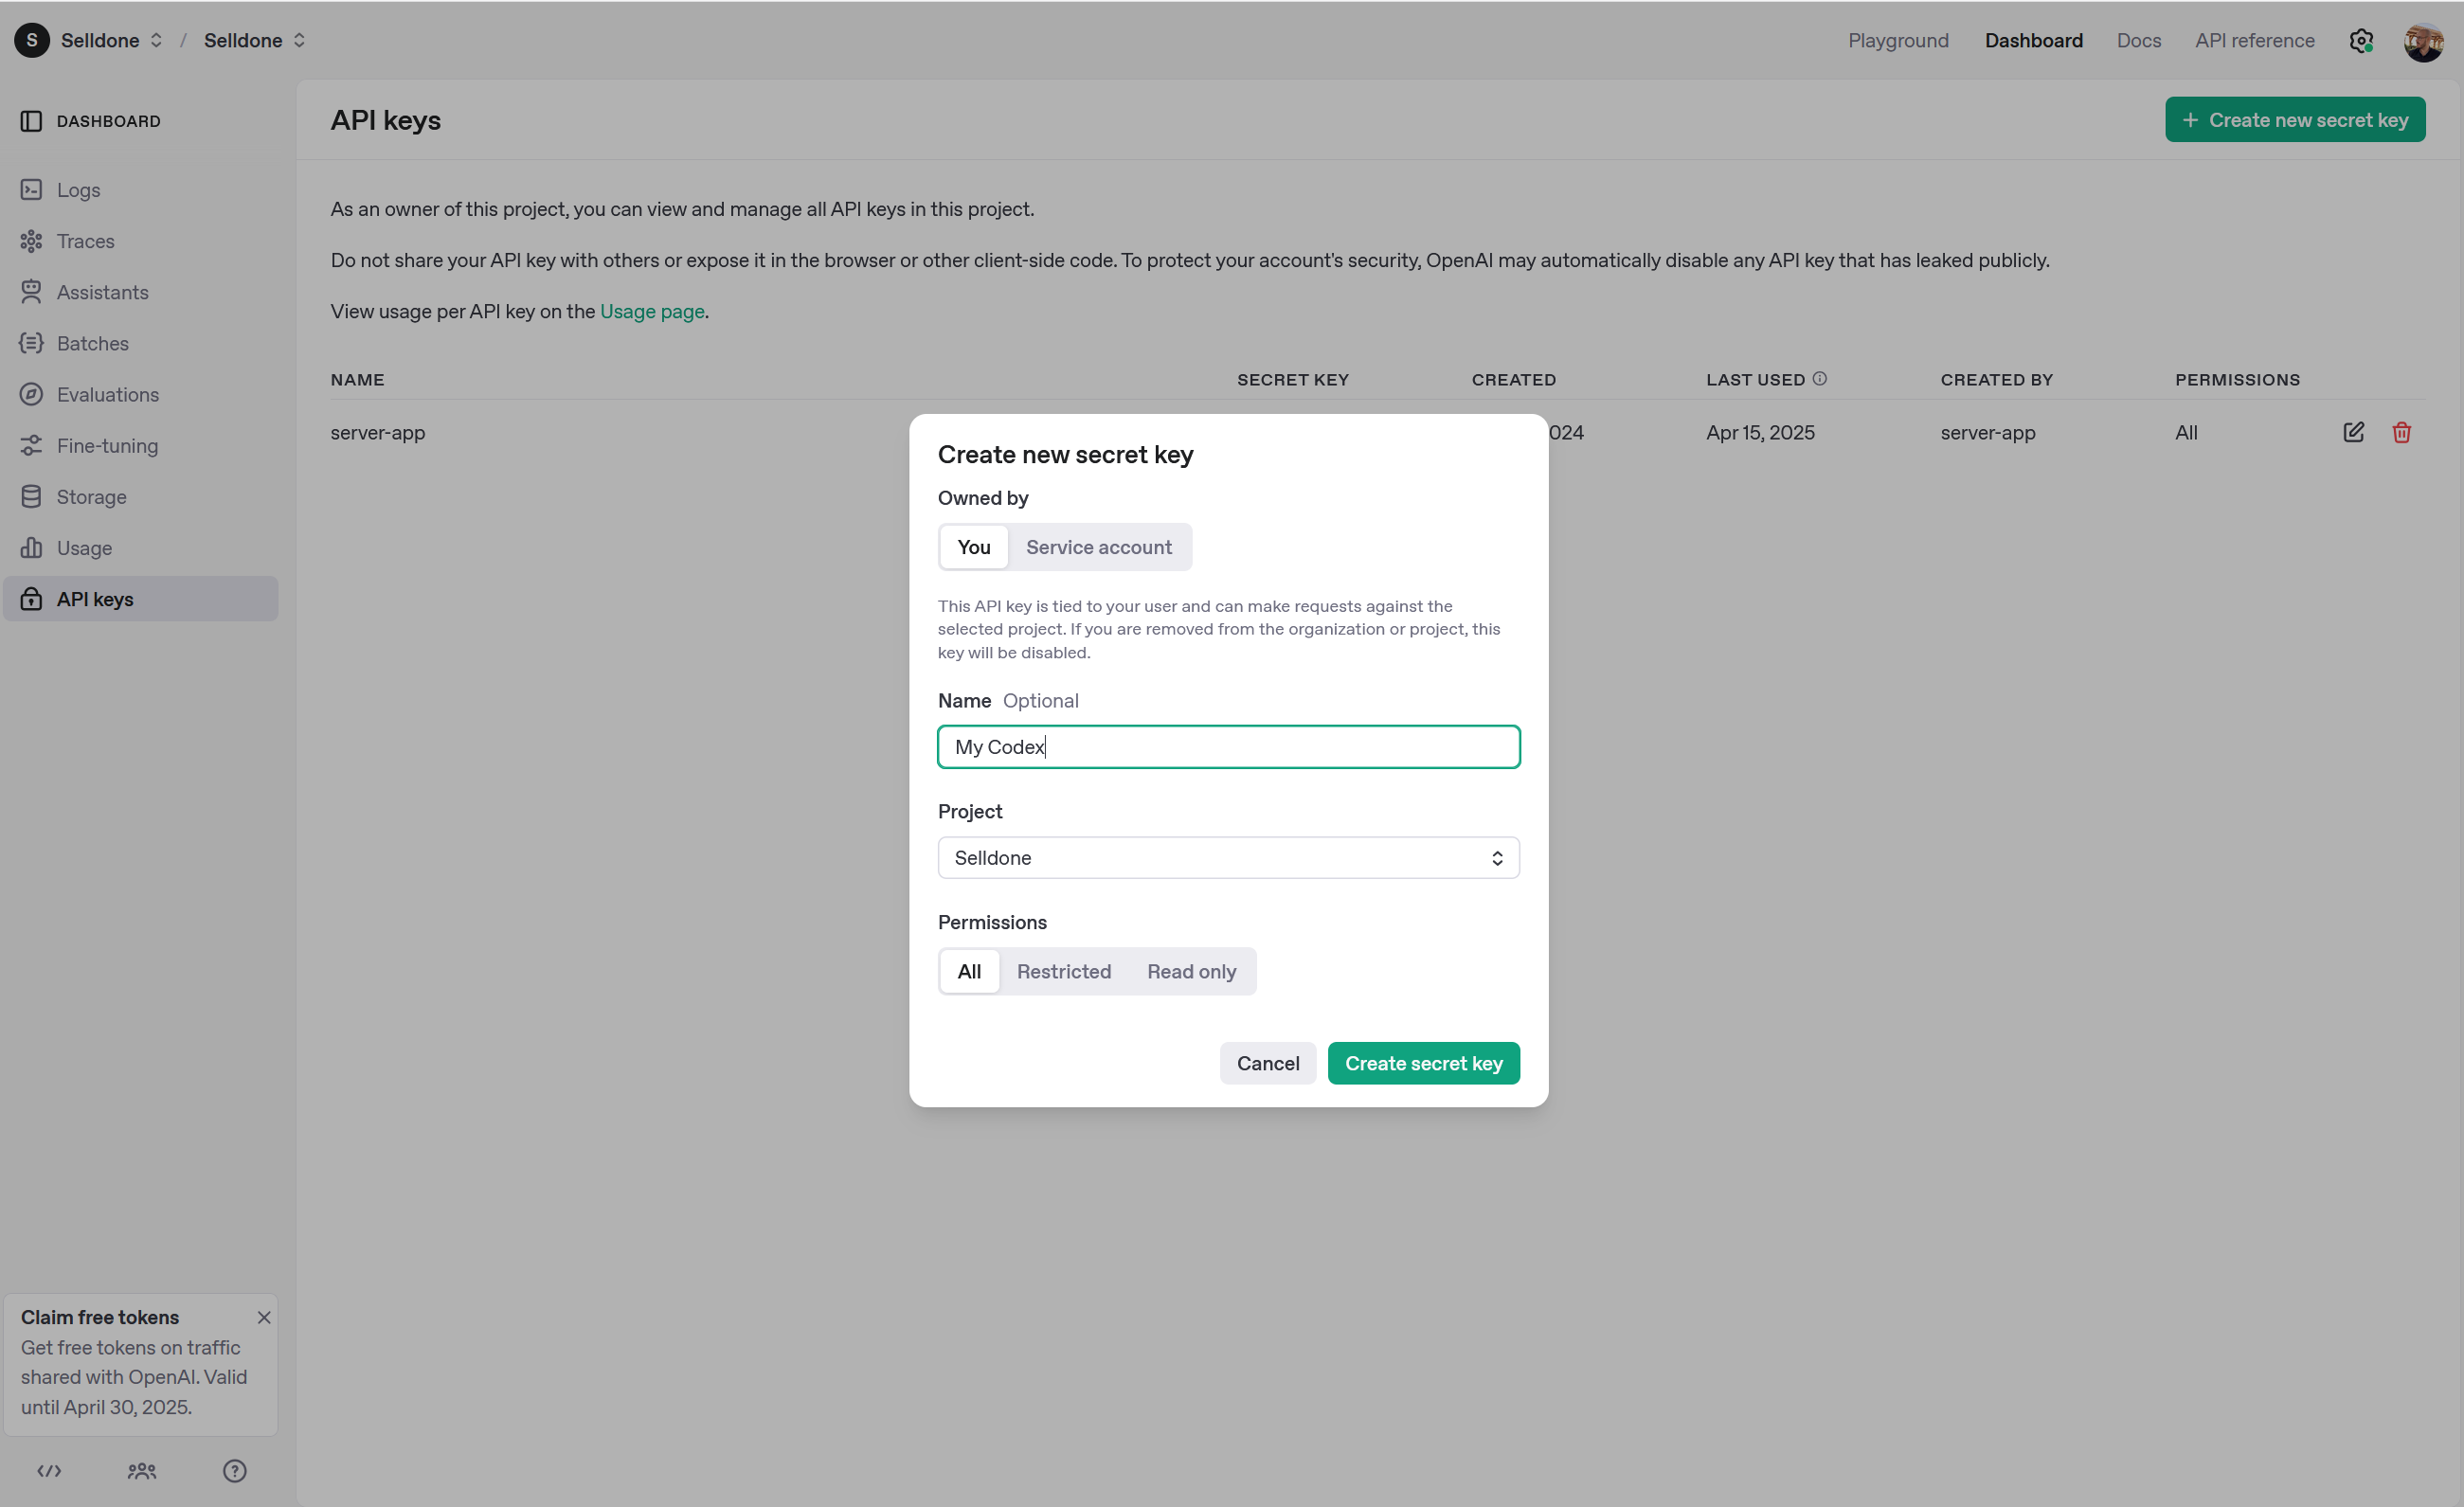
Step 5: Set the API Key
To set your key in Linux/macOS terminal:
export OPENAI_API_KEY="your-api-key"
To set in Windows (temporarily):
set OPENAI_API_KEY=sk-proj-...your-key...
To make it permanent (on Windows):
- Press Win + S, search "Environment Variables"
- Click "Edit the system environment variables"
- Go to Environment Variables…
- Under User variables, click New…
- Set name to OPENAI_API_KEY, value to your key
- Click OK three times to apply
🟢 This will make the key available in all terminals and apps.
Step 6: Use WSL for Projects (Important for Windows)
If you're on Windows, don’t use CMD or PowerShell to run Codex. It won't have access to your file system properly. Instead:
- Open WSL terminal
- Create a project folder like Codex
- Or open your Linux folder through: *\wsl$\Ubuntu\home\your-user*
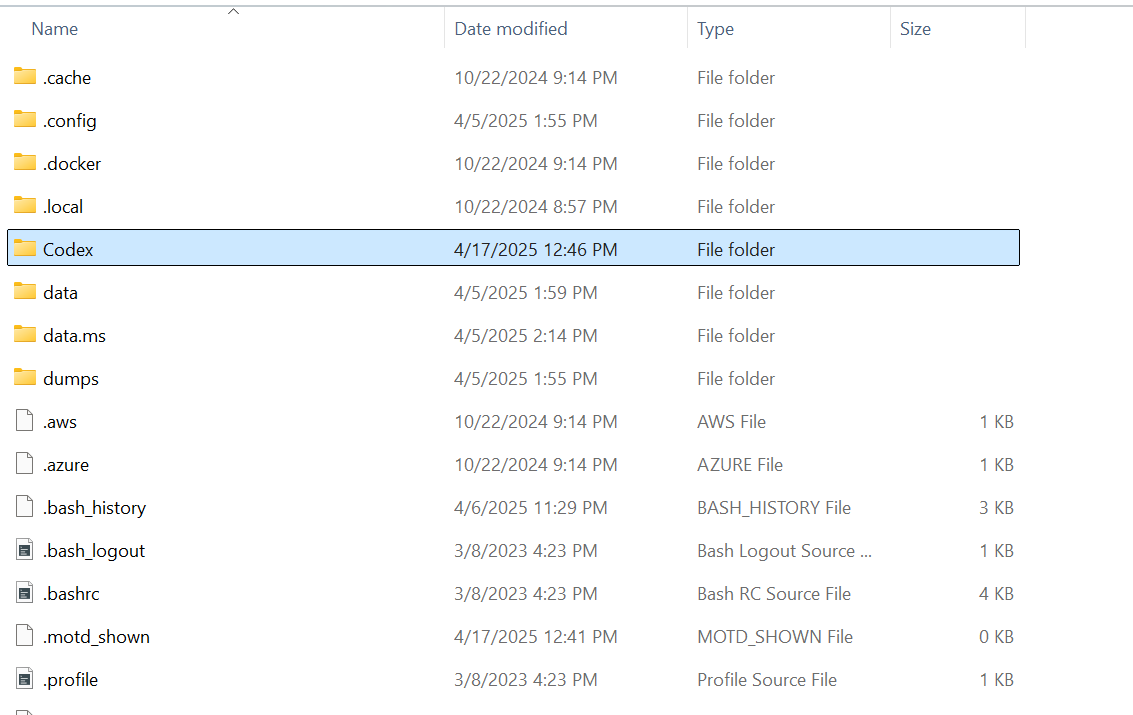
Now, put your assets (images, videos, design screenshots) in a folder here.
Inside WSL terminal:
mkdir Codex
cd Codex
git init
Tip: Using Git from the beginning helps keep a full history of changes. Codex even auto-commits when you approve.
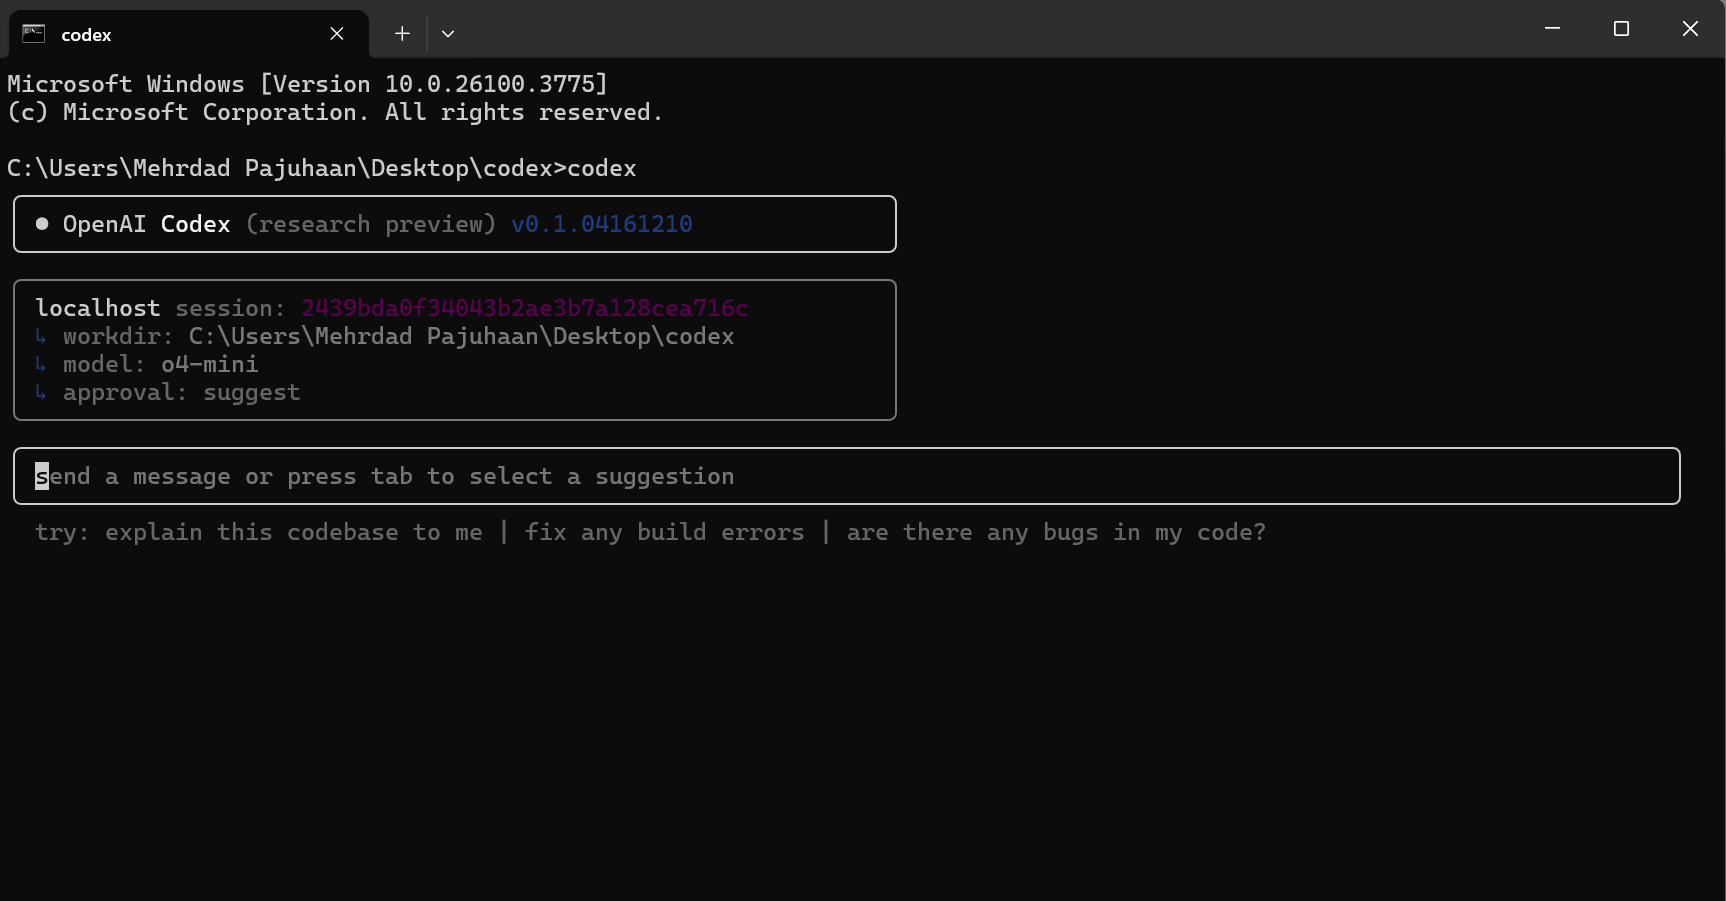
Step 7: Run Codex
Now, run:
codex
Or, for an instant project scaffold:
codex --approval-mode full-auto "create the fanciest todo-list app"
Codex will:
- Create the folder structure
- Install packages
- Build the code
- Run it live in a sandbox
- Show the result
- Ask for your approval
- Commit it
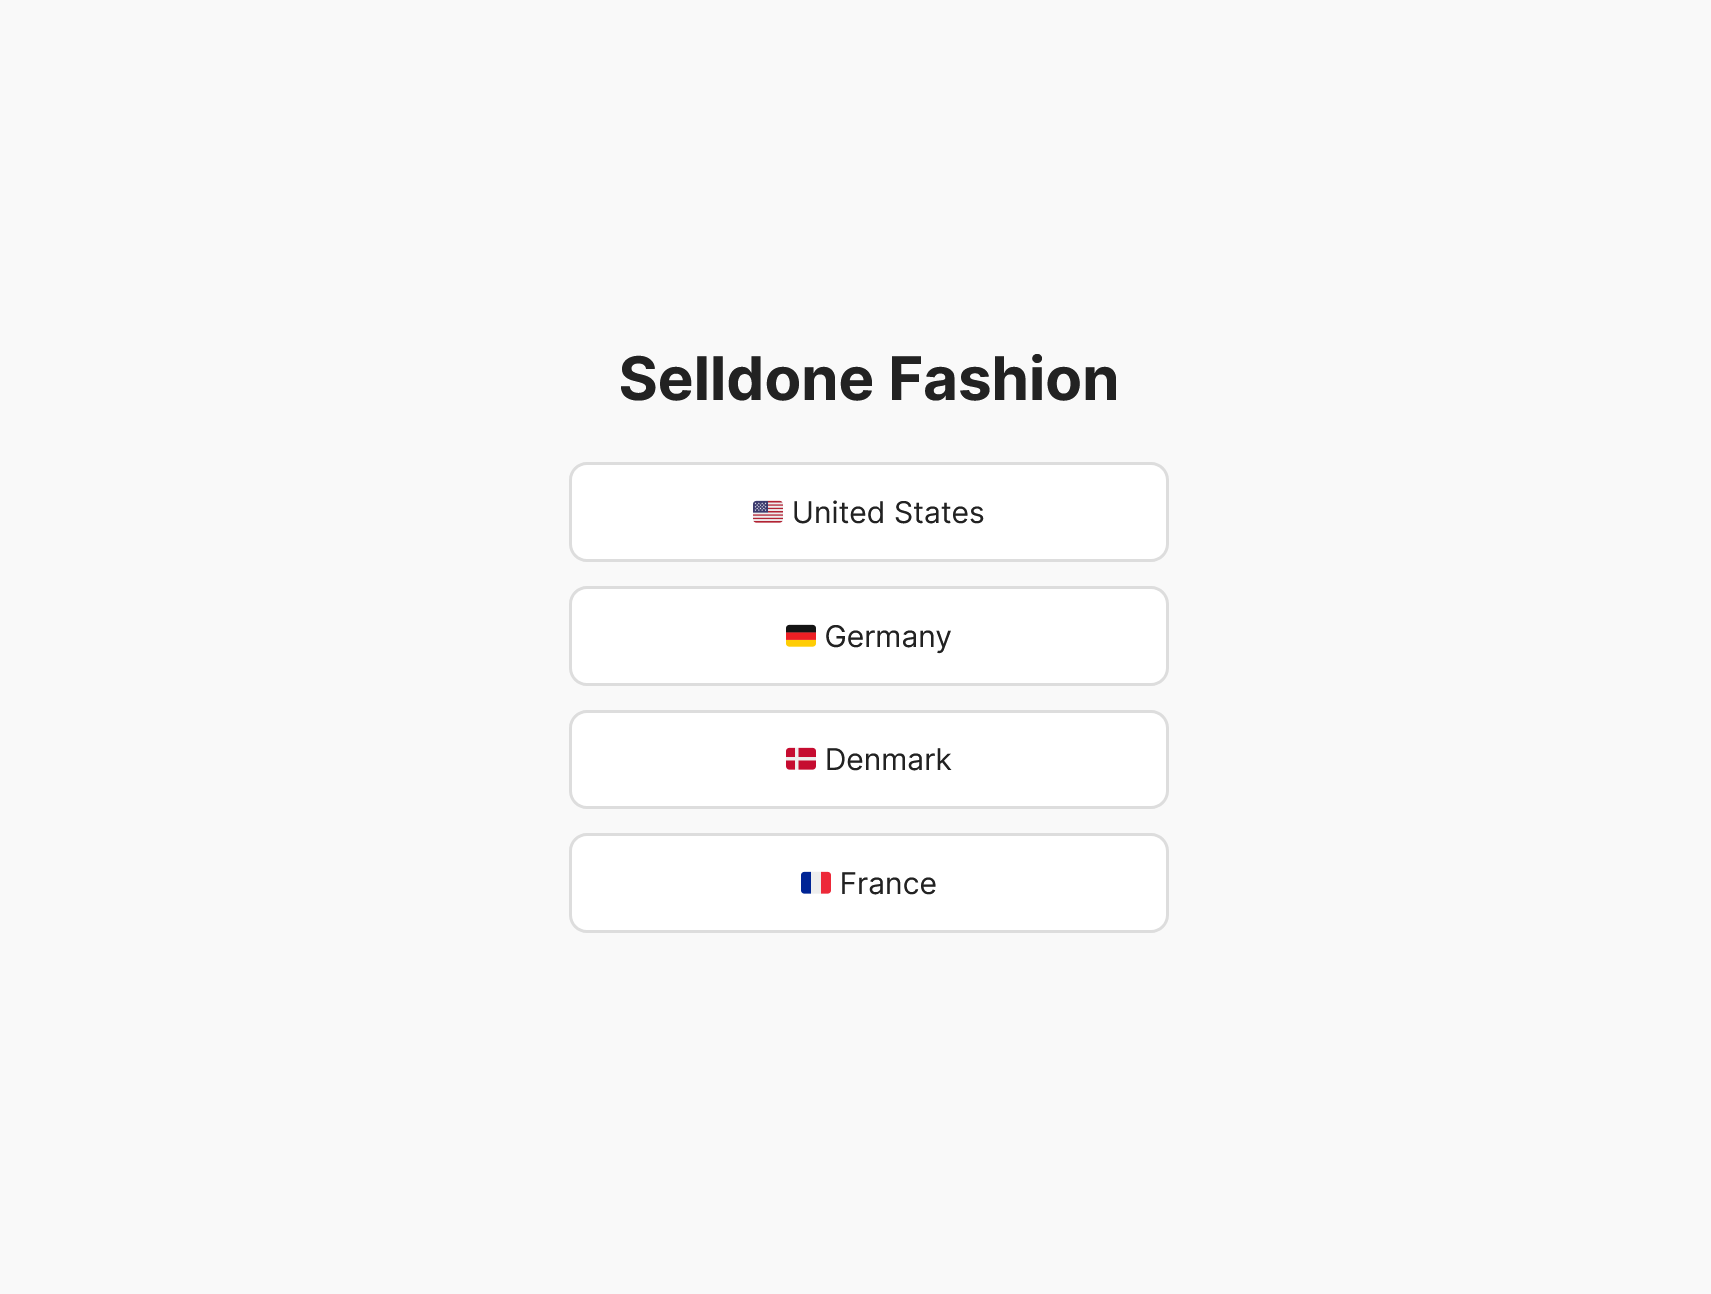
Step 8: Convert a Design to a Website
Now it gets fun. You can turn any design into a website instantly.
Try a prompt like:
codex --approval-mode full-auto "create a website with home page and blog, modern, flat, animated, use bootstrap"
You can get inspired from Figma, Dribbble, Pinterest, Freepik — just describe the layout and style you want.
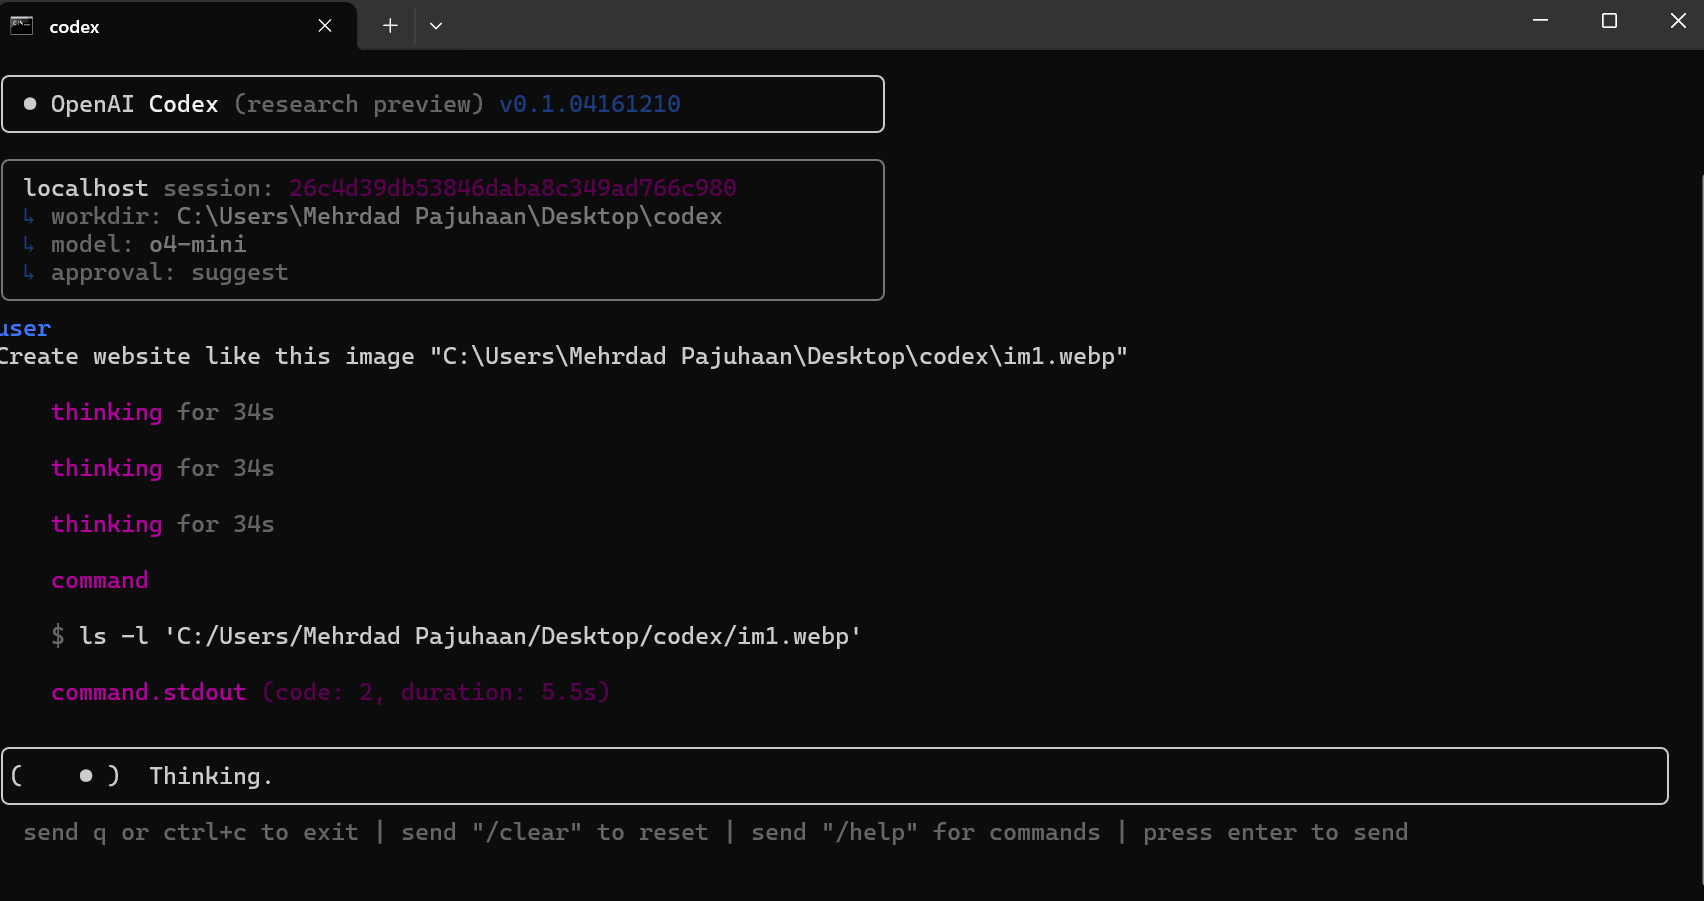
Step 9: From Image to Website (Literally)
You can even convert an to a website layout.
Just write:
create website like this image
Then . This will auto-insert the image URL, and Codex will use it.
⚠️ Codex can’t access your local image unless the image path is correct and relative to the working folder. Best practice is to drag from a browser directly.
Step 10: Add Assets (Images, Videos)
Create a folder called and put your resources there.
Then run a prompt like:
create a website about ants using assets in the folder ‘assets’
Codex will reference your files (sometimes you’ll need to rename them manually later to match filenames it generates like , ).
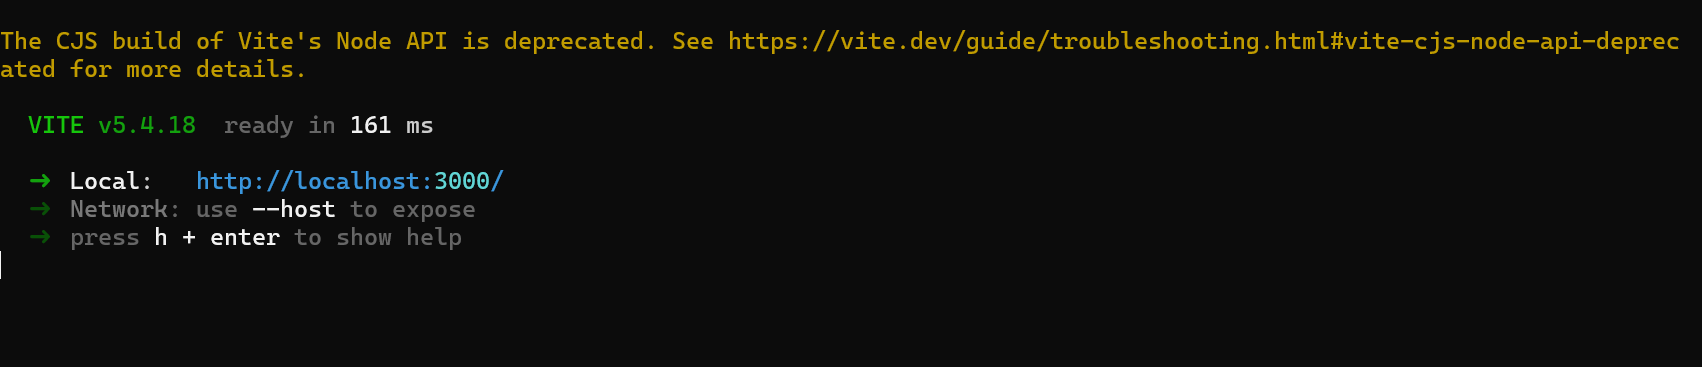
Step 11: Run the Site
To see your site in action:
npm install
npm run dev
This will launch the dev server, and you’ll get a link to preview the site live in your browser.

💡 Codex Website Generation Prompt Handbook to Fast Start
Here's a thoughtfully curated list of useful prompts tailored for OpenAI Codex O3 / O4, specifically designed to help you create websites inspired by design samples or existing websites.
Each prompt can be dropped into Codex CLI (with --approval-mode full-auto) and will help scaffold a useful layout or even a full website structure.
| Prompt | Framework/Library |
|---|
| create a modern personal portfolio website like this image, using React and Tailwind CSS | React + Tailwind CSS |
| build a SaaS landing page inspired by Stripe’s homepage using Vue 3 and Bootstrap 5 | Vue 3 + Bootstrap 5 |
| create an animated marketing website for a tech startup based on this image, using React and Framer Motion | React + Framer Motion |
| build an ecommerce landing page inspired by Shopify using Vue 3 and Vuetify | Vue 3 + Vuetify |
| generate a minimalist blog layout using Next.js and Tailwind CSS, inspired by Medium’s design | Next.js + Tailwind CSS |
| create a responsive agency website with parallax sections like this image, using React and Bootstrap 5 | React + Bootstrap 5 |
| build a one‑page scrollable portfolio site based on this image, using Vue 3 and Tailwind CSS | Vue 3 + Tailwind CSS |
| make a luxury product landing page using Bootstrap 5, inspired by Apple’s clean design style | Bootstrap 5 |
| generate a modern app showcase website using React and Chakra UI, inspired by this image | React + Chakra UI |
| create a colorful and fun website for a children’s toy store using Vue 3 and Bootstrap 5 | Vue 3 + Bootstrap 5 |
| build a landing page for a fitness app using Tailwind CSS and Alpine.js, based on this screenshot | Tailwind CSS + Alpine.js |
| create a fashion ecommerce landing page with animations using React and Styled Components, inspired by this layout | React + Styled Components |
| generate a clean site for a digital agency, inspired by this image, using Vue 3 and Element Plus | Vue 3 + Element Plus |
| build a responsive dark‑themed homepage for a crypto dashboard using Next.js and Tailwind CSS | Next.js + Tailwind CSS |
| create a retro‑themed landing page inspired by this 90s‑style design using plain HTML, CSS, and Bootstrap 5 | Bootstrap 5 |
| generate a photography portfolio gallery site based on this image, using Vue 3 and Tailwind CSS | Vue 3 + Tailwind CSS |
| create a tech blog homepage using Hugo and Bootstrap 5, inspired by this blog template | Hugo + Bootstrap 5 |
| build an AI startup website using React and Material UI, based on this inspirational image | React + Material UI |
| generate an admin dashboard layout inspired by this image, using React and Ant Design | React + Ant Design |
| create a landing page with hero video background and animated text, using React and Bootstrap 5 | React + Bootstrap 5 |
Troubleshooting Notes
Codex might generate image names that don’t match your files. Just rename them manually.
Use Git to track and roll back changes anytime.
Don’t use CMD on Windows — always run everything inside WSL.
Where to Go From Here?
You're no longer tied to website builders. With Codex, just describe, approve, and launch. Whether it's for landing pages, blogs, portfolios, or even small web apps — it's never been easier or faster.
Keep experimenting. Try different designs. Prompt creatively. This is just the beginning.
And yes — we’ll keep this article updated as Codex evolves.
Need help or want to see Codex in action with your own design? Let’s talk!
Make Your Business Online By The Best No—Code & No—Plugin Solution In The Market.
30 Day Money-Back Guarantee
Create Your E-commerce Store Start now — it's freeSay goodbye to your low online sales rate!


![Setup Facebook Pixel with Full Events for Ecommerce Without Plugin [Comprehensive Guide]](https://cdn.selldone.com/app/contents/articles/fadc80ec175fe990b5065af781998655.png)