

From Local Shop to Global Brand: A Beginner’s Guide to Buying and Scaling a Small Business
Buying a small local business and transforming it into a major online brand is an exciting journey. This comprehensive guide will walk you through every step – from finding the right business to buy, to launching an e-commerce site, to marketing and scaling globally. We’ll keep things beginner-friendly, with clear explanations and practical steps. By the end, you’ll understand how to evaluate a local business, handle the purchase process, build an online presence (including why Seldone is a top choice for your e-commerce platform), and grow that business into a worldwide brand. Let’s dive in!

1. Identifying and Evaluating Small Local Businesses for Purchase
Know What You’re Looking For: Consider industries or product types you are passionate about or familiar with. For example, are you interested in handmade crafts, boutique apparel, organic cosmetics, artisanal foods, or something else? Choosing a business in a field you understand (or have a genuine interest in) will make it easier and more enjoyable to manage. It’s also wise to pick a business that makes products with broader online appeal. A handmade soap shop or a local fashion boutique might have untapped demand beyond its hometown if marketed online.
Where to Search: Great small businesses can be found through multiple channels. Check online marketplaces for businesses (such as BizBuySell, BusinessesForSale, or local classified listings) where owners list businesses for sale. You can also network with local business brokers, who connect buyers and sellers for a commission. Don’t overlook your community – sometimes simply asking local shop owners if they know someone looking to retire or sell can lead to opportunities. Industry events or artisan fairs are another avenue: if you notice a popular stall at a craft fair, for instance, the owner might be open to selling their business or partnering for growth. Cast a wide net and look at several options; the more businesses you review, the better you’ll recognize a gem when you see one.
Key Traits of a Worthwhile Business: As you evaluate potential targets, keep an eye out for these positive signs:
Healthy Finances: The business should ideally be profitable or at least breaking even with a clear path to profitability. Review its sales and expenses – is it generating consistent revenue? A business with positive cash flow and growing sales year over year is a great sign. If it’s not profitable yet, is there a logical reason (like being very new or in a growth phase) and do you see how you could improve it?
Unique Products or Brand Story: Small artisanal businesses often succeed by offering something unique – be it handcrafted quality, locally-sourced materials, or a compelling story. This uniqueness can be a big asset when scaling up. For example, a chocolatier using a 100-year-old family recipe has a story that can be marketed globally. Look for a business with products that stand out or have a loyal niche following.
Loyal Customer Base: Does the business have repeat customers or a good reputation locally? If locals love it, there’s a good chance a wider audience online might love it too. A small boutique with a line out the door on weekends or a cafe that’s always busy has proven demand. Check reviews (on Google, Yelp, etc.) if available, or ask the owner about their customers. A business with happy customers and word-of-mouth popularity has a solid foundation to build on.
Growth Potential: Think about how you could expand the business once you take over. Perhaps the current owner has no online store – launching one could greatly increase sales. Or maybe they only sell a limited product range – you could add new products or variants. Untapped markets are ideal. For instance, a local tea blender might only sell in one city; selling online could attract tea enthusiasts worldwide. Envision the future: can you see this small brand scaling up to a much larger enterprise with the right strategies? If yes, that’s a promising sign.
Something You Enjoy: Finally, you should feel excited about the business. You’ll be putting a lot of time and effort into growing it, so make sure it’s a business you’d enjoy running. If you love fashion, an apparel boutique will keep you motivated; if you’re a foodie, a gourmet snack business might be your dream come true. Enthusiasm will carry you through challenges and make the work feel rewarding.
Initial Evaluation of Finances: Before going too deep, get a snapshot of the business’s financial health. Ask for basic figures like annual revenue, profit margins, and expenses. For a very small business, financial records might be informal, but try to see at least sales receipts or tax returns. Does the asking price make sense relative to yearly profits (a common rule of thumb is small businesses often sell for around 2-3 times their annual earnings, though it varies)? If a seller wants $100,000 for a shop that earns $10,000 a year, you’d want to understand why it’s priced that way. Maybe they are factoring in brand value or growth potential – you’ll have to judge if it’s justified. Be cautious of businesses that are losing money without a clear reason or plan – unless you have a solid turnaround strategy, it might be safer to pass on those.
Why Is It For Sale? Always inquire why the owner is selling. Many small businesses are sold for perfectly normal reasons (owner retiring, health issues, moving away, wanting to pursue a different venture). Those can be fine. But if the business is failing due to poor sales or has a looming problem (like a new competitor in town), you need to know that. A transparent, honest explanation from the seller is a good sign. If they’re evasive or the reason doesn’t sound convincing, that’s a red flag.
In summary, identify a business that has solid fundamentals (product, customers, finances) and room to grow, in an area you care about. Once you spot a candidate that checks these boxes, you’re ready to dig deeper with due diligence.

2. Due Diligence and Legal Basics for First-Time Buyers
Buying a business is a significant investment, so you’ll want to thoroughly check everything about the business before money changes hands. This investigative process is called due diligence. Think of it as doing your homework to confirm that the business is as good as it appears. Here are the basics for first-time buyers:
Financial Due Diligence: Carefully review the business’s financial records. At minimum, ask for and examine:
Tax Returns and Financial Statements: Get the last 2-3 years of profit-and-loss statements, balance sheets, and tax returns. These will show revenue, expenses, profits, and any debts. Do the numbers match what the owner told you? For example, if a handmade pottery studio claims $50,000 annual profit, the tax filings should reflect something close to that. Look for trends: are sales growing, flat, or declining? Steady growth is a green flag; declining sales might indicate problems.
Sales Breakdown: See if you can get a breakdown of sales by product or by customer segment. If one product makes up, say, 80% of sales, that’s a risk (what if its popularity fades?). Or if one client (maybe a wholesale partner) accounts for a huge chunk of revenue, that dependency is a concern. Ideally, the business has diversified income streams – a variety of products and customers – so it’s not “all eggs in one basket.”
Inventory and Assets: If the business sells physical goods, you need an accurate inventory count. What is the value of the current stock of products or raw materials, and is that included in the sale price? Also, list any other assets you’re buying: equipment (e.g. sewing machines for an apparel business, ovens for a bakery), furniture, computers or POS systems, etc. Ensure everything is in good working order. If possible, physically inspect the assets. For example, if you’re buying a local leather-craft shop, check the condition of the leatherworking tools and how much leather and supplies are on hand.
Debts and Liabilities: Find out if the business has any outstanding debts or liabilities. This includes loans, unpaid bills to suppliers, or pending tax payments. Also ask about any legal liabilities – like ongoing lawsuits or potential claims. You don’t want to inherit a surprise debt or legal fight. If the business has employees, are there any owed wages or benefits? Any contracts (like a lease) that have obligations? Due diligence means uncovering any skeletons in the closet financially.
Operational and Legal Due Diligence: Beyond the raw numbers, understand how the business runs day-to-day and any legal considerations:
Business Structure: Confirm what exactly you are buying. Often, small business purchases are structured as an asset sale – meaning you buy the assets (inventory, equipment, brand name, customer list, etc.) but not the legal entity (company) itself. This way, you generally don’t take on any liabilities from before. In other cases, it might be a stock sale (you buy the owner’s shares and thus the company as a whole). For a first-time buyer, asset purchases are more common and simpler. Discuss with the seller and possibly a lawyer which approach is being taken, and the implications of each.
Licenses and Permits: Check what licenses, permits, or certifications the business holds and which ones you’ll need to continue operating. For example, a food production business might need health department permits; a clothing store might just need a basic business license. Ensure these are valid and transferable or understand the process to obtain your own. If you’re taking over a local storefront, confirm the zoning laws allow the business to continue as is.
Contracts and Agreements: Review any important contracts the business has:
Lease Agreements: If the business has a physical location that’s rented, read the lease. How long does it last, and can it be transferred to you or subleased? You may need the landlord’s approval to take over the lease. Also, note the rent amount and any clauses like annual increases.
Supplier Contracts: Does the business have contracts with suppliers or distributors? For instance, if a local coffee roasting company has an exclusive deal with a coffee bean supplier, you’d want to know the terms. Make sure you can continue getting essential supplies after the purchase.
Customer Contracts: Not as common in very small retail businesses, but if there are any large clients under contract or wholesale agreements, review those. Are they binding and will they continue after ownership changes?
Franchise or License Agreements: If the business is a franchise or operates under a licensed brand, ensure you understand the franchisor’s approval process for new owners and any fees or training required.
Employee Considerations: If the business has employees, determine what happens to them upon sale. Will they continue working for you? Are there any key employees critical to operations? It’s often beneficial to retain good staff who have experience – they can help you learn the ropes. Check if there are any outstanding payroll, promised bonuses, or accrued vacation liabilities you’d be inheriting. Also plan how you’ll handle introducing yourself to employees as the new owner (usually after the sale is finalized, unless you involve them earlier with the seller’s consent).
Intellectual Property: For an artisanal or branded business, IP can be crucial. Ensure the sale includes rights to the business name, logo, any unique product designs or recipes, slogans, and so on. If the business has a trademark (like a registered brand name or logo) or patents, those should be transferred to you. If not formally registered, at least have the owner explicitly agree not to use the name or branding after selling (so they don’t start a competing venture with the same name).
Pending Legal Issues: Ask if there are any lawsuits, threatened legal actions, or product liability issues. For example, if someone slipped and fell in the shop last month and might sue, you need to know. Or if a former business partner has a claim on the business. It’s rare in very small businesses, but better to ask and be safe.
Professional Help (Attorney & Accountant): While doing due diligence, it’s highly recommended to consult professionals:
An experienced business attorney can help review or draft the purchase agreement, advise on the structure (asset vs stock sale), and ensure all legal bases are covered. They will make sure the contract clearly states what’s included in the sale, any training or transition assistance the seller will provide, non-compete clauses (to prevent the seller from opening a rival business next door), etc. They protect your interests and catch legal details you might miss.
A business accountant or valuation expert can help verify financials and perhaps perform a formal business valuation. They can spot red flags in the books or estimate a fair price based on the numbers. They’ll also advise on tax implications of the purchase.
Yes, hiring professionals costs money (a few thousand dollars perhaps), but for a first-time buyer it’s often worth it. They help avoid costly mistakes and give you peace of mind that you’re making a sound investment.
The Purchase Agreement: Once due diligence is satisfactory and you decide to proceed, everything gets formalized in a purchase agreement (a legal contract to buy the business). This document will include the agreed price, exactly what assets or shares are being transferred, the timeline (closing date), and any special terms:
Payment Terms: Are you paying the full amount at closing, or is the seller financing part of the price (meaning you pay them in installments or with interest over time)? Sometimes, sellers offer financing which can help if you don’t have the full cash – basically, the seller acts as a lender and you owe them the remainder.
Training/Transition: Often, small business sellers agree to help the new owner for a brief transition period. The contract might say the seller will consult or work with you for, say, 30 days after closing to introduce you to suppliers, teach you how to make the products (if it’s handmade goods, for instance), or just give general guidance. This can be extremely helpful for a beginner.
Non-Compete Clause: Typically, the seller will agree not to start a similar business in the same area or market for a certain period of time. This prevents them from selling you the business and then immediately drawing the old customers to a new venture. Make sure some form of non-compete or non-solicitation clause is in place.
Inventory Count at Closing: If inventory is involved, often the final price can be adjusted based on the actual inventory level at closing. For example, if the sale price assumed $10,000 worth of stock, and on closing day there’s $12,000 of stock (at cost), you might pay extra for the surplus (or vice versa if less stock).
Everything you’ve agreed on with the seller verbally should be in writing in this contract.
Closing the Deal: “Closing” is the final step where the ownership officially transfers. This is usually done with both parties signing the agreement and the funds being transferred (often through an escrow account for safety). After closing:
You pay the seller (and any brokers or fees due).
The seller hands over keys, assets, passwords to accounts, customer lists, etc. If it’s an asset sale, you start operating under a new entity you set up. If it’s a stock sale, the company’s shares are now yours but business continues as usual.
Ensure you handle any licenses or registrations to now put them in your name or your company’s name. For instance, you’ll want to update the business license and tax accounts to reflect the new owner.
Celebrate – you now own the business! But keep the seller’s number handy for any follow-up questions during transition.
Due diligence and legal prep can seem tedious, but they are crucial. By being thorough now, you prevent nasty surprises later. Once you’ve checked all the boxes and finalized the purchase, you can shift from evaluating the business to running and growing it – and that’s where the fun really begins, especially taking it online.
3. Building an Online Presence for Your New Business
Now that you own the business, it’s time to bring it online and start reaching a global audience. Building an online presence means creating an e-commerce website where customers can browse and purchase your products, as well as establishing your brand on social media and other channels. Here we’ll focus first on choosing the right platform for your online store, then later we’ll cover marketing.
Choosing an E-Commerce Platform
Your e-commerce platform is the foundation of your online store – it’s the software or service that powers your website, product catalog, shopping cart, and payment processing. There are many options out there, each with its pros and cons. As a beginner, you want a platform that is easy to use, affordable, and scalable as your business grows. Let’s look at some popular choices (Shopify, Wix, Squarespace, etc.) and what they offer:
Shopify: Shopify is one of the most popular e-commerce platforms worldwide, known for its user-friendliness. It’s a hosted solution, meaning Shopify runs the website for you – you just sign up and build your store on their site. Advantages of Shopify include a very easy store setup, a wide variety of professional-looking templates (themes) for design, and a large app store for adding features (like extra marketing tools, integrations with shipping carriers, etc.). They also handle security, updates, and can scale to large stores. You don’t need any coding skills to use Shopify; it’s mostly click, drag, and drop. Potential downsides: Shopify has monthly fees (ranging from around $29/month for basic plan up to $299+ for advanced plans), and if you want a lot of advanced features, sometimes you need to pay for third-party apps which can add to the cost. Also, Shopify charges transaction fees on sales if you don’t use their own payment system (Shopify Payments). Overall, it’s a strong choice for ease of use and power, used by many successful online brands.
Wix eCommerce: Wix is a popular website builder known for its simple drag-and-drop site design interface. Wix primarily started as a general website builder (for blogs, portfolios, etc.), but it also offers e-commerce capabilities. If you use Wix eCommerce, you’ll get a very visual editor to design pages exactly how you want, which is great for beginners who want creative control without coding. They have many templates as well. Wix includes hosting in the plan and offers features for small online stores. However, compared to e-commerce-dedicated platforms like Shopify, Wix’s commerce functions might be a bit more basic. It’s well-suited for a small product catalog and smaller scale operations. As your business grows very large, you might find Wix less flexible than some competitors. Pricing is similar to Shopify’s range for business plans. Wix is a good choice if design freedom and simplicity are your top priorities, and you plan to keep the store moderately sized.
Squarespace: Squarespace is another website builder platform known for beautiful, modern templates and a sleek design aesthetic. Many creatives (artists, designers, photographers) use Squarespace for its portfolio templates. It also has an e-commerce feature set (Squarespace Commerce) that allows you to sell products or services. Like Shopify and Wix, it’s hosted and doesn’t require you to handle any server stuff. Squarespace’s interface is pretty user-friendly, though a bit different in style (some say it’s very intuitive for design). It’s great for showcasing visually appealing products (like apparel, jewelry, art) because of its clean designs. In terms of e-commerce features, it covers the basics well (product pages, inventory tracking, simple promotions, etc.), and supports integrations like shipping label printing, but it might not have every advanced feature out-of-the-box that a more e-commerce-specific platform has. Also, multi-currency or multi-language support is somewhat limited, which might be an issue if you’re immediately targeting international markets. Pricing is in the same ballpark as others for business plans. If you value design and want an elegant site quickly, Squarespace is a solid pick for a small to mid-size online store.
WooCommerce (with WordPress): WooCommerce is a bit different from the above because it’s not a standalone service but a plugin for WordPress (the popular content management system). Essentially, if you create a website using WordPress (which is often self-hosted, meaning you arrange your own web hosting server or service), you can install the free WooCommerce plugin to add e-commerce functionality. WooCommerce itself is free and open-source, and it’s very powerful – it can handle everything from selling one product to tens of thousands. There are tons of extensions for WooCommerce to add features, and a large community of developers. The big advantage is flexibility: you can customize almost anything if you have the know-how or hire someone who does. There are no monthly platform fees aside from what you pay for hosting. However, the downsides for a beginner: it’s more hands-on to set up. You have to deal with choosing a web host, installing WordPress, managing updates, security, etc. You may need some technical knowledge, or you might end up hiring help for setup or customizations. If you enjoy tech and want maximum control, WooCommerce is great. But if that sounds daunting, a hosted solution like the ones above might be easier. Many small businesses start on Shopify/Wix and only consider WooCommerce if they outgrow those or want something very specific.
BigCommerce: BigCommerce is another dedicated e-commerce platform (like Shopify, it’s a hosted SaaS service). It’s known for having a lot of built-in features, possibly even more out-of-the-box than Shopify (for example, more flexible product options, no transaction fees, etc.). BigCommerce can scale up to fairly large stores and has strong SEO features. The interface may not be quite as beginner-simple as Shopify or Wix, but it’s still approachable. BigCommerce plans can be a bit pricier as you scale (and they have a sales volume limit per tier, requiring you to upgrade as your revenue grows). For a beginner with a small shop, BigCommerce might be more than you need, but it’s a good platform if you anticipate needing robust features without relying on too many third-party apps. In short, powerful but possibly more complex and costly, so weigh that based on your ambition.
Other Platforms: There are many others – Weebly (now part of Square, and good if you also want a point-of-sale integration for a physical store), Magento/Adobe Commerce (very enterprise-level, probably overkill for a beginner), PrestaShop, OpenCart (open-source like WooCommerce, but standalone systems). Even marketplaces like Etsy or Amazon can be channels to sell handcrafted goods without building your own site (though you’ll want your own website for brand-building). Each platform has its own ecosystem. The key is to choose one that fits your current skill level and business needs, but also your future growth. You don’t want to rebuild your site from scratch in six months because you outgrew the platform.
Given these options, you might feel overwhelmed. Many beginners gravitate towards something like Shopify for a quick start, or Wix/Squarespace if they want more design freedom initially. However, in the next section, we’re going to introduce Seldone, which combines many of the advantages of the above platforms while minimizing the drawbacks – an excellent choice for launching and scaling your store.

4. Why Seldone is the Ideal Platform for Launching and Scaling Your Online Store
![A collage of e-commerce features integrated in Seldone’s platform (e.g., orders management, online POS, shipping, inventory, loyalty programs, community management), all labeled “No–plugin” to highlight Seldone’s all-in-one, no-plugin-needed approach] Seldone (also stylized as Selldone) is a modern e-commerce platform that is particularly well-suited for entrepreneurs who want a powerful online store without the usual technical headaches. If you haven’t heard of it before, think of Seldone as a next-generation combination of an e-commerce builder and a complete business operating system. Here’s why Seldone stands out and why we consider it the for launching and scaling your online brand:
No Plugins Needed – All-in-One Functionality: Seldone provides an extensive suite of features built directly into the platform, so you don’t have to hunt for and install numerous apps or plugins to get the functionality you need. Right out-of-the-box, you have everything: product management, inventory tracking, order processing, payment integration, shipping management, marketing tools, customer loyalty features, even point-of-sale (POS) for in-person sales, and more – all included. The image above illustrates some of these capabilities (from order management and shipping to loyalty programs and even 3D/AR support for products) that Seldone offers without requiring separate add-ons. This all-in-one approach simplifies your life immensely: fewer moving parts to configure, fewer compatibility issues, and one single dashboard where you can manage all aspects of your business.
Beginner-Friendly and Quick to Launch: Seldone is designed to be extremely user-friendly, especially for those without a technical background. The onboarding process is remarkably quick – when you sign up, the platform can automatically set up the basics of your store within minutes. In fact, Seldone even generates sample products and a ready-made homepage tailored to your business category, giving you a live preview of how your store could look. This means you don’t start with a blank canvas (which can be intimidating); you start with a functional outline that you can then customize with your real products and branding. Many users can go from registration to a live store in under an hour on Seldone, thanks to these streamlined setup features. No wrestling with code, no complex initial configuration – it’s plug-and-play.
Integrated AI Assistance at Every Step: One of Seldone’s cutting-edge advantages is that it leverages artificial intelligence to help you build and run your store. What does this mean in practice? It means the platform can assist with things like generating product descriptions, suggesting optimal pricing, recommending promotional strategies, and even analyzing your sales data to give you insights – all automatically. Imagine uploading a new handmade necklace to your shop: Seldone’s AI could propose a well-written description highlighting its features and craftmanship, sparing you the struggle of writing copy. Or as you operate, the system might notice a product is selling fast and suggest reordering inventory or raising the stock level. Essentially, AI acts like a smart assistant, making your workflow up to “100x simpler” (as Seldone claims) by taking care of routine or complex tasks and guiding you with data-driven suggestions. For a beginner who might not know the best e-commerce practices, this kind of built-in guidance is invaluable.
Free Plan with Custom Domain – Unbeatable Value: Many platforms offer free trials or free plans, but they often come with limitations like not allowing a custom domain (your store might be stuck on a generic subdomain like yourshop.platform.com unless you pay). Seldone distinguishes itself by offering a lifetime free plan that is actually robust – and notably, it lets you connect your own custom domain even on the free tier. This is a big deal because having your own domain (e.g., yourbrand.com) is important for branding and credibility, and Seldone lets you achieve that without an extra fee. As your business scales, Seldone has higher-tier plans with more capacity (for products, storage, bandwidth, etc.), but the fact that you can start for free with a fully branded site is excellent for a first-time entrepreneur on a budget. You won’t feel rushed to upgrade until your sales truly justify it.
Cost Savings by Eliminating App Fees: Because Seldone includes so many features natively, you won’t have to subscribe to a bunch of separate apps or plugins that charge monthly fees. On some other platforms, a basic store might need add-ons for email marketing, loyalty rewards, advanced shipping calculations, etc., and each of those might be $10, $20, $50 per month, which adds up. Seldone’s philosophy is to provide the functionality internally, which means one subscription (or the free plan) covers everything. This keeps your costs predictable and often lower. You can reinvest those savings into marketing or product development instead of software fees.
Scalability and Advanced Features When You Need Them: While Seldone is great for a small beginner store, it’s not a dead-end that you’ll outgrow too soon. The platform is built to scale with your business. If you start with 10 products and then expand to 1000 products, Seldone can handle it. If you begin shipping locally and later ship worldwide, Seldone has the infrastructure (like multi-currency, multi-language, various payment gateways) ready to support that growth. It even supports things like multi-vendor marketplaces or subscription products should your business model evolve in those directions. In short, Seldone grows with you – you won’t need to migrate to another platform once your brand takes off, because it’s powerful enough to accommodate a large, complex online business.
Seamless Online and Offline Integration: Many small local businesses still have a physical element (like a storefront or sell at markets). Seldone has a built-in POS (Point of Sale) system, meaning you can use it to run in-person transactions as well and keep all your sales synced. For example, you could use a tablet or phone at your craft shop or pop-up stall to process an order through Seldone’s POS, and that inventory will update in your online store as well. This unified system means you don’t juggle separate software for online vs offline sales – a huge plus as you scale and perhaps continue to do both.
Community and Loyalty Features: Seldone goes beyond just selling – it has tools to help you build a community around your brand. There are features for creating forums or community sections, enabling customer accounts and engagement, and loyalty programs to reward repeat customers. These are the kinds of things that usually require multiple plugins elsewhere. Here, they are readily available, allowing you to start nurturing a loyal customer base from early on. For instance, you could set up a points-based loyalty system on your Seldone store that gives customers discounts after certain purchases, without needing any third-party app.
Robust Security and Stability: Security is critical for e-commerce (you’ll be handling customer info and payments). With Seldone being a fully hosted service, they take care of security measures, SSL certificates (to have that padlock and HTTPS on your site), and regular backups. They also ensure the platform is fast and stable, so your site loads quickly for visitors worldwide. You don’t have to be a tech guru constantly worrying about patches or server issues – Seldone’s team manages that in the background.
In essence, Seldone is built to minimize the technical and financial barriers that small business owners face when going online. For someone new to e-commerce, it provides a gentle learning curve with powerful capabilities. You get the ease-of-use similar to Wix or Squarespace, the e-commerce strength akin to Shopify or BigCommerce, and added benefits like AI assistance and inclusive features that are unique to Seldone.
For these reasons, Seldone is an excellent choice to launch your online store and support your journey as you scale up from local shop to global brand. Next, we’ll walk through the practical steps of setting up your store on Seldone so you can see how it all comes together.

5. Step-by-Step: Setting Up Your Online Store on Seldone
In this section, we’ll guide you through getting your e-commerce website up and running using Seldone. The process is straightforward, even if you’ve never created a website before. By following these steps, you’ll go from zero to a functional online store ready to accept orders.
Step 1: Create Your Seldone Account and Initial Store Setup
Head over to Seldone’s website (on your computer, it’s all web-based – no software install needed). Click on the sign-up or “Get Started” button. You’ll provide basic information like your email and a password. Once registered, Seldone will prompt you to create your first store. You’ll need to enter some details about your business: the store name (don’t worry, you can change it later if needed), the type of products or industry (so the platform can tailor some things to your niche), and your business’s address and contact (for legal info like terms or shipping origin). Seldone’s instant onboarding means that as soon as you fill in these basics, it will automatically generate a starter site for you. This usually includes placeholder product listings, categories, and a homepage layout. For example, if you indicated you sell handmade jewelry, Seldone might populate a few sample jewelry items and a nice homepage banner image. This helps you visualize the structure. You’ll be dropped into the dashboard, which is the backend control panel for your store. Take a moment to familiarize yourself: you should see sections for Products, Orders, Customers, Website/Design, Settings, etc. The interface is user-friendly, often with tooltips and guides along the way (and remember, the integrated AI might even highlight the next logical steps for you).
Step 2: Connect Your Custom Domain (or Use a Free One)
One of Seldone’s perks is offering a free custom domain connection even on their free plan. During setup, you likely chose a store name. By default, your store might initially be accessible on a Seldone subdomain (like mystore.sldn.site or similar), but you’ll want to use your own .com (or .co.uk, .net, etc.) domain for a professional touch. If you already have a domain name (say you registered myhandmadebrand.com via a registrar like GoDaddy or Namecheap), you can connect it now. In Seldone’s dashboard, go to the domain or settings section and look for “Add custom domain.” It will give you some DNS information (like an IP address or CNAME) to point your domain to Seldone. This sounds technical, but it’s basically a quick setting you update where you bought the domain – instructions are usually provided. If you don’t have a domain name yet, you can either quickly register one (Seldone might even guide you to do so), or use the free subdomain they provide until you decide on a custom name. Using a custom domain is highly recommended for building your brand, but it’s not required to launch – you can always add it later. The key point: Seldone makes domain setup very easy – no complex configuration – and there’s no extra charge to use your own domain.
Step 3: Design Your Website’s Look and Feel
Now comes the fun part – making your online store visually reflect your brand. Navigate to the Website or Theme/Design section of the Seldone dashboard. Here you’ll find templates or themes that you can apply. Seldone likely has a selection of modern, mobile-responsive themes. Choose one that resonates with your style (for instance, a minimalist clean look for a contemporary apparel brand, or a more earthy, crafts-inspired template for artisanal goods). Once you apply a theme, you can customize it. Using Seldone’s visual editor, you can change the color scheme to match your branding, upload your logo, and edit the layout of pages. Replace the placeholder homepage banner with your own high-quality image that represents your business (maybe a photo of your shop, your products beautifully arranged, or a lifestyle image showing the products in use). Edit the text on the homepage – perhaps write a welcome message or your brand’s tagline. No coding is required; it’s mostly click on an element and edit, or drag sections to reorder. You can create additional pages if needed, like an “About Us” page telling your story (important for artisan brands – customers love a good story!), or a “Contact Us” page. Also, set up your navigation menu (e.g., links to Shop, About, Contact, Cart). Seldone’s templates are typically already optimized for mobile, so your site will look good on smartphones automatically – which is crucial, since many customers will browse on mobile devices. Spend some time to ensure the site reflects the personality of the business you bought: use the brand colors (if the business already had a color theme or logo), and maintain consistency with any existing branding to not alienate current customers. After design tweaks, preview the site – Seldone should allow you to see a preview or even a live staging site as you make changes.
Step 4: Add Your Products and Categories
With the site design in shape, it’s time to populate it with your actual products. Go to the Products (or Catalog) section of the Seldone dashboard. The platform likely provided sample products; you can delete those and start fresh, or edit them to transform into your real products. For each product you need to add:
Name: The product title, e.g., “Hand-Knit Wool Scarf – Blue Pattern”.
Description: Write a clear, enticing description. Highlight the features and the story (for example, “A cozy hand-knit scarf made from 100% organic wool. Crafted by local artisans in [Your City], featuring a unique blue geometric pattern inspired by traditional designs. Soft, warm, and perfect for winter outfits.”). If writing isn’t your strong suit, here’s where Seldone’s AI can help – it might suggest or auto-generate a baseline description once you input some keywords.
Photos: Upload high-quality images of the product. This is extremely important for online sales since customers can’t touch the item. Use multiple photos: e.g., for apparel, upload front, back, detail close-ups, and maybe one showing it being worn. Make sure images are well-lit and clear. Seldone will let you arrange multiple images per product and will handle creating a gallery or slideshow for them on the product page.
Price: Set your selling price. You might keep it the same as it was in the physical store or adjust based on any additional costs like packaging/shipping. If you plan to run promotions, you can also set a “compare at” price or sale price.
Inventory and Options: Enter the stock quantity you have on hand for each product so the system can track inventory (and not sell what you don’t have). If your product has variants (like sizes S, M, L or colors Red, Blue), you’ll add those options and stock for each variant. Seldone’s product management can handle variants easily. For example, for a T-shirt product, you’d add variant attributes Size and Color, then list combinations (Small-Red, Small-Blue, Medium-Red, etc.) each with its own SKU or stock count.
Category/Collection: Organize products into categories or collections to help shoppers browse. You might have categories like “Men’s Apparel”, “Women’s Apparel” or “Necklaces”, “Earrings” for jewelry, etc., depending on what you sell. Set which category each product belongs to (a product can often belong to multiple collections as well, like “New Arrivals” and “Gifts under $50”). In Seldone, creating and assigning collections should be straightforward in the product setup interface.
SEO fields: Many platforms (likely Seldone too) have fields for SEO (Search Engine Optimization) per product – like meta title and description which search engines use. Fill these in with a short description including important keywords (“Handmade blue wool scarf organic”). It helps Google find your product, but don’t stress too much initially; just ensure your product titles and descriptions naturally contain keywords a buyer might search for.
Repeat this for all your products. If you have a lot, take your time – maybe start with your core 10-20 products that you want to feature, then add the rest gradually. You want everything to be accurate. One tip: Leverage Seldone’s bulk tools if available. Some platforms let you import a CSV spreadsheet of products; Seldone might too. But since your business is small/local, you might not have too many items, making manual entry fine.
Step 5: Configure Payments
Next, you need to set up how you will accept payments from customers. Seldone supports integration with major payment gateways. Most common choices are Stripe (for credit/debit cards), PayPal, and possibly others depending on your region (like Square, Authorize.net, etc.). Stripe is popular because it’s easy – it lets you take card payments on your site seamlessly. To set up, you’d go to the Payment settings in Seldone. Likely, there’s an option like “Connect with Stripe” which will direct you to sign in or create a Stripe account and authorize the connection. Stripe will ask for some business details for verification (since it’s handling money – usually info about you, bank account for deposits, etc.). Alternatively, you could enable PayPal, which might just require entering your PayPal email or doing an OAuth login to link it. Seldone might also offer its own native payment processing or other local options. The goal is to ensure when a customer clicks “Checkout,” they can securely enter their card info (or choose PayPal, etc.) and complete the purchase, with the funds eventually landing in your account. Ensure to test the payment setup once done (some platforms have a test mode or you can run a small real transaction to verify). Additionally, check what payment methods you want to offer: some customers like multiple options. At minimum, accepting Visa/MasterCard via Stripe and PayPal covers a lot of ground. Also, verify that your currency is set correctly (e.g., USD, GBP, EUR – whatever you plan to charge in).
Step 6: Set Up Shipping Options
Since you’ll be selling physical goods online, you need to figure out how you will ship them and what you’ll charge customers for shipping. In the Seldone dashboard, find the Shipping settings. Here you’ll configure:
Shipping Zones: Define regions where you will ship. Often people set up domestic (for example, all of UK, or all of USA) as one zone, and international as another, possibly broken down by region if needed (Europe, North America, etc.). Initially, you might focus on domestic and maybe a few key countries, then expand as you figure out international logistics.
Shipping Rates: For each zone, decide how you’ll charge. Options include: flat rate (e.g., $5 shipping within your country, a flat $15 for international), free shipping (often with a threshold like “Free shipping on orders over $50”), or real-time carrier rates (Seldone might integrate with carriers like USPS, UPS, FedEx, DHL, etc., to fetch actual postage rates based on package weight/destination). As a beginner, a simple approach is fine. You might start with a flat rate or table (like different flat rates for different weight ranges). For example: shipping within the same country $5 for small items, $10 for larger orders; shipping to North America $15; shipping to Europe $20, etc. Keep it straightforward so you don’t confuse customers. Make sure to consider your costs – packaging materials and postal fees – when setting these rates so you’re not losing money on shipping. You can always adjust the strategy as you gather more data on costs.
Carrier Integration (if any): Seldone may allow you to connect an account with shipping providers or use built-in shipping label purchasing. This can simplify fulfilling orders (we’ll talk more about fulfillment later). For setup, it’s not mandatory to integrate anything yet, but be aware of the options. For instance, you might input default package dimensions and weight for more accurate real-time quotes if using that.
After setting up the rules, be sure to also configure if you’re offering local pickup (if you still have a local shop and want locals to be able to order online and pick up in-store, Seldone can likely accommodate that with a pickup option at checkout). Also, consider enabling shipping to only certain countries at first if you want to limit where you’re selling until you figure out international shipping processes.
Step 7: Configure Tax Settings
This part might vary depending on your location and what you sell. In many regions, online sales require collecting sales tax or VAT. Seldone likely has a tax settings section where you can specify tax rules or enable automatic tax calculation. For example, if you’re in the US, you may need to collect sales tax for sales to states where your business has a presence (nexus). If in the EU, you might charge VAT. The good news is e-commerce platforms often have this built-in: you enter your business location and it can auto apply the correct tax at checkout based on customer location. Make sure to consult with an accountant or a quick online research on tax obligations for online sales in your region. At the very least, set the store’s default tax logic: either prices include tax or tax is added on at checkout, and which regions to apply it for. Seldone’s system might handle the calculations, but you have to turn it on and set the rates. This ensures you remain compliant and don’t undercharge or overcharge customers inadvertently.
Step 8: Review and Launch Your Store
You’re almost ready to go live! Before announcing it to the world, do a thorough review of everything:
Proofread product descriptions, page content, and make sure all links work (click through your menu, add a product to cart, go to checkout).
Test the Checkout Process: It’s wise to run a full test order. Place an order as if you were a customer: add an item to cart, go through checkout, use a real or test payment (if your platform has a test mode, otherwise use a low-price item and then refund yourself). Ensure you receive the order confirmation email, and that in your Seldone admin, the order appears correctly. Verify that stock levels update (inventory reduced by the quantity purchased). It’s better you catch any snags than your customers do.
Store Settings: Fill out any remaining details like your store’s contact email (so customers can reach you), your business address (often appears on invoices/receipts), and upload an Favicon (the little icon for the browser tab) for professionalism. Also set up policies pages: Seldone may have templates or sections for Refund Policy, Privacy Policy, and Terms of Service. Customize those (there are many examples online for small business policy wording) and have them accessible in your footer. This builds trust with shoppers.
Email Notifications: Check the email templates for order confirmation, shipping notification, etc. Seldone should have default ones that are fine to start with, but you might add a personal touch or at least confirm that your business name and logo appear correctly in them.
Connect Analytics (optional but recommended): If you plan on tracking visitors and performance (which you should for marketing insights), you might integrate Google Analytics or use Seldone’s built-in analytics. Setting this up at launch means from day one you’ll gather data on how people find and use your site.
Now, take a deep breath – you are ready. If everything looks good, turn off any password protection or “coming soon” mode that might be blocking public access (some platforms have a storefront password until you choose to open). With Seldone, once you’re done editing, you basically just start sharing your site link.
Step 9: Announce Your Online Store to the World
Your site is live – congratulations! But people won’t know about it until you tell them. As part of launching:
Update any local customers: If the business had an existing customer base (emails, social media followers, in-store visitors), let them know you’re now online. Post on the business’s social media pages announcing the new online store URL. Put a sign in the physical shop, if you have one, with the website address. If you have an email list or past customer emails (ensure compliance with email marketing rules), send a friendly announcement about the online store launch, maybe even offering a small discount for their first online purchase to encourage them to try it.
Ensure your new store is linked everywhere relevant: for example, if the business had a Google My Business listing, update it to include the website. If it had an old website or Etsy page, put a note or redirect to the new site if possible.
Submit your sitemap to Google (Seldone likely auto-generates one). This will help Google index your site faster so it can appear in search results for relevant queries.
Double-check the mobile view of your site by actually using your phone. A lot of your customers will experience it that way, and though templates are responsive, it’s good to see if any images or text look off on a smaller screen.
Step 10: Familiarize Yourself with Store Management
Once launched, you’ll need to manage orders as they come in. In Seldone’s dashboard, the Orders section will show new orders, where you can view details, mark them as fulfilled (shipped) when you send them out, and so on. Get comfortable with:
Printing packing slips or invoices (if you include those in shipments).
The process for marking an order shipped and adding a tracking number if applicable (so the customer gets notified).
Managing inventory: see how Seldone alerts you when stock is low, and how to update inventory when you restock products.
Handling returns or refunds via the platform if needed.
Using any built-in marketing tools in Seldone (like maybe sending a newsletter or discount code creation) – we will cover marketing later, but just peek at what’s available.
At this stage, your online store is operational. You’ve effectively taken the small local business and given it a window to the entire world through the internet. It’s a big milestone! From now on, you’ll be juggling both running the business (fulfilling orders, customer service, maybe continuing local sales) and the business through marketing and scaling strategies. In the next sections, we’ll delve into product sourcing for growth, branding and packaging, and all the marketing fundamentals to attract customers to your new online store.
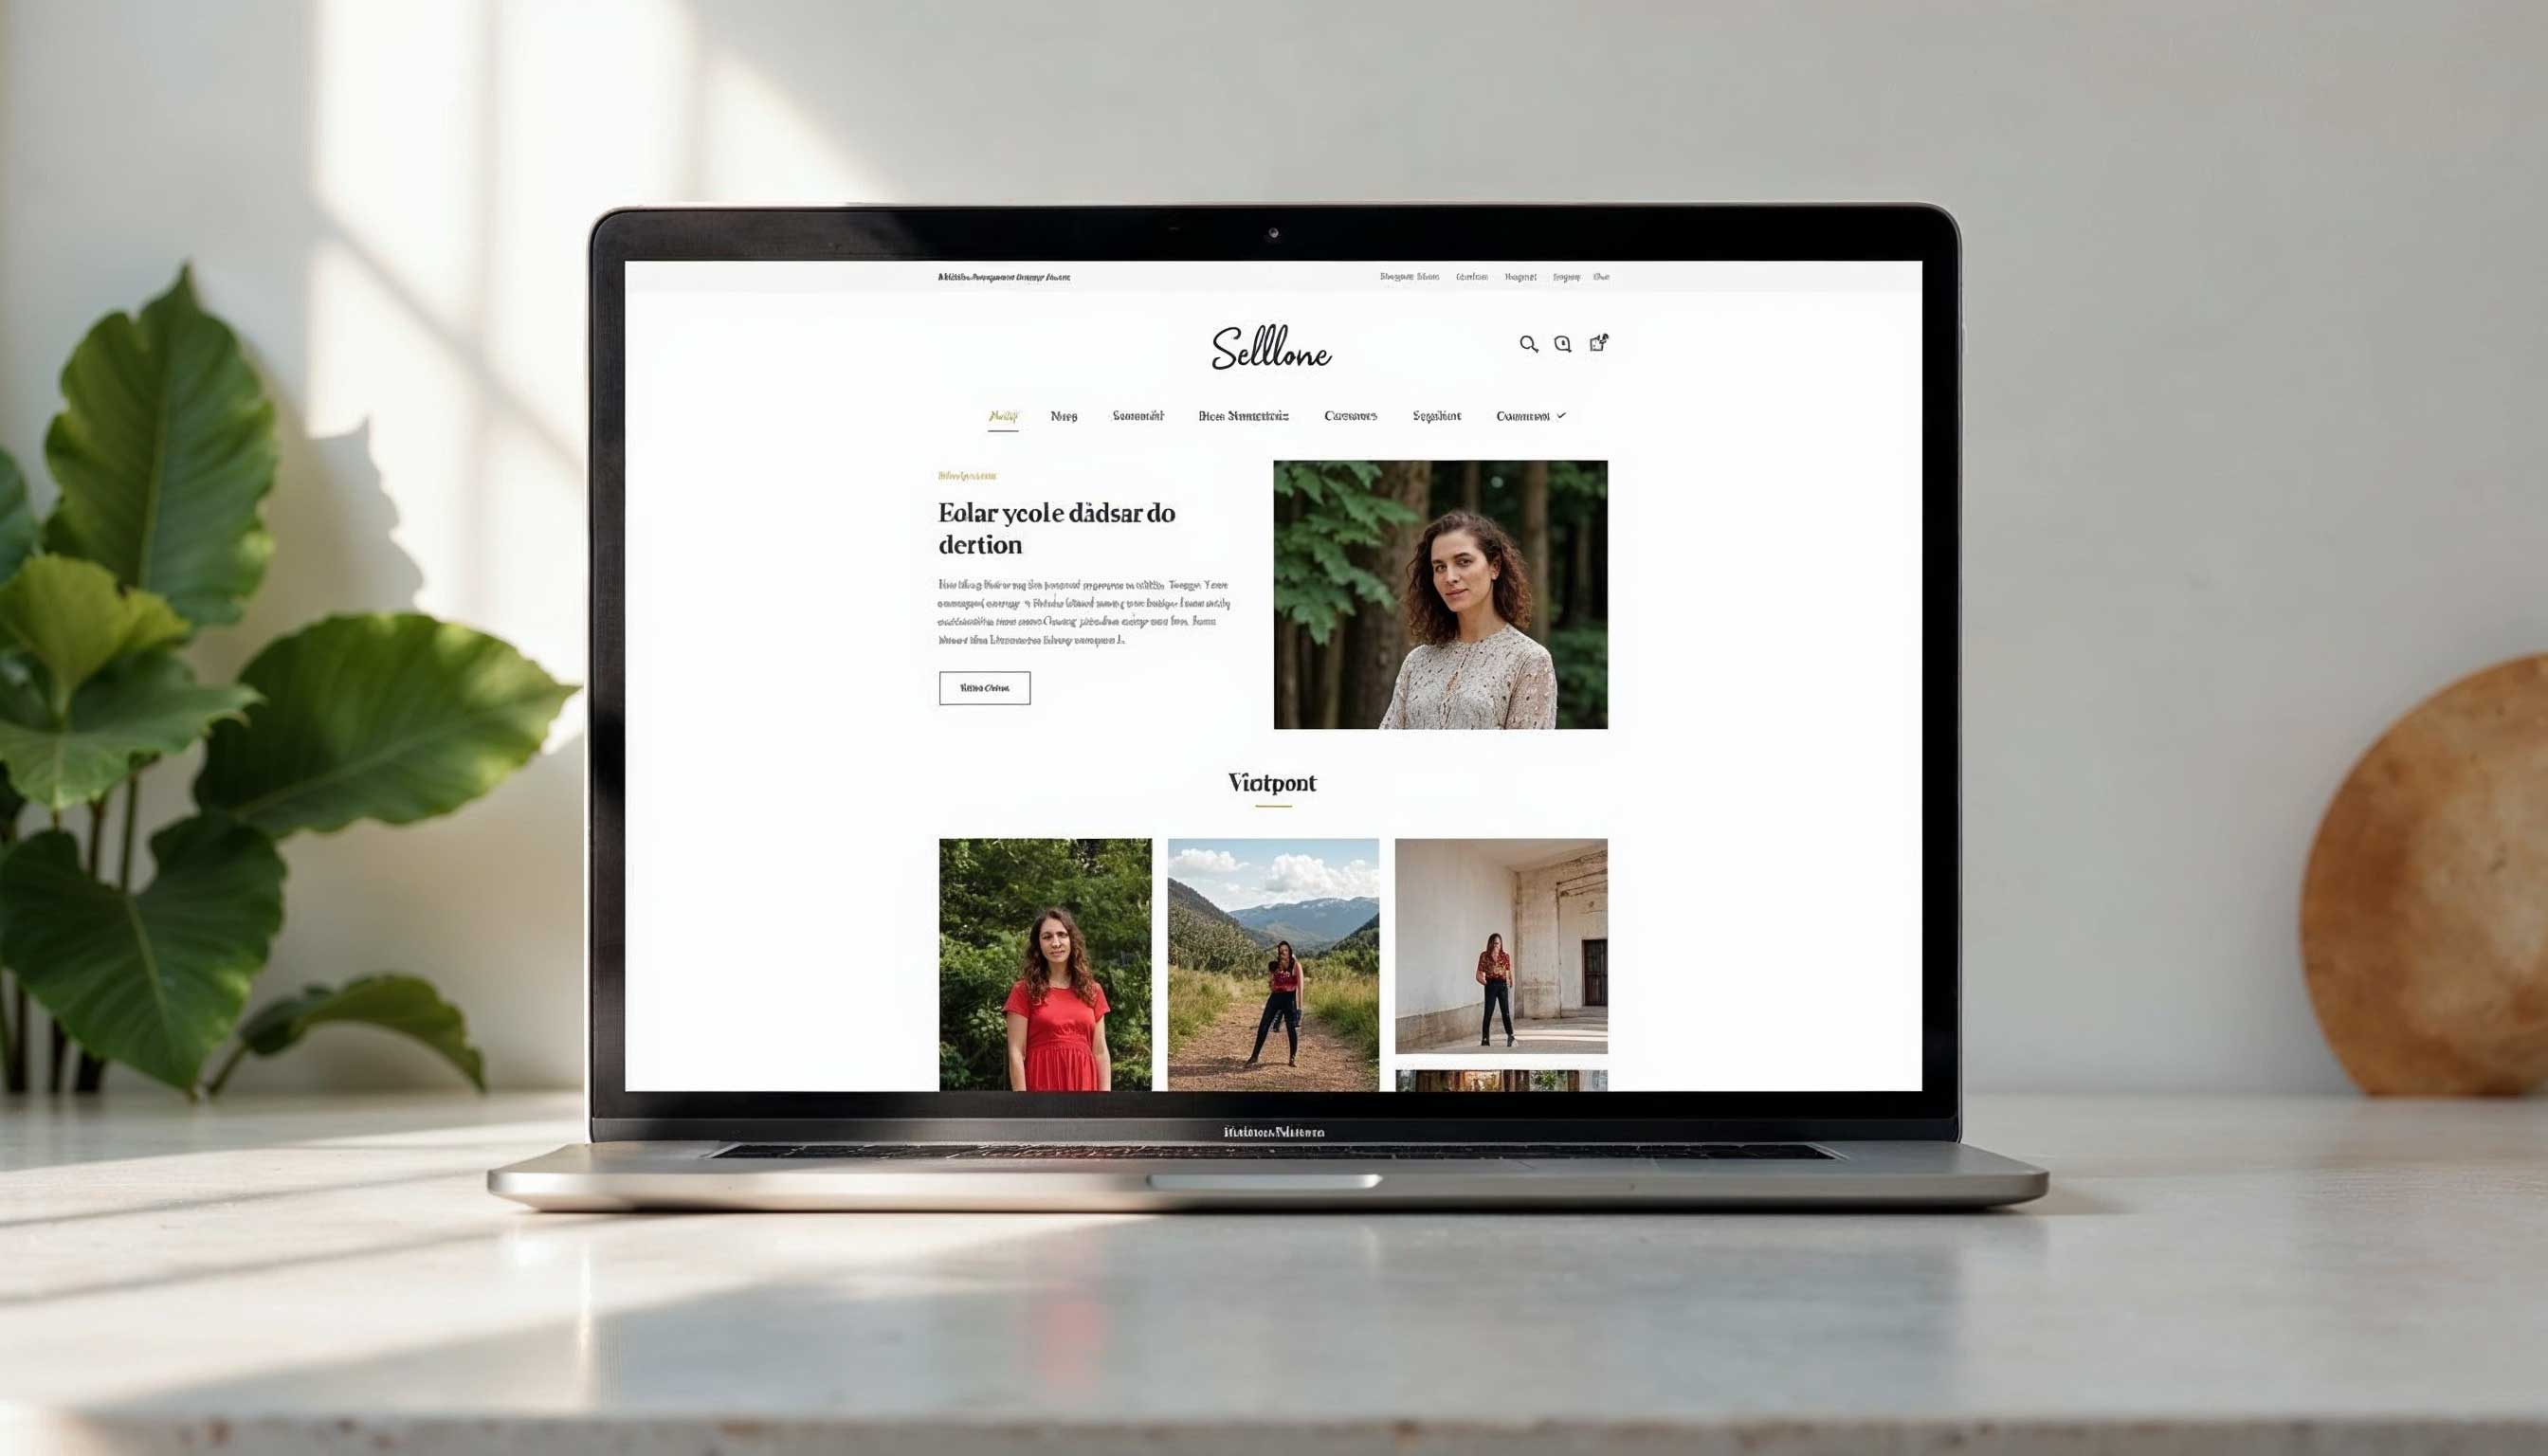
![A responsive online storefront example on Seldone, as seen on desktop and mobile devices – your store can have a modern look that works on all screen sizes without extra effort] The screenshot above is an example of a fashion boutique’s site built with Seldone – you can achieve a similar professional look for your brand with the steps we’ve covered.
With the technical setup out of the way, let’s turn our attention to other crucial aspects of scaling your business: sourcing and developing great products, creating an attractive brand, and delivering a memorable unboxing experience with quality packaging.

6. Product Sourcing, Branding, and Packaging
Successfully scaling a small business into a major brand isn’t just about the website and marketing – it’s fundamentally about having the right products and presenting them well. This section focuses on ensuring you can source or produce enough product as you grow, refining your branding for a broader market, and upgrading your packaging to impress customers and handle shipping.
Product Sourcing and Development
When you scale up, you need to meet higher demand while maintaining quality. Depending on the type of business you bought (handcrafted vs. manufactured goods), sourcing can take different forms:
If the products are handmade by artisans (including possibly the previous owner): Determine how you will increase production if orders double or triple. Will you learn the craft yourself? Will the original maker stay on as a supplier or consultant? In many cases, keeping the original craftsmanship is key to authenticity. You might need to hire additional artisans or train staff to replicate the process. For example, if you bought a local organic soap-making business run by one person, to scale you could bring in a couple more soap makers or outsource some production to a small cooperative that adheres to the same methods. Be careful with outsourcing – ensure the quality and ingredients remain the same, as loyal customers will notice differences. One strategy is to document the production process thoroughly (recipes, techniques, curing times, etc.) so that it can be taught and repeated at scale without losing the essence that makes the product special.
If the products are not handmade (e.g., boutique selling wholesale clothing, or items assembled from sourced components): You’ll likely need to find reliable suppliers or manufacturers for larger quantities. Start by talking to the current suppliers – can they handle larger orders? Often, scaling means better pricing per unit too, which improves your margins. If you need new suppliers (say you want to expand the product line), research and reach out carefully. For instance, if you’re adding a new line of accessories to your apparel store, you might find suppliers on platforms like Alibaba, Maker’s Row, or via industry trade shows. Always request samples and do small test orders to validate quality and shipping times before committing big. Diversify suppliers if possible so you’re not entirely reliant on one source, especially for crucial products. If one factory experiences delays, you have a backup.
Maintain Quality Control: One of the biggest pitfalls in scaling is letting quality slip. Don’t let that happen. Implement checks – whether it’s you inspecting batches of product, hiring a quality control person, or getting feedback from a few trusted customers on new production runs. For example, if your artisan coffee roasting business suddenly roasts 5x the volume, cup-test the output from each batch or new roaster machine to ensure flavor consistency. Your brand’s reputation rides on delivering the same (or better) product experience as you grow.
Expand Product Line Strategically: Part of scaling can be offering more variety to attract more customers. Think about complementary products or extensions of the line. If you sell handmade candles, perhaps you add diffusers or room sprays. If you have a local fashion boutique, you might introduce an in-house label or collaborate with another designer for exclusive pieces. Use customer feedback and market research to guide this – what are people asking for? What’s trending in your niche? However, don’t stretch too thin. It’s usually best to start with your core successful products and ensure those are always in stock and doing well online, then gradually introduce new items and see how the market responds.
Inventory Management: Sourcing ties into how much stock to keep. As you scale, managing inventory becomes a balancing act – you need enough to meet demand (so you don’t stock out and lose sales), but not so much that your cash is tied up in unsold goods. Use the data from your online store and any offline sales to identify fast-moving products and ensure you reorder or produce in time. Seldone’s analytics or inventory alerts can help here. Also prepare for seasonality – e.g., if you expect a big spike during holidays, ramp up production a couple of months in advance. Over time, you might integrate inventory management software or techniques (even simple spreadsheets or reorder point systems) to streamline this.
Branding: Developing a Strong Brand Identity
When you’re trying to build a major online brand, branding is paramount. Branding is more than just a logo – it’s the story, values, and personality of your business that sets it apart and creates emotional connections with customers. Here’s how to refine and leverage your branding:
Brand Story: Every small business has a story – why it was founded, who the people behind it are, what mission or passion drives it. Use that story as a selling point. Consumers love brands with authenticity, especially in the artisanal and handmade space. For example, if the business you bought was a family-run workshop making leather goods using traditional techniques, tell that story on your website’s About page and even in product descriptions. Now, since you’ve taken over, weave your own narrative too: perhaps “Founded in 2015 by Jane Doe, our brand started as a tiny market stall. Today, under new owner [Your Name], we remain committed to Jane’s original vision of sustainable, handcrafted quality while expanding our reach to customers worldwide.” Make sure the story emphasizes continuity and values (existing customers appreciate knowing the soul of the brand is intact) and your exciting plans for the future.
Visual Identity: If the business already had a logo and a certain look, evaluate if it’s suitable for a larger audience or if it needs a refresh. You want a professional, memorable logo that looks good on a website, social media, and packaging. If you’re happy with the existing one, great – use it consistently. If it looks a bit amateur or outdated, consider updating it (but try not to stray so far that old customers won’t recognize it). This could mean hiring a graphic designer or using design tools to create a cleaner version. Also decide on brand colors and fonts and use them everywhere (website, marketing materials, labels). Consistency in visual elements helps create brand recognition – when someone sees your packaging or an Instagram post, they should immediately sense it’s from your brand due to the style.
Brand Voice: How does your brand “sound” in writing and communication? Is it friendly and casual, or expert and sophisticated? Many artisan brands go for a friendly, relatable tone – like talking to a friend – which can be great for social media and building community. Whatever tone you choose, use it in product descriptions, emails, social posts, and even customer service. For instance, a friendly brand might have a thank-you note in packages that says “Hey there! We just wanted to say thanks for supporting our little brand – you made our day!” versus a formal one that might say “Thank you for your purchase. We appreciate your business.” Neither is wrong; it depends on your audience and image. Just keep it consistent.
Mission and Values: Modern consumers, especially when shopping from smaller brands, often care about the values of a business. Are you eco-friendly? Do you donate a portion of profits to a cause? Are your products ethically made? Highlight whatever positive values your brand stands for. If, for example, you ensure fair wages to artisans or you use only biodegradable packaging, make that a proud part of your branding. It differentiates you from generic big-box competitors and can build a loyal following who share those values.
Rebranding Caution: If you do decide to change the name or major branding elements of the business you bought, do it carefully. Changing the name is usually not advised in the early stages of scaling, as you’d lose existing brand equity. However, if you must (maybe the old name was too local like “Main Street Soaps” and you want something broader), communicate transparently with customers: “We’re rebranding to [New Name] to better reflect our vision of bringing our soaps to the world. Rest assured, the same great products and people are behind the scenes!” and forward the old domain to the new one, etc. Keep any transitions smooth to not confuse people.
Packaging: Product Packaging and Unboxing Experience
In e-commerce, packaging serves two key purposes: protecting the product during shipping and delighting the customer when they receive it. Good packaging can enhance your brand image and encourage repeat business. Here’s how to approach it:
Protective Packaging: First and foremost, ensure your products are well-protected for sometimes long and bumpy journeys through postal or courier systems. Assess each product type and what it needs. Fragile items (like ceramics, glass, delicate crafts) will need cushioning – bubble wrap, foam, or biodegradable packing peanuts/paper. Soft goods (textiles, clothing) might just need a poly mailer or box to keep them dry and clean. If you’re shipping liquids (say handmade jams or oils), double seal them and use leak-proof bags around the container as an extra precaution. The goal is that your item arrives in perfect condition no matter if the box gets tossed around. Do some test packages and drop them, see if the product remains safe. Better to over-protect than have broken items and upset customers.
Branded Packaging: This is where you turn a utilitarian necessity into a brand experience. Consider investing in custom packaging as you scale. This could be as simple as stickers with your logo that you put on plain boxes, up to fully printed boxes or mailer envelopes with your brand design. For many small brands, a cost-effective approach is: a clean, sturdy kraft box or mailer, a custom logo sticker seal or a stamp of your logo on the box, and perhaps tissue paper in your brand color wrapping the product inside. Branded packaging makes your product feel like a gift when it arrives. It also spreads brand awareness – someone seeing the box on a neighbor’s porch or in the mailroom will see your brand name.
Unboxing Experience: Think about the a customer opens your package. It should feel rewarding. A few ideas to enhance unboxing:
Include a thank-you card or note. This can be handwritten for a nice touch (though at big scale that may be hard, at least have a designed card that looks personal). Thank them for supporting your business, perhaps give a small discount code for their next purchase to encourage repeat business (“Use code THANKYOU10 for 10% off your next order”).
Nicely present the product. If appropriate, use tissue paper or a small pouch for the item, tied with twine or a ribbon for a crafty feel. Avoid it looking like something just tossed in a box.
Include a little extra if feasible: maybe a free sample of another product, or a branded sticker or small freebie. People love surprises – a tea shop might throw in a couple of sample tea bags of a different flavor; a soap company might include a tiny guest soap bar as a bonus. These not only please the customer but introduce them to other products they might buy next time.
If your brand voice allows, you can make the packaging fun: print a witty message inside the box flap (“Yay! It’s here!” or “Unwrap happiness.”) – such small touches create a sharable moment. Many customers share cool unboxing experiences on social media, which is free promo for you.
Eco-Friendly Considerations: Modern consumers increasingly appreciate sustainable packaging. Wherever possible, use recyclable or compostable materials. For example, use paper-based cushioning instead of plastic bubble wrap (there are green wrap alternatives), avoid excessive plastic, and source packaging from sustainable suppliers. Let customers know you’ve done this – maybe a line on your thank-you note: “Our packaging is 100% recyclable. Thank you for recycling or reusing it!” It shows you care about your environmental footprint, which can strengthen customer loyalty.
Packaging for Retail vs. Shipping: Note if you plan to still sell in a physical setting, your packaging needs might differ (for retail display you might want fancier boxes or tags). But for online shipping, simpler is often better as long as it protects the item. You can have separate solutions: e.g., a jewelry brand might have a nice jewelry gift box for the product itself and then put that inside a padded mailer for shipping.
Cost Management: Packaging is an expense – as you scale, buying in bulk will save money (order 500 boxes vs 50, to cut unit cost). Balance quality with cost. It’s often worth spending a bit more per package for a great presentation if it turns customers into repeat buyers. Track packaging costs as part of your product cost calculations so you’re still profitable.
By ensuring your sourcing can handle growth, sharpening your branding to appeal to a wide audience, and delivering products in beautiful, secure packaging, you set a strong stage for scaling success. Your products and their presentation will do a lot of the talking for your brand, building trust and satisfaction in your growing customer base. Next, we’ll turn to the engine that will drive customers to discover and purchase those products: digital marketing.

7. Digital Marketing Fundamentals: SEO, Social Media, Email, and Influencers
“Build it and they will come” unfortunately doesn’t quite apply to online stores – you have to actively attract visitors to your site. This is where digital marketing comes in. We’ll cover the fundamental channels and strategies: Search Engine Optimization (SEO) to capture people searching the web, social media to engage and grow an audience, email marketing to retain and nurture customers, and influencer outreach to expand your reach via trusted figures. Each of these could be a guide on its own, but here’s an overview to get you started:
Search Engine Optimization (SEO)
SEO is all about making your website show up in search engines (mainly Google) when people search for keywords related to your products. Good SEO means more organic (free) traffic to your store.
Keyword Research: Start by brainstorming and researching what keywords your potential customers might use. If you sell artisanal leather wallets, keywords could be “handmade leather wallet”, “artisan leather goods”, “best slim leather wallet”, etc. Use free tools like Google’s Keyword Planner or Ubersuggest to get ideas and see search volumes. This will guide what terms to focus on in your content.
On-Page Optimization: Incorporate those keywords naturally into your site:
Page Titles & Meta Descriptions: Ensure each page (especially product pages) has a descriptive title tag that includes relevant keywords. For example, your product page title could be “Handmade Italian Leather Wallet – [Your Brand]”. The meta description (a short snippet shown in search results) should also include an enticing, keyword-rich sentence (“Genuine hand-stitched Italian leather wallet, crafted by artisans. Durable, stylish, and slim – discover quality at [Your Brand].”).
Headings and Content: Use headings (H1, H2, etc.) on your pages that include keywords where appropriate. Write thorough product descriptions and even consider adding a short blog or guide content to your site if applicable (e.g., a blog post about “How to Care for Your Leather Wallet” or “Top 5 Spring Fashion Trends in [your niche]”). Useful content can rank and draw visitors.
Alt Text for Images: Add descriptive alt text to your product images (e.g., alt=”handmade blue ceramic vase”). This helps search engines understand images and also improves accessibility.
Site Structure: Organize your site clearly. Use clear menu names and make sure every product is a couple of clicks from the homepage. A sitemap (which Seldone likely provides automatically) helps search engines crawl everything.
Technical SEO: The nice thing about using Seldone or similar platforms is they handle much of the technical heavy lifting. Your site will be mobile-friendly (which is crucial for SEO since Google prioritizes mobile), and likely Seldone optimizes site speed. Still, keep an eye on:
Site Speed: Images should be optimized (not huge file sizes) so pages load fast. Fast-loading sites rank better and keep users from leaving.
SSL: Your site should have HTTPS (secure). Hosted platforms do this automatically with SSL certificates. This is a must for user trust and SEO.
No Broken Links: If you ever remove products or pages, set up proper redirects to avoid “404 not found” errors which can hurt SEO.
Off-Page SEO: Over time, try to get backlinks (other sites linking to your site), as this strongly boosts SEO. Early on, you can:
Ensure your social media profiles link to your site (and maybe vice versa).
Get your business listed in relevant directories or local listings if applicable (Yelp, Google Business, etc.).
If you write any guest posts for blogs or collaborate on content, see if they can link to your site.
Encourage customers or bloggers to review your products; if a blogger writes about your product and links to your site, that’s gold for SEO (as well as direct traffic).
SEO is a long-term game – you won’t be #1 on Google overnight. But steady effort and good content will pay dividends by constantly funneling interested shoppers who find you via search.
Social Media Marketing
Social media is a powerful tool to build brand awareness, community, and drive traffic/sales. The key is to focus on platforms where your target customers hang out and create content that engages them.
Choose the Right Platforms: You don’t have to be on every social network; choose those that make sense for your business:
Instagram: Great for visual products (fashion, crafts, food, beauty, home decor, etc.). It’s highly visual and shopping-friendly (you can set up Instagram Shopping to tag products that link to your website). You can share photos of your products, behind-the-scenes of how they’re made, customer photos, etc. Instagram Stories and Reels (short videos) can humanize your brand and show fun snippets (like packing orders, or quick product demos). Use relevant hashtags (e.g., #handmade, #slowfashion, #yourbrandname) to reach new audiences, and engage by liking and commenting in the community of your niche.
Facebook: Still useful, particularly for slightly older demographics. Having a Facebook Page for your business is good for legitimacy and for those who prefer that platform. You can post updates, run contests, and use Facebook’s Shop feature as well. Facebook is also tightly integrated with Instagram, especially for advertising (Facebook Ads Manager handles both FB and IG ads). If your product appeals across age groups, maintain a presence here.
Pinterest: Excellent if your products are the kind people search for inspiration (fashion, DIY, decor, recipes if you sell food items, etc.). Many use Pinterest like a visual search engine. By pinning attractive images of your products (with proper descriptions and links back to your site), you can get re-pins and traffic. For example, a candle maker might pin lifestyle shots of candles in home settings, which could go viral in decor boards.
TikTok: If you have the creativity for short videos and your target is Gen Z or young adults, TikTok can be amazing for exposure. Content could be quick behind-the-scenes clips, satisfying craft processes (people love watching how things are made), or packaging orders with a trending song. TikTok’s algorithm can catapult even small accounts to many viewers if the content is engaging. It can translate to sales, as viral products (“TikTok made me buy it”) are now a trend.
Others: If you’re B2B or more professional, LinkedIn; if you have a lot of tutorials or storytelling, YouTube. But likely for a B2C product brand, Instagram, Facebook, Pinterest, TikTok are top options.
Content Strategy: Post regularly (consistency is more important than volume at first – even 3 times a week is okay, as long as you keep it up). Mix up your content:
Product photos with interesting captions (tell the story of that product or how it’s used).
Behind-the-scenes glimpses: e.g., show your workshop, or a day in the life of fulfilling orders, or new designs in the making. This gives customers a personal connection to your process.
User-generated content: Encourage customers to share photos of themselves using your product (maybe create a branded hashtag for it). Repost those (with permission) – it acts as social proof that real people love your items.
Educational or value content: If your niche allows, share tips or info. For example, a skincare brand could share skincare tips or routines (with subtle mention of their product). A tea brand could share brewing tips or cultural facts about tea.
Engaging posts: questions, polls, or fill-in-the-blank prompts can generate comments. For example, a fashion boutique might post two outfit styles and ask “Which would you wear for a summer date? A or B?” This gets people involved.
Use features like Stories (for daily updates or quick news), Reels/TikTok (for trending content), Live video (maybe a live Q&A or a studio tour).
Importantly, respond to comments and messages. Social media is a two-way street. Thank people for compliments, answer questions, address any concerns. Building those relationships can turn followers into customers. Also engage outside your page – comment on other posts in your niche, join conversations (not spamming your link, but genuine engagement to get your name out there).
Social Media Advertising (Briefly): While this section focuses on organic (free) tactics, keep in mind that platforms like Facebook and Instagram offer powerful targeted advertising. As you grow, you might invest in some ads to reach people beyond your follower base (for instance, targeting women 25-45 interested in “handmade crafts” and “Etsy” for your jewelry brand). Even a modest budget can boost your reach. But learn the basics first, perhaps after you’ve done organic marketing for a bit and understand what messaging resonates with your audience.
Email Marketing
Email might sound old-fashioned compared to social media, but it remains one of the highest converting marketing channels. People on your email list have shown interest in your brand (by signing up or purchasing) and are more likely to buy again. Here’s how to harness email marketing:
Build Your Email List: Start collecting emails as soon as possible. There are a few key methods:
On your website: Use a sign-up form or pop-up offering something in exchange for an email. Commonly, brands offer a one-time discount (e.g., “Join our newsletter and get 10% off your first order!”) or perhaps a free small downloadable (like a PDF guide) if relevant. Almost everyone likes a discount, so that tends to work well. Seldone might have built-in email capture forms or you can integrate with an email marketing service easily.
At Checkout: Ensure that during the checkout process, customers can opt in to your newsletter. Many will agree, especially if phrased as “Get updates and exclusive offers via email.”
In person (if applicable): If you still operate a physical shop or market stall, have a sign-up sheet or a digital way (like an iPad form) for customers to subscribe for updates or to join a VIP club for offers.
Compliance: Be aware of email marketing laws like GDPR (in Europe) and CAN-SPAM (in the US). Basically, get explicit permission to email people, always provide an unsubscribe link in emails, and don’t share their email with others without consent. Most email marketing platforms handle these technicalities.
Use an Email Marketing Service: Don’t try to send marketing emails from your personal email; use a proper service like Mailchimp, SendinBlue, ConvertKit, or possibly Seldone’s own email tools if provided. They offer templates, manage unsubscribes, and help avoid your emails going to spam. Many have free plans up to a certain subscriber count.
Email Content Strategy: What to send? Common types of emails include:
Welcome Email: When someone signs up, send a warm welcome. If you offered a discount code, include it here. Introduce your brand briefly and set the tone.
Newsletter Updates: Maybe once or twice a month, send a newsletter to all subscribers. This can feature new products, behind-the-scenes news, or upcoming events. Keep it visually appealing (images of products or your team) and not too long. Always have a clear call-to-action (CTA) – like “Shop New Arrivals” linking to your site.
Promotional Emails: If you’re running a sale or special offer, definitely email your list. E.g., “Holiday Sale – 20% off all scarves this week only!” Make the offer and terms clear, and encourage them to act soon (scarcity and urgency can spur action).
Product Highlights or Education: You could send occasional emails focusing on one product (“Product Spotlight: Our Signature Candle and the story behind its scent”) or educational content that ties in (“5 Summer Outfit Ideas – featuring items from our new collection”).
Personalized Emails: As you grow, segment your list for better targeting. For instance, customers who bought from you before might get a “Thank you – here’s a special discount for being a loyal customer.” Or if you have varied categories, segment by interest (those who bought jewelry vs those who bought clothing – send each group more relevant content).
Post-Purchase Follow-ups: After someone buys, consider an automated email after a suitable delay – “How are you enjoying your [product]? We’d love to hear feedback or see a photo!” This not only engages them, but if they respond with a testimonial or picture, you gain marketing material. Also, you could include a “Related products you might like” suggestion.
Tone and Value: Just like branding elsewhere, keep your emails on-brand in voice and look (most services let you use your logo and brand colors in templates). Provide value in each email – whether it’s a deal, useful info, or just something entertaining. If every email is only “Buy this now”, people may lose interest. Mix in storytelling or tips to keep them opening your mails.
Don’t Spam: Quality over quantity. It’s generally sufficient to email at most once a week for a small brand (unless you have a special daily deal thing, but usually not). Many successful small brands email 1-4 times a month, ramping up a little during holiday season with more frequent promotions. Pay attention to open rates and unsubscribe rates; if you see a lot of people tuning out, scale back or reassess your content.
Influencer Outreach
Influencer marketing involves collaborating with individuals who have a following (big or small) in your target demographic to promote your product. It can be incredibly effective because it’s like word-of-mouth at scale – people trust recommendations from the influencers they follow.
Identify Relevant Influencers: Look for influencers whose content and audience align with your brand. They don’t have to be mega-famous; in fact, micro-influencers (those with, say, 5,000 to 50,000 followers) often have very engaged audiences and are more accessible to small brands. For example, if you sell artisanal vegan chocolates, look for food bloggers or Instagrammers who focus on vegan recipes or ethical products. If you have a fashion line, find fashion bloggers or Instagram style pages that match your vibe (boho, streetwear, minimalist, etc.). Also consider YouTubers if your product could benefit from a video review or unboxing.
Reach Out Professionally: When contacting an influencer, personalize your message. Show that you know and appreciate their content. Explain why you think your product would resonate with them and their followers. Propose what you have in mind: are you offering to send a free product for them to try (no strings attached, but hoping if they love it they’ll share)? Are you proposing a paid collaboration (bigger influencers will usually require payment for a dedicated post or video)? Or an affiliate deal (they get a commission on sales they drive with a unique code)? For micro-influencers, many are happy to receive a product gift and, if they truly like it, will post about it. Be clear but friendly in your outreach. Something like:
“Hi [Name],
I love your [Instagram/TikTok/Blog] – especially the post you did about sustainable fashion. I recently took over a small business that makes eco-friendly handmade wallets, and I think you and your audience might really appreciate our designs. I’d love to send you one of our wallets as a gift. If you genuinely like it, it’d mean the world if you might share your experience with your followers, but of course there’s no pressure. Let me know if you’re interested and if so, where I can send it!
Thank you, [Your Name], [Brand]”Keep it concise and let your product speak for itself.
Provide Assets and Info: If they agree, send the product promptly. You can also provide a little info sheet about it (features, the story, any specific messaging). Don’t script them (audiences value authenticity), but giving background info helps them create content. Also, make it easy: if you have a preferred hashtag or want them to tag your account, mention those details.
FTC Guidelines: Influencers often need to disclose if something was a gift or paid promotion (#ad or #gifted or #sponsored). Encourage them to comply with regulations; it’s standard now and doesn’t harm authenticity as long as they speak truthfully about your product.
Affiliate or Referral Programs: To entice influencers (and even happy customers) to actively promote, consider setting up an affiliate program. This means giving them a unique discount code or link that gives their followers a discount and allows you to track sales they referred, and you then give the influencer a commission (e.g., 10% of sales). People love sharing discount codes, and influencers love commissions. Some platforms (maybe Seldone or external apps) can help manage affiliate tracking, or you can do it manually on a small scale with codes.
Monitor and Maintain Relationships: If an influencer posts about you, be sure to engage with that content (comment and thank them). Keep the relationship warm – maybe in future, you can collaborate on a new product launch or a giveaway contest. On that note, Giveaways are a common collab: you provide product(s) to be given to a follower of the influencer, and they host a contest (like “follow us both and tag a friend to enter”). This can rapidly increase your social following and create buzz, although entrants might be more interested in free stuff than being loyal customers, so use giveaways sparingly and strategically.
Leverage Content: When an influencer creates a nice photo or video with your product, ask for permission to repost that on your own social media or website. User-generated content like that is excellent social proof.
By combining SEO, social media, email marketing, and influencer partnerships, you create a multi-channel marketing engine for your brand. SEO brings in those actively searching, social media builds a community and keeps your brand in daily view, email re-engages those who’ve shown interest, and influencers help you reach new audiences through trusted voices. As a beginner doing this alone or with a small team, it might seem like a lot – so pace yourself and maybe focus on one channel at a time, get comfortable, then add the next. Over time, these efforts compound: your SEO improves, your email list grows, your social followers multiply, and sales will start to come in more regularly from all sides.
Next, we’ll touch on the practical side of delivering your goods efficiently and keeping customers happy after they click “Buy” – logistics, fulfillment, shipping, and customer service.

8. Logistics, Fulfillment, and International Shipping Basics
Selling online means you’ll be shipping orders out to customers near and far. Efficient logistics and fulfillment ensure that once someone places an order, the product reaches them in a timely and cost-effective manner. Additionally, as you scale globally, you’ll encounter the complexities of international shipping. Let’s break down the basics:
Order Fulfillment Process
Fulfillment covers everything from the moment an order is placed to the moment it’s delivered to the customer. In the beginning, you might handle this entirely by yourself (or with a small team), which is fine. Here’s how to organize it:
Inventory Storage: Set up a dedicated space for your inventory. It could be a room in your house, a garage, or part of the business’s shop if you still have it. Organize products logically – perhaps by category – and keep a simple inventory count system. As you grow, you might invest in shelving, bins, and labels to keep stock neat. Good organization means faster packing and fewer mistakes (like sending the wrong item).
Packaging Station: Have a clear area for packing orders. Stock it with all necessary supplies: various box sizes or mailers, packing tape, scissors, protective materials (bubble wrap, etc.), your thank-you cards, a printer for shipping labels, and a scale (to weigh packages for shipping). If you have it all in one spot, you won’t scramble for things when orders come in.
Order Management: Using Seldone’s order dashboard, you’ll see new orders listed. It likely shows the items, customer address, and shipping method chosen. It might allow you to tick orders as processed or print a packing slip. Develop a routine: Check orders at least daily (more frequently as volume increases), and aim to pack and ship within a certain timeframe, like 1-2 business days after order (fast shipping = happy customers). If you foresee a delay (maybe one product is back-ordered a few days), proactively email the customer to inform them; communication goes a long way.
Printing Labels: For shipping, you’ll need to get postage and address labels on your parcels. There are a few ways:
Many e-commerce platforms integrate with shipping software or carriers to let you buy and print labels at home, often at a slight discount. Check if Seldone has such integration (it might link to label printing for USPS, DHL, etc.). If yes, you can input package weight/dimensions, pay for postage, and print the label – then just drop the package at the post office or schedule a pickup.
Alternatively, you can manually go to your postal service or courier website and use their online label tools, or even take packages to the post office/courier store to pay and ship (though that gets inefficient as you scale).
Using a simple shipping software (like PirateShip, ShipStation, etc.) can save time by importing orders and printing labels in bulk, but at first you can certainly do things one by one.
Always double-check that the shipping address prints correctly and include a return address (which should be your business address).
Quality Check: Before sealing a package, do a quick check: correct item(s)? In good condition? All extras (like any freebie or note) included? It’s easier to catch a mistake now than to have to fix it later at greater expense.
Dispatching: Once packed and labeled, send it out! Drop off at the post or have a pickup. If you’re shipping a handful of orders a day, dropping off is fine. If you get to dozens per day, you can arrange daily pickup with USPS or courier services so you don’t spend time driving packages around. Keep receipts or tracking proof when you hand over packages (most carriers provide some form of proof of shipment).
Tracking: Provide tracking numbers to customers. Typically, if you use integrated shipping, Seldone can send an automated email with the tracking link when you mark the order as shipped. If not, you might manually update the order with tracking info. Customers love being able to track their orders, and it pre-empts a lot of “where is my order?” queries.
Handling Problems: Inevitably, things happen: a package gets lost, delayed, or arrives damaged. Have a plan for these:
If tracking shows stalled or lost, open a case with the carrier and keep the customer in the loop. Often you might need to reship the item to satisfy the customer, and then sort out the lost package claim with the carrier in the background (most carriers have some insurance).
If item arrives damaged, apologize sincerely and offer a replacement or refund promptly. You can request they send a photo of damage (both to confirm and to perhaps use for improving packaging).
If an incorrect item was sent (fulfillment error), again apologize and immediately ship the correct item with expedited shipping if feasible, including perhaps a small gift for the trouble. Then arrange return of the wrong item if you want it back (or sometimes to save hassle you might let them keep it, depending on value).
Efficient fulfillment and good handling of issues turn first-time buyers into repeat customers because they know they can trust your brand not just to sell quality goods but to deliver them reliably.
International Shipping Basics
Expanding globally is exciting – you can get orders from anywhere! But international shipping has extra considerations:
Costs and Pricing: International shipping can be expensive relative to domestic, and costs vary by country and package weight/size. Research typical rates to regions you anticipate interest from. You may decide to charge customers the full shipping cost or subsidize some. A common practice is to offer free or low-cost domestic shipping but charge a calculated rate for international. Be transparent about these costs on your website (maybe a page explaining shipping rates or at least show it clearly at checkout before payment).
Customs and Duties: When you send a package across borders, it may be subject to customs duties or import taxes in the destination country, depending on value and item type. Generally:
You, as the shipper, need to fill out a customs form (often integrated into the shipping label if done online) detailing the contents and their value.
Typically, the recipient (customer) is responsible for any import fees. It’s good to note on your site that international orders may incur such fees and that the customer is responsible for them. Surprising someone with a customs bill can lead to resentment, so set expectations.
Some countries have de minimis thresholds under which packages sail through without fees (for example, the US generally doesn’t tax imports under $800, the EU has recently low thresholds so many packages get VAT).
If you ship a lot to a certain country/region, read up on their specific import rules. For example, cosmetics or food items might be restricted in some places, or require specific labeling.
Shipping Carriers for International: Postal services (like USPS in the U.S., Royal Mail in UK, etc., often handed off to the destination country’s postal service) are usually the cheapest for small parcels but can be slower (2-4 weeks sometimes) and have limited tracking. Couriers (UPS, FedEx, DHL) are faster (a few days to a week), reliable tracking, but pricier ...shipping).
Choose carriers wisely: For each country, certain carriers may be more reliable. For example, DHL is often great for international shipping worldwide (fast but pricey), while postal services are cheaper but vary in reliability. As you get orders, track which shipping method yields better results (speed/cost).
Delivery times: Set realistic expectations on your site for international delivery windows (like “International orders typically arrive in 1-3 weeks depending on location and service”). Then if possible, outperform those expectations. It’s better customers are pleasantly surprised by quick delivery than upset at delays.
Localized Considerations: If you see a lot of interest from a specific foreign market, consider localized touches: maybe translating parts of your site, accepting payments in their currency (Seldone may allow multi-currency), or partnering with a local distributor down the line. But initially, just ensure you ship to those customers and that they have a smooth experience ordering from abroad.
When to Consider 3PL (Third-Party Logistics) or Warehousing
As your order volume grows (say, dozens per day or expanding to many countries), fulfilling from your home base might become too time-consuming or slow for far regions. That’s when you might consider third-party logistics providers (3PLs) or fulfillment centers. These are companies that will store your inventory and ship orders on your behalf from their warehouses. For example, you could keep stock in a U.S. warehouse for North America and one in Europe for EU customers to get faster local deliveries. Services like Amazon FBA (Fulfilled by Amazon) can also handle storage and shipping (even if you sell through your own site, you can use them for logistics). Early on, you likely won’t need this, but it’s good to know it’s an option as you scale to lighten your operational load and potentially reduce international shipping costs (by stocking inventory closer to those customers).
In summary, streamlined fulfillment and smart shipping strategies are key. They ensure your hard-won customers get their orders smoothly, turning them into happy, repeat buyers. Don’t be afraid to start small (packing at your kitchen table) and then evolve your logistics as the business grows. Many big brands began exactly that way and built sophisticated logistics over time.
9. Customer Support and Building a Community
Up to now, we’ve focused on getting customers to buy from you. Equally important is what happens after the sale and how you cultivate relationships. Great customer support turns one-time shoppers into loyal fans, and a strong community around your brand can drive word-of-mouth and long-term success. Let’s break this down:
Customer Support Essentials
Be Reachable: Make it easy for customers to contact you with questions or issues. Common channels include:
Email Support: Have a dedicated support email (like [email protected] or [email protected]). Check it regularly (at least once a day, more often if volume dictates) and respond promptly. A good practice is to reply within 24 hours on weekdays. If you need time to find an answer, at least acknowledge the email and let them know you’re on it.
Contact Form: On your site’s Contact Us page, include a form or at least list your email. Some customers prefer forms which guide them to provide necessary info.
Social Media DMs: People might message you on Instagram, Facebook, etc. Try to monitor those too and respond or politely redirect them to email if it’s something complex. Facebook and Instagram even show response rate badges, and quick replies on social make a positive public impression.
Phone or Chat (Optional): Depending on your capacity, you might offer a customer service phone number or live chat on your site. As a small business, this can be challenging to manage, but even a few hours a day of live chat support can boost trust for shoppers who have immediate questions. Alternatively, a chatbot or clearly stated hours for phone support can help. This is more relevant as you grow; starting out, email is usually sufficient.
FAQ and Self-Service Info: Many customers have similar questions (about shipping times, return policy, product details like sizing, etc.). Create a FAQ page on your site addressing common queries. This not only reduces repetitive questions directed to you, but also builds trust – shoppers often check FAQs for reassurance. Include topics like:
Shipping (methods, costs, international, how long it takes)
Returns and exchanges (how to initiate, time window, conditions)
Product-specific questions (e.g., “How do I care for this handmade sweater?” or “Are your ingredients organic?”)
Sizing charts if applicable.
Any guarantees or warranties.
Also consider creating how-to guides or videos if your product needs instructions. For example, if you sell a DIY craft kit, have a tutorial video; if it’s a wearable, maybe a style guide. This kind of content supports customers post-purchase and reduces support requests.
Return and Exchange Policy: Having a clear, fair return policy is vital. Many shoppers will check it before buying, especially from a new brand. Decide on your policy and state it on your site (often in the footer and FAQ):
Common approach: Accept returns/exchanges within a certain window (30 days is typical) as long as item is unused and in original packaging. Some products (like perishable goods or personal care items) may be final sale for hygiene reasons, which you should state.
Who pays return shipping? Some brands offer free returns, which customers appreciate, but as a small business you have to gauge if you can afford that. Perhaps you offer free returns for domestic but not international, or only exchanges are free. If not free, be very clear on the process (e.g., customer emails you, you provide an RMA number and address to ship back to; once received, you refund minus original shipping if you charged any).
If a product is faulty or you made an error, always cover the return/exchange shipping and resolve it with profuse apologies – these cases are an opportunity to shine in service recovery. A customer who had an issue fixed well can become more loyal than one who never had an issue at all.
Once you set a policy, stick to it, but also use discretion to delight customers. For instance, someone is just past the return window but has a genuine reason? It might be worth bending the rule to keep them happy. People remember experiences, and you want that memory to be positive.
Personal Touches in Support: As a small brand, you can offer a level of personal care that big companies can’t. Use that to your advantage. Address customers by name in emails, reference their order or situation specifically, and be friendly and human (not overly formal or using canned corporate jargon). For example, “Hi Sarah, I’m sorry the necklace didn’t meet your expectations. I totally understand wanting it to match that outfit for your event. If you’d like, I can help you exchange it for a different style or process a return – whichever you prefer. Just let me know what works best for you, and I’ll take care of it right away!” This kind of response shows empathy and flexibility.
Under-Promise & Over-Deliver: A classic customer service mantra. If you think you’ll have an answer or resolution by Friday, tell the customer you’ll have it by Monday and then surprise them on Friday. If you’re shipping a replacement, maybe toss in a small freebie or a handwritten apology note. These small gestures turn problems into opportunities to impress.
Organize Customer Inquiries: As you get more emails, consider using a simple help desk system or at least an organized email label system so nothing falls through the cracks. There are tools like HelpScout or Zendesk (they cost money, though some have free tiers for a single user) which centralize support and even allow FAQs and saved replies. But initially, a diligent approach with regular email checking and perhaps star/flag important items can suffice.
Community Building
Beyond one-on-one support, building a community means creating a space and culture where your customers (and potential customers) feel connected to your brand and to each other. This can lead to organic advocacy – people who love your brand will spread the word and stick with you long-term.
Social Media Engagement: We discussed social media for marketing, but it’s also a community tool. Encourage conversation on your posts by asking questions, and when people comment, reply back to keep it going. Feature user-generated content (like sharing a customer’s photo wearing your product, with credit to them) – this not only flatters the person who posted it, but shows others that there are real happy customers out there (and they might aspire to be featured too). Some brands even create a specific hashtag for their community (e.g., #[YourBrand]Family or #[Brand]Squad) and encourage fans to tag their posts with it. Acknowledge your top fans – if you notice someone frequently liking/commenting or tagging you, maybe send them a thank-you coupon via DM or publicly shout them out in a story.
Build an Online Group or Forum: Depending on your product, a dedicated community space can work well. For instance:
A Facebook Group for customers and enthusiasts to join and discuss. Say you sell baking kits, you might have a group where people share their finished cupcakes or recipes, and you pop in to comment and drop sneak peeks of new flavors.
A forum on your website (or using Seldone’s community feature if available) where customers can interact, ask questions, share tips (like a skincare brand having a forum for users to discuss routines).
Platforms like Discord or Slack communities are increasingly used for brands too, especially if you have a younger, tech-savvy audience that wants a more live-chat group vibe.
These take some effort to maintain (you’ll need to moderate to keep it positive and on-topic), but they can create a strong sense of belonging. People will feel like they’re part of a tribe around your brand.
Offline Community Engagement: Even if you’re focusing online, don’t overlook the power of occasional real-world interaction:
If feasible, host events or pop-up shops in key cities where you have lots of customers. For example, a small fashion label might do a trunk show or a meet-and-greet event. Or participate in local markets or fairs and invite your online followers to come meet you there.
Workshops or classes: If your product lends to it (like a craft or a skill), consider hosting a virtual or local workshop. A yarn shop that went online could hold Zoom knitting circles; a coffee brand could do a live virtual coffee brewing tutorial. This engages people beyond just buying stuff – it’s providing value and community.
Collaborations: Partner with complementary brands or influencers for joint events (Instagram Live chats, co-sponsored giveaways, etc.). This not only reaches new people, but also gives your existing community something fresh and exciting.
Loyalty Programs and VIPs: A more structured way to build community and reward it is through a loyalty program. This could be points-based (e.g., 1 point per $1 spent, and after 100 points they get $5 off, etc.), which many platforms support or have apps for. It incentivizes repeat purchases. But beyond that, think of adding tiers or special statuses: maybe after a customer makes 5 orders, they become a “VIP member” who gets early access to new products or an annual gift. Or run a referral program – existing customers get a reward for referring new ones (like “give $10, get $10” links). People love sharing products they enjoy, especially if there’s a perk in it for them, and it effectively turns your community into an informal sales force.
Listen and Involve the Community: Make customers feel heard. Solicit their feedback on new product ideas (“We’re thinking of launching a new scent – which of these three options would you love most?” let them vote via poll). If appropriate, let them be part of product development (some brands have done contests where customers suggest a new flavor or design and the winner’s idea gets produced and credited). When you implement a suggestion or common request, announce it: “You spoke, we listened – our new t-shirts will now be made with 100% organic cotton, as many of you requested!” This makes customers feel ownership of the brand’s journey.
Storytelling and Brand Values in Community: Share not just product stuff, but your brand’s behind-the-scenes stories with your community. Show the faces behind the brand (your team, your artisans). If you do something for the community or environment (like volunteering or donating), share that. It humanizes your business and fosters an emotional connection. Many people love to support businesses that align with their values, and if they feel part of your mission, they become true brand advocates who will champion you to others.
Handle Community Issues Gracefully: In any community, sometimes negativity or criticism arises (maybe a customer posts on social media that they had a bad experience). Always address these calmly and helpfully. Never get into public fights with customers; instead, apologize they’re unhappy and try to move the conversation to direct messages or email to resolve it. Then, if resolved, politely ask if they’d update their post or note that the issue was solved. Your broader community will see how you handle such situations, and a fair, empathetic approach builds trust. Deleting criticism outright or responding rudely will erode trust quickly.
In building a community, the overarching theme is genuine care and connection. Small businesses have the advantage of authenticity – you can know your customers by name, you can remember that Emily likes the lavender soap and check in how she liked the new batch. Those human touches don’t scale infinitely, but you’d be surprised how far you can go with them even as you grow. And ultimately, a brand that has a community of true fans can weather competitive markets because those fans stick around and bring others along.
10. Real-World Case Studies: Small Businesses That Scaled Globally
To inspire you on this journey from local business to global brand, let’s look at a few real-world success stories. These case studies illustrate how humble beginnings, paired with smart strategies (many of which we’ve discussed), led to worldwide success.
Case Study 1: Gymshark – From a Garage Sewing Machine to a Billion-Dollar Fitness Brand
Background: Gymshark is a fitness apparel brand that was started in 2012 by a 19-year-old named Ben Francis and his friends in the UK. Initially, it was literally run out of a garage – Ben, who was a pizza delivery driver at the time, began by screen-printing logos on t-shirts and later learned to sew to create his own workout apparel designs. They had no huge funding or experience; just passion for fitness and an eye for the emerging trend of stylish gym wear.
Scaling Strategy: Gymshark’s growth exploded thanks to savvy use of social media and influencer marketing. Early on, Ben leveraged bodybuilding influencers on YouTube and Instagram – he’d send free Gymshark outfits to fitness content creators who had large followings. These influencers loved the gear and wore it in their videos and posts, effectively giving Gymshark massive exposure to a target audience of fitness enthusiasts. This was relatively low cost (just the cost of the merchandise) but high impact, especially in the mid-2010s when influencer marketing was less saturated.
Gymshark also built a strong community around its brand; they were early in creating a lifestyle around their products, not just selling clothes. They interacted with fans at fitness expos, eventually hosting their own events. They continuously engaged their social media followers with workout tips, motivational content, and new product teasers, keeping excitement high.
Online Presence: Gymshark was a digital-first company. They sold exclusively through their own website (no physical stores initially), which allowed them control over customer data and avoiding retail middlemen. They used Shopify for their e-commerce in the early days (which provided scalability as traffic surged during their famous product drop launches).
Results: In a few short years, Gymshark grew from garage project to one of the fastest-growing fitness brands globally. By 2020, it reportedly hit over £400 million in valuation and later surpassed £1 billion, making Ben Francis one of the youngest billionaires. They now sell to customers all over the world. Key takeaways from Gymshark:
Niche focus (fitness apparel for the youthful gym crowd) and understanding of their audience.
Heavy reliance on influencer marketing and social proof to build credibility quickly.
Cultivating a community (Gymshark fans felt like they were part of a movement).
Smart use of e-commerce technology and direct-to-consumer model for global reach.
Consistency in branding – they maintained an image of aspirational, functional, and stylish fitness wear throughout.
Case Study 2: Kendra Scott – $500 Startup to a Global Jewelry Empire
Background: Kendra Scott is now a well-known jewelry brand, but it started extremely humbly. In 2002, Kendra Scott (a new mom at the time) began her business with just $500 in her spare bedroom in Austin, Texas. She designed and made her own jewelry pieces by hand. Her first approach was literally door-to-door: she went around to local boutiques in Austin trying to sell her jewelry. She faced rejections until one small store agreed to carry some pieces – and they sold out in days.
Scaling Strategy: Kendra Scott’s brand took off because of relentless networking and understanding her market. She hit a chord with affordable, colorful, fashionable jewelry that was missing in the market at the time. Word-of-mouth played a huge role; women loved her designs and told friends. As she got more orders than she could handle, she hired local stay-at-home moms and students to help make the jewelry (scaling production while keeping it handmade initially).
A big turning point was when she got a last-minute opportunity to show her line at a major fashion tradeshow due to a cancellation. She seized it, even though she was small, and her collection was a hit with retailers. That opened national wholesale accounts. Over time, she balanced between wholesale (selling through stores including big ones like Nordstrom) and her own direct channels (her website and eventually her own branded boutiques).
Building a Brand & Community: Kendra put a heavy emphasis on the brand experience. Her stores (when she opened them) offered things like a Color Bar where customers could customize jewelry – an interactive community experience. She’s also known for her customer-centric policies, like amazing customer service and a focus on events (she often did local events in her stores that engaged communities, such as fundraising events for charities, which built goodwill).
Online, her e-commerce has been strong, but Kendra Scott’s case is a mix of online and offline growth. Still, the lessons apply: she started tiny, scaled production smartly by getting help, and built a brand known for quality, positivity, and community engagement (philanthropy became a core value; the brand often donates to causes and encourages employees to volunteer).
Results: From that $500 start in 2002, by 2016 Kendra Scott’s company was valued at over $1 billion. As of mid-2020s, it has dozens of retail stores across the US, a thriving online store serving international customers, and a reputation as a major player in fashion jewelry. Key takeaways:
You can start with almost nothing if the product hits a market need (her accessible fashionable jewelry did).
Personal hustle in early days (door-to-door sales) can lay groundwork for later scaling.
Don’t scale alone – she enlisted others to help make products as demand grew, maintaining quality by training them, etc.
Community and values (philanthropy, personal service) can differentiate your brand in a crowded market and create loyal fans.
Omni-channel approach can work (both online and retail) if managed well, but even before she had stores, her emphasis on direct connection with customers set the stage for a strong community.
Case Study 3: Burt’s Bees – From a Craft Fair Honey Stand to an International Natural Care Brand
Background: Burt’s Bees is famous for lip balm and natural personal care, but it began in 1984 as literally a roadside honey stand in rural Maine, USA. Burt Shavitz was a beekeeper selling honey from the back of his truck. Roxanne Quimby, an artist and single mother, met Burt and they teamed up – she started making candles from Burt’s leftover beeswax to sell alongside the honey. Their first big market test was a local craft fair: they made a few hundred dollars of sales which encouraged them to keep going. They invested those earnings back into the business, gradually expanding into other products like soaps and eventually the iconic lip balm by 1991.
Scaling Strategy: Burt’s Bees grew throughout the late 80s and 90s by riding the wave of interest in natural products. They focused on quality and story – every product emphasized natural ingredients, and their rustic branding (with Burt’s face and the bee motif) stood out. They got an early break when a New York boutique ordered a large batch of their candles – which pushed them to increase production. Roxanne was very strategic: as demand grew, she relocated manufacturing from Maine to North Carolina to be closer to distribution centers and raw materials, which is a key scaling move (optimizing logistics).
Marketing-wise, Burt’s Bees relied on the authenticity of their story (back-to-nature, simple goodness) and gradually got their products into more stores. They did a lot of educational marketing about why natural is better, building trust with health-conscious consumers. They didn’t have social media back then, but they effectively used the equivalent – press articles, word-of-mouth from satisfied customers, and presence in health stores/co-ops.
E-Commerce Expansion: In the 2000s, as e-commerce became a thing, Burt’s Bees also embraced online sales through their own site (as well as being carried by online retailers). Their brand community was strong – many customers were advocates telling friends “you have to try this lip balm, it’s all natural and amazing!”. Burt’s Bees capitalized on this by maintaining excellent customer relations and a quirky, friendly brand persona.
Results: By mid-2000s, Burt’s Bees was selling hundreds of products globally, from lip care to lotions to baby products. In 2007, they were acquired by Clorox for a reported $925 million – a testament to how valuable the brand had become. Today, they are sold worldwide and are a benchmark for successfully scaling an initially tiny, homespun business into a mainstream global brand without losing a core focus on natural quality. Key takeaways:
Start with a unique angle (natural beeswax products in a time of synthetic cosmetics) and build around that mission.
Gradually expand the product line but keep it cohesive (all natural personal care).
Be willing to scale operations (moving or expanding production facilities) to meet demand – growth can mean tough decisions, but it enabled them to serve a national then global market.
Storytelling (like the imagery of Burt the beekeeper) and consistency in brand ethos created a loyal following that propelled growth largely via word-of-mouth until they were big enough to attract major distribution.
Case Study 4: TOMS Shoes – One Small Idea with Global Impact (and Community Building)
Background: TOMS Shoes began in 2006 when Blake Mycoskie, an entrepreneur traveling in Argentina, noticed the canvas alpargata shoes many locals wore and the extreme poverty that left many children without shoes. He started TOMS with a simple model: for every pair of shoes sold, one pair would be donated to a child in need (the One-for-One model). He started small, selling from his apartment, initially just to friends and family and local LA boutiques.
Scaling Strategy: TOMS’ story and mission (a purchase equals a charitable act) resonated strongly. Cause-driven marketing became their key. Customers felt that by wearing TOMS, they were part of something bigger – a community that cares. This fueled word-of-mouth like crazy; people didn’t just like the shoes, they loved telling the story of the company. Campus groups, churches, and socially conscious consumers became evangelists. Essentially, TOMS built a community around giving back.
They leveraged a lot of PR and media coverage too because the business model was novel. Major magazines and TV shows featured TOMS for its philanthropy angle, giving them free exposure that a tiny company normally couldn’t buy.
Online, they used their website not only to sell shoes but to share the impact of purchases (showing photos and stories of shoe drops in developing countries). This transparency made supporters trust them more and share more.
Growth and Community: As sales grew, TOMS kept engaging their community. They started the annual “One Day Without Shoes” campaign, asking people to go one day barefoot to raise awareness for the cause – thousands participated globally, sharing on social media and hosting local events, effectively promoting TOMS without it being a traditional advertisement. They also expanded product lines (from just classic canvas shoes to other styles, eyewear with a similar charity model, etc.) to keep customers returning and broaden appeal.
Results: TOMS went from a one-man startup in 2006 to by 2013 having given 10 million pairs of shoes to children in need – indicating roughly 10 million sold. They became an internationally recognized brand available both online and in retail stores worldwide. While TOMS later faced some challenges (competition, critiques of their charity model’s effectiveness), there’s no doubt their early scaling was phenomenal because of community and mission. Key takeaways:
A strong social mission can differentiate your business and build a passionate customer base that essentially does marketing for you (because buying from you makes them feel part of positive change).
Engaging those customers in that mission via campaigns and events deepens loyalty (TOMS turned customers into activists for their cause).
Storytelling (each pair = one donated, with real stories of kids) was central in all marketing, making even a $50 shoe purchase feel emotionally significant.
They leveraged both online (e-commerce, social campaigns) and offline (PR, events, retail partnerships) to scale reach quickly, but the consistent thread was the community of supporters and advocates.
Case Study 5: Dollar Shave Club – Disrupting an Industry Through E-Commerce and Clever Marketing
Background: Not all scaled businesses are artisanal – some are just clever twists on existing industries. Dollar Shave Club started in 2011 as a small e-commerce subscription service selling razor blades. Razors were dominated by big brands in retail with high prices, so DSC’s idea was to sell decent razors cheap via a mail subscription ($1 for the first month, then a few bucks per month).
Scaling Strategy: Dollar Shave Club famously launched with a viral video ad in 2012 titled “Our Blades Are F***ing Great.” It was humorous, edgy, and perfectly targeted at young men fed up with overpriced razors. That single video (which cost only around $4,500 to make) went viral on YouTube, garnering millions of views within weeks and crashing their website with the surge of orders. This highlights the power of viral digital marketing for scaling – one piece of sharable content put them on the map nationally.
Their model of subscription meant recurring revenue and constant interaction with their customers (monthly deliveries). They focused on customer experience – easy sign-up, witty communications (their packaging inserts and emails kept the humorous tone, building a brand personality customers enjoyed interacting with), and great support.
As they grew, they expanded product offerings (shave butter, additional grooming products) to increase revenue per customer and brand stickiness.
Community & Retention: DSC built a community in the sense of brand fans who would talk about them. They encouraged referrals by giving credits for referring friends. They also were active on social media with the same brand voice, engaging customers (people often posted memes or jokes about their DSC subscription and the company would respond in kind).
Results: Within about five years, Dollar Shave Club had attracted over 3 million subscribers and took a significant chunk of the shaving market from giants like Gillette. In 2016, Unilever acquired DSC for a reported $1 billion. The company remains a top subscription e-commerce example. Key takeaways:
A smart solution to a consumer pain point (cheap, convenient razors) can explode if marketed cleverly.
Viral marketing can catapult a small business into fame basically overnight, but you need a product/service that lives up to the hype and can retain those customers.
Consistent, unique brand voice (humor and relatability, in this case) set DSC apart from staid incumbents and created a loyal following that felt they were part of a “rebellion” against the status quo.
Subscription model created a sense of belonging (subscribers felt like club members, as per the name) and drove community-like engagement, with the business reinforcing it through personalized, tongue-in-cheek customer service and content.
These case studies show that there’s no single path to success, but there are common themes:
Passion and a great product (whether it’s quality craftsmanship like Burt’s Bees or just a better way like Dollar Shave Club).
Leveraging modern channels – be it social media, influencers, viral content, or building an online community.
Customer-centric approach – every story above involved connecting with customers, whether through mission (TOMS), humor (DSC), personal touch (Kendra Scott), or community events (Gymshark).
Scaling operations smartly – from production to distribution, each business had to adapt their logistics as they grew (just as you will).
Brand consistency – successful small-to-big brands know who they are and they project that identity strongly at every stage. They don’t try to be everything to everyone; they double down on what makes them unique.
Let these examples inspire you but remember, the business you build will have its own unique story. Perhaps be the next case study others cite – the local artisan shop that became a global e-commerce sensation!
Conclusion: Your Journey from Local to Global
Embarking on the journey to buy a small local business and scale it into an online brand is both challenging and incredibly rewarding. We’ve covered a lot of ground in this guide, so let’s briefly recap the roadmap:
Start Smart: Identify a promising small business with solid fundamentals – something you believe in and that has room to grow. Do your homework with thorough due diligence to ensure you know exactly what you’re buying and have a plan to address any issues.
Lay the Foundation: Transition the business online by choosing the right e-commerce platform. We highlighted various options, ultimately recommending Seldone for its all-in-one, beginner-friendly yet powerful approach. With Seldone, you can set up your store step-by-step, from custom domain to product listings, in a matter of days (or even hours).
Build Your Brand: Think beyond products. Develop a brand story and visual identity that resonate with customers worldwide. Keep the authenticity of the small business’s roots while polishing the branding to professional levels. Package your products beautifully and securely, so the unboxing experience delights customers and reinforces your brand’s quality and values.
Attract Customers: Utilize digital marketing fundamentals to drive traffic and sales. Optimize your site for search engines so people can find you. Engage on social media to build awareness and community. Use email marketing to nurture leads and turn buyers into repeat customers. Partner with influencers to reach new audiences in a trusted way. Remember, marketing is an ongoing effort – experiment, measure what works, and double down on those channels.
Deliver Excellence: Ensure your logistics and fulfillment are dependable. Fast, accurate shipping (with reasonable international options) and top-notch customer service will set you apart from faceless big-box retailers. When customers see that you care – through quick support replies, fair policies, and personal touches – they’ll trust your new brand even if it’s small.
Grow and Engage: As sales roll in, invest back into the business to expand product lines, improve operations, and reach new markets. But also invest in your customer relationships. Build a community around your brand, whether through social media groups, loyalty programs, or events. Happy customers can become brand ambassadors who drive organic growth.
Learn and Adapt: The business landscape can change fast. Stay curious and keep learning – about new marketing trends, tools that can streamline your work, and feedback from your customers which can spark innovations. Be ready to pivot strategies if something isn’t working, just like our case studies did at various points.
From the first step of evaluating a business to the ultimate goal of global success, the thread that ties everything is your passion and commitment. Scaling a brand is not an overnight process; it’s a journey of continuous improvement, creativity, and connection with your audience. There will be hurdles – a campaign that flops, a supplier issue, or just the fatigue of wearing many hats – but those who persist and stay customer-focused will see their efforts pay off.
You now have a comprehensive guide in your hands. Use it as a reference at each stage of your journey. And don’t forget: every big brand you admire was once a small unknown business. They made it big by starting small, thinking big, and taking it one step at a time. You can do the same.
Here’s to your success in transforming that small local business into the next global brand – we can’t wait to see your story unfold!
Make Your Business Online By The Best No—Code & No—Plugin Solution In The Market.
30 Day Money-Back Guarantee
Create Your E-commerce Store Start now — it's freeSay goodbye to your low online sales rate!