
How to Add Flutterwave to Selldone
List of content
Flutterwave is a powerful payment gateway that enables businesses to accept payments globally. By integrating Flutterwave with Selldone, you can provide your customers with seamless transactions using multiple payment options.
Follow these straightforward steps to integrate Flutterwave into your Selldone store:
Step 1. Create a Flutterwave Account
If you haven't created a Flutterwave account yet, head over to Flutterwave Onboarding and sign up to get started.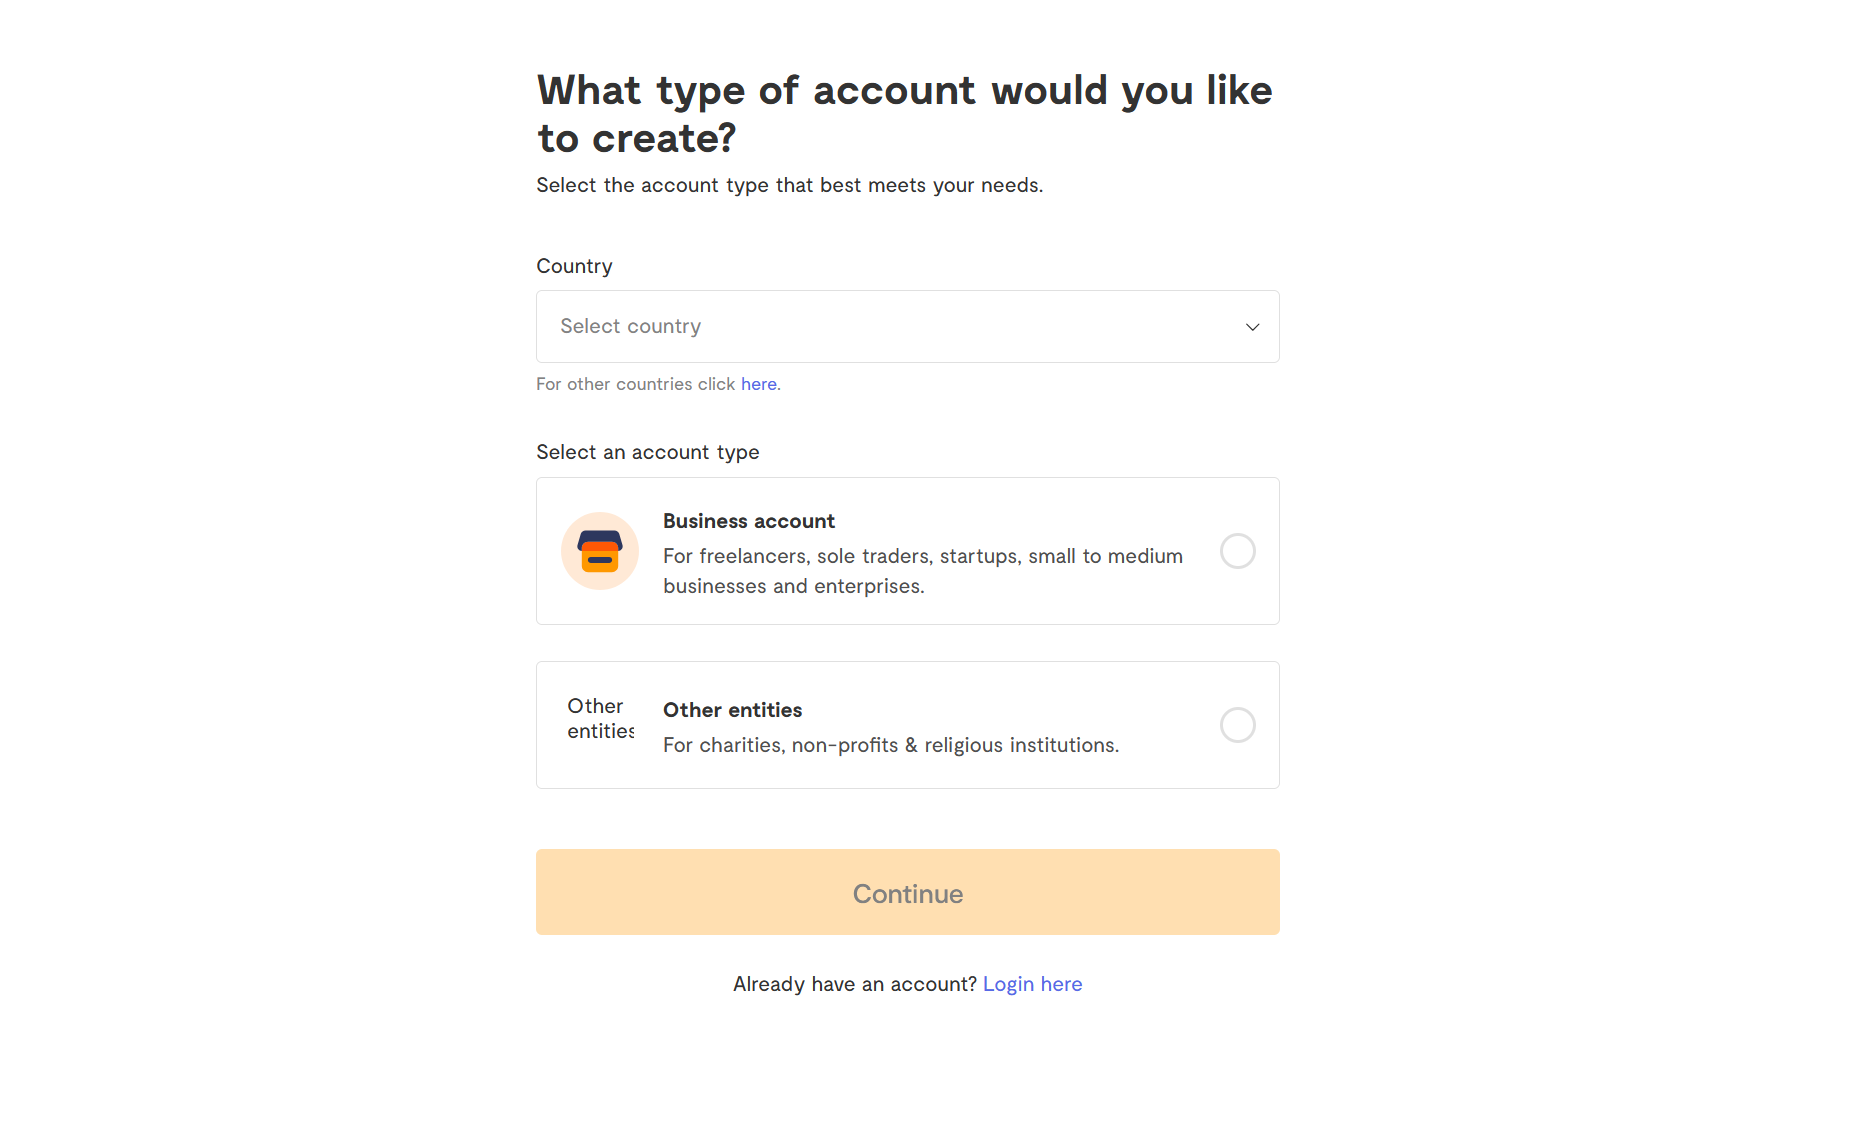
Step 2: Retrieve API Keys (Secret Key)
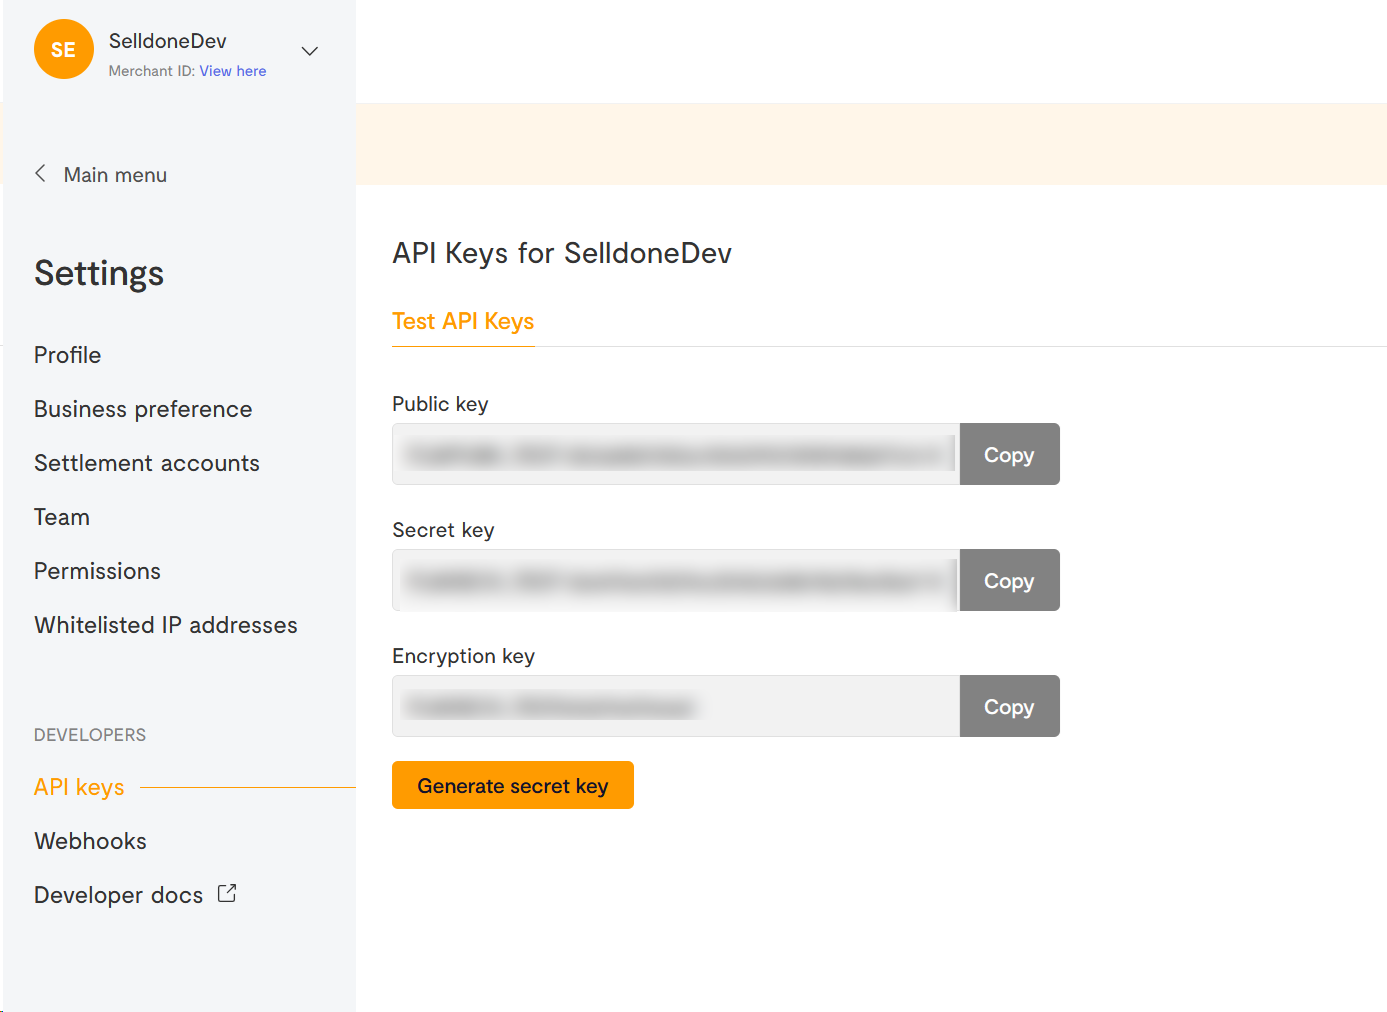
To integrate Flutterwave with Selldone, you will need API keys. Follow these steps to obtain them:
- Log in to your Flutterwave account.
- Navigate to Settings > API Keys.
- Copy your Public Key and Secret Key.
Step 3: Configure Payment Gateway in Selldone
Now, set up Flutterwave as a payment method in your Selldone shop:
- Log in to your Selldone Shop Dashboard.
- Go to Accounting > Gateway.
- Click on the "NEW PAYMENT METHOD" button.
- Select the Currency for your transactions.
- Choose Flutterwave from the list of available payment gateways.
- Enter your Public Key and Secret Key.
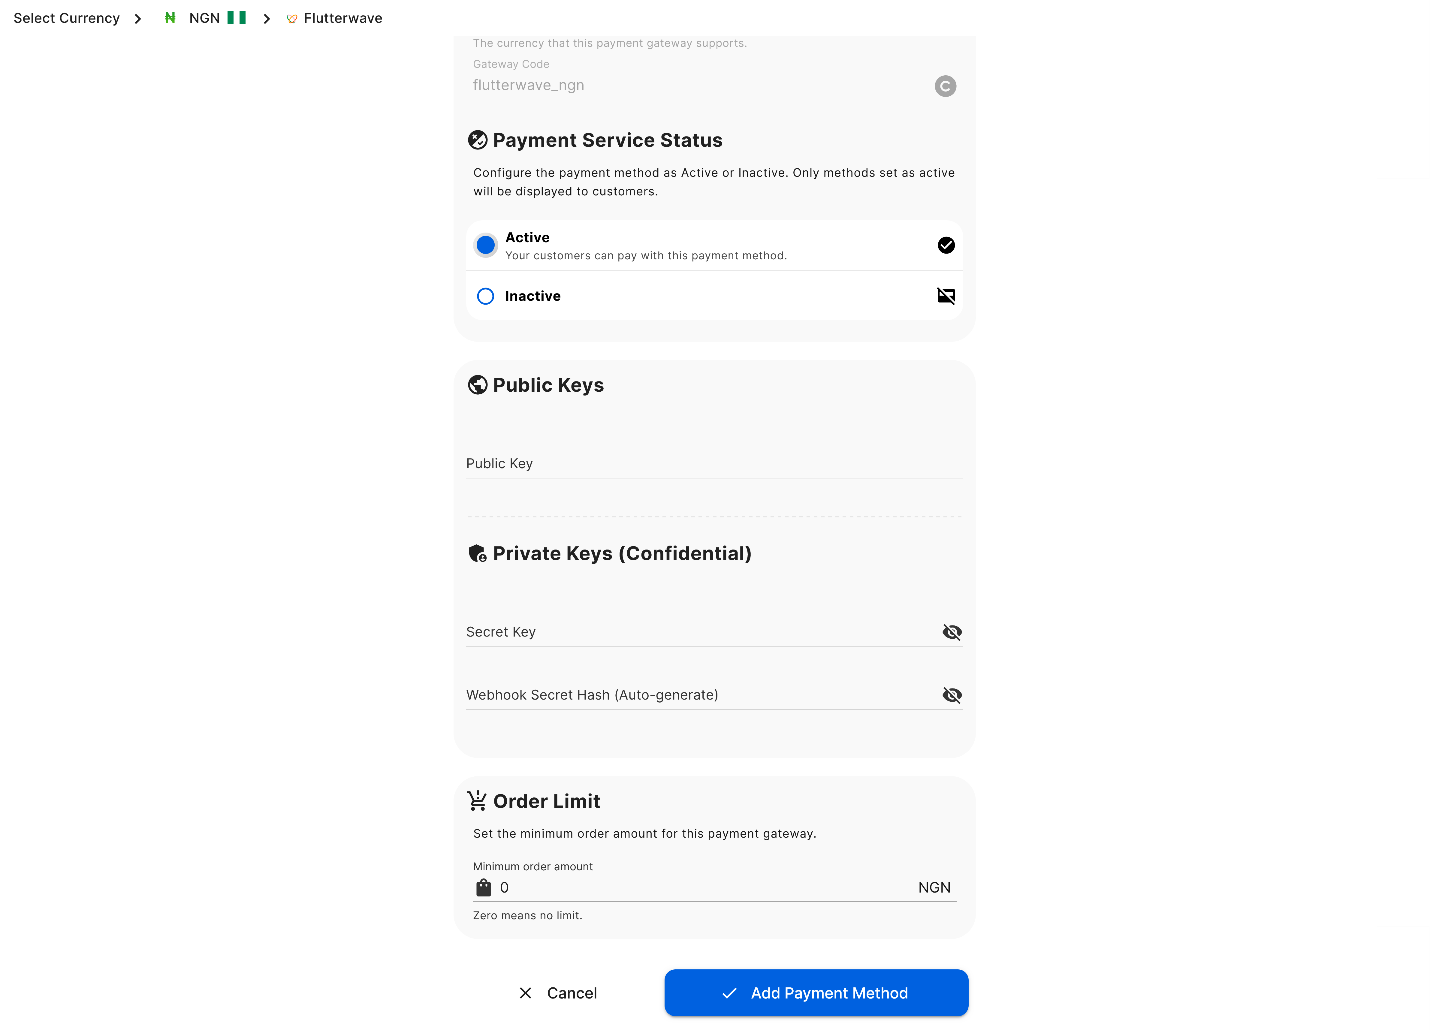
Important: No need to manually enter the webhook key. Selldone will generate it automatically and after that you can set it in your Flutterwave. Flutterwave does not support auto config webhook via APIs so it needs to set manually (Step 4).
Step 4: Set Webhook in Flutterwave
A webhook is required for Flutterwave to send payment updates to Selldone. To set it up:
- Log in to your Flutterwave account.
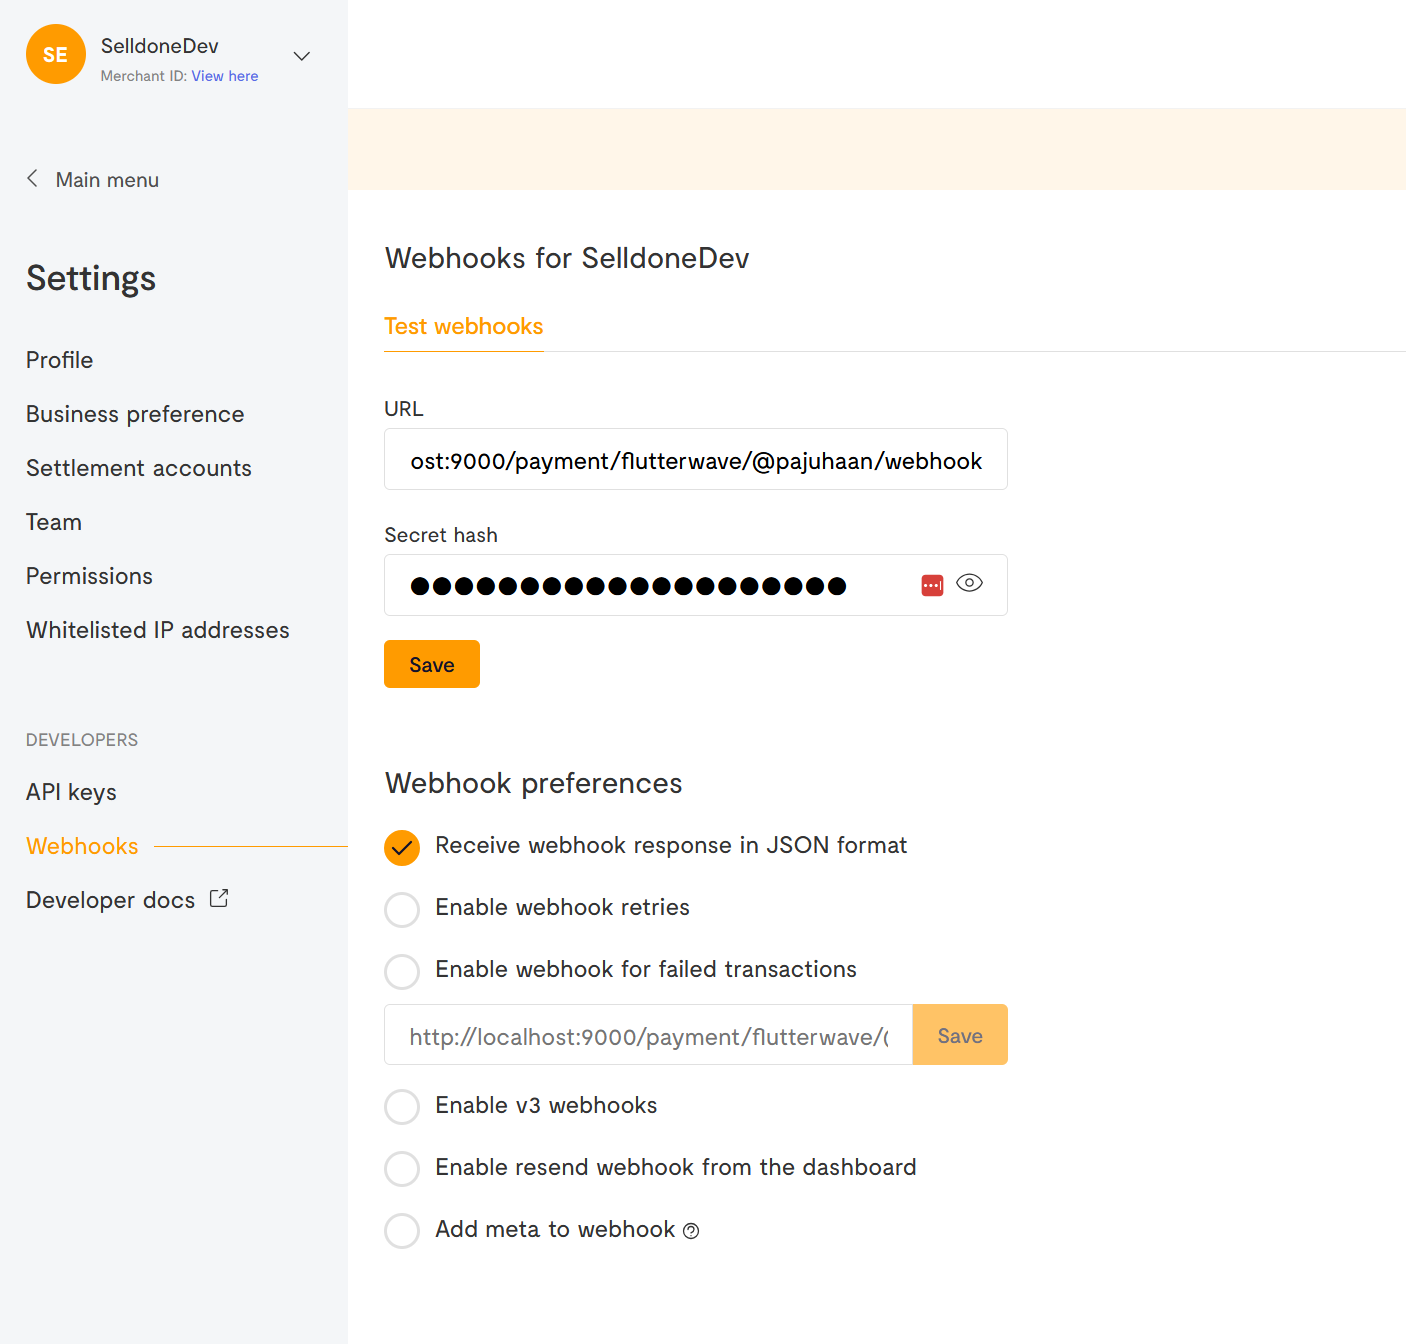
- Navigate to Settings > Settings > Webhooks.
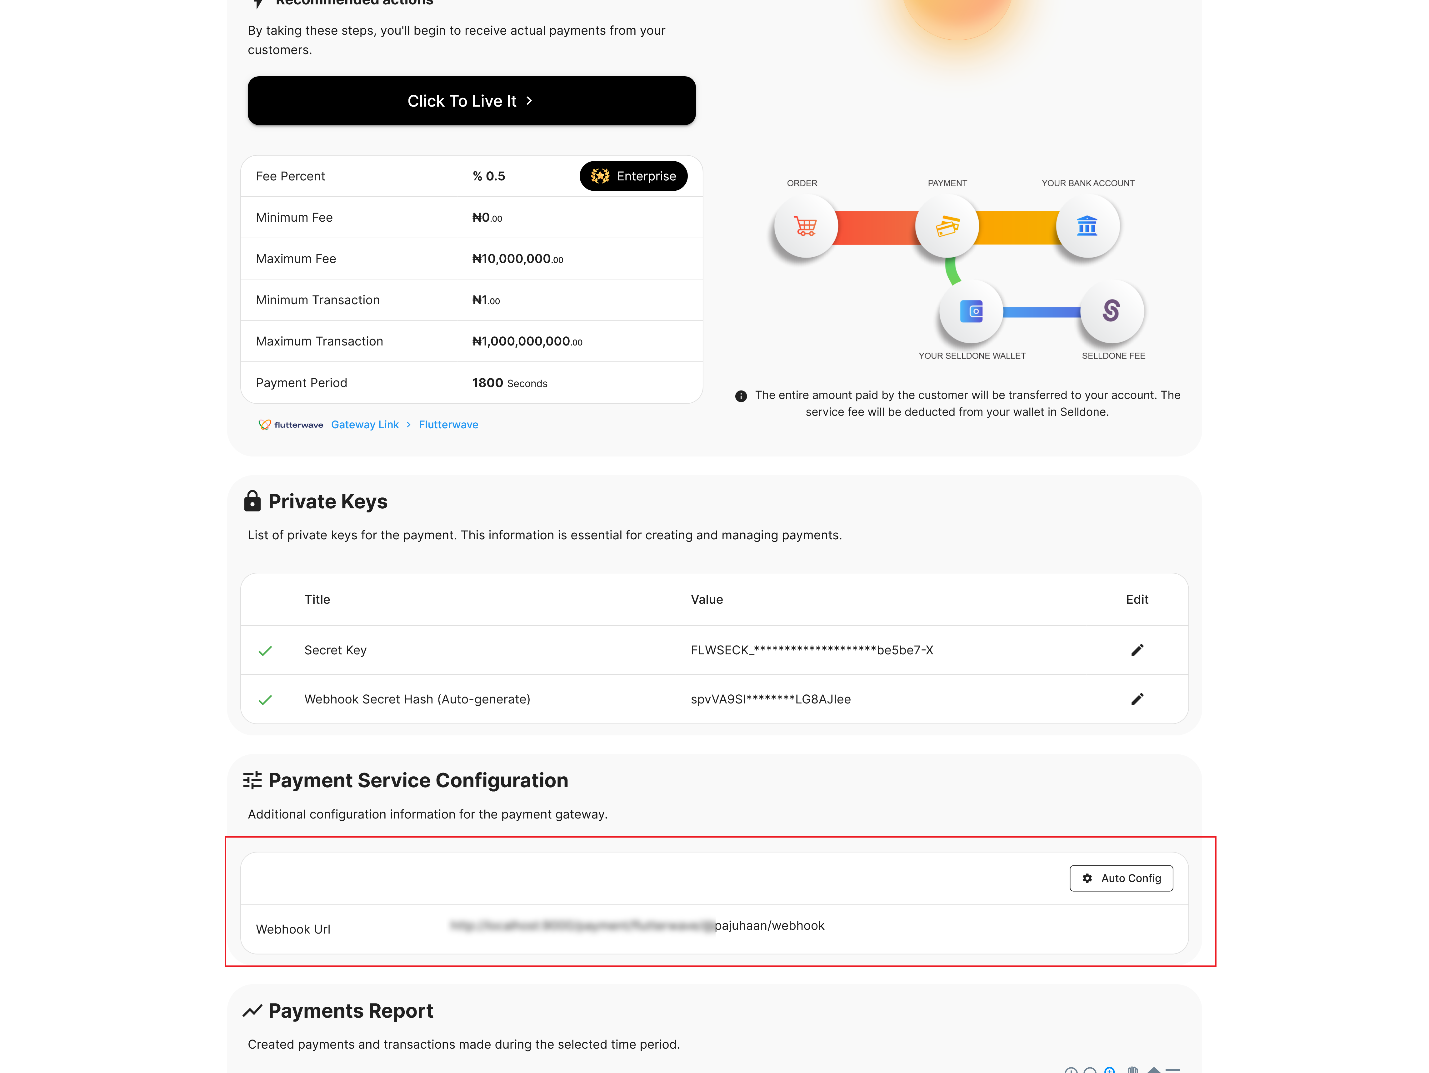
- Enter the webhook URL & Webhook Secret Hash provided by Selldone (following image).
Step 5: Test Your Payment Integration
Now that your integration is complete, test your payment method:
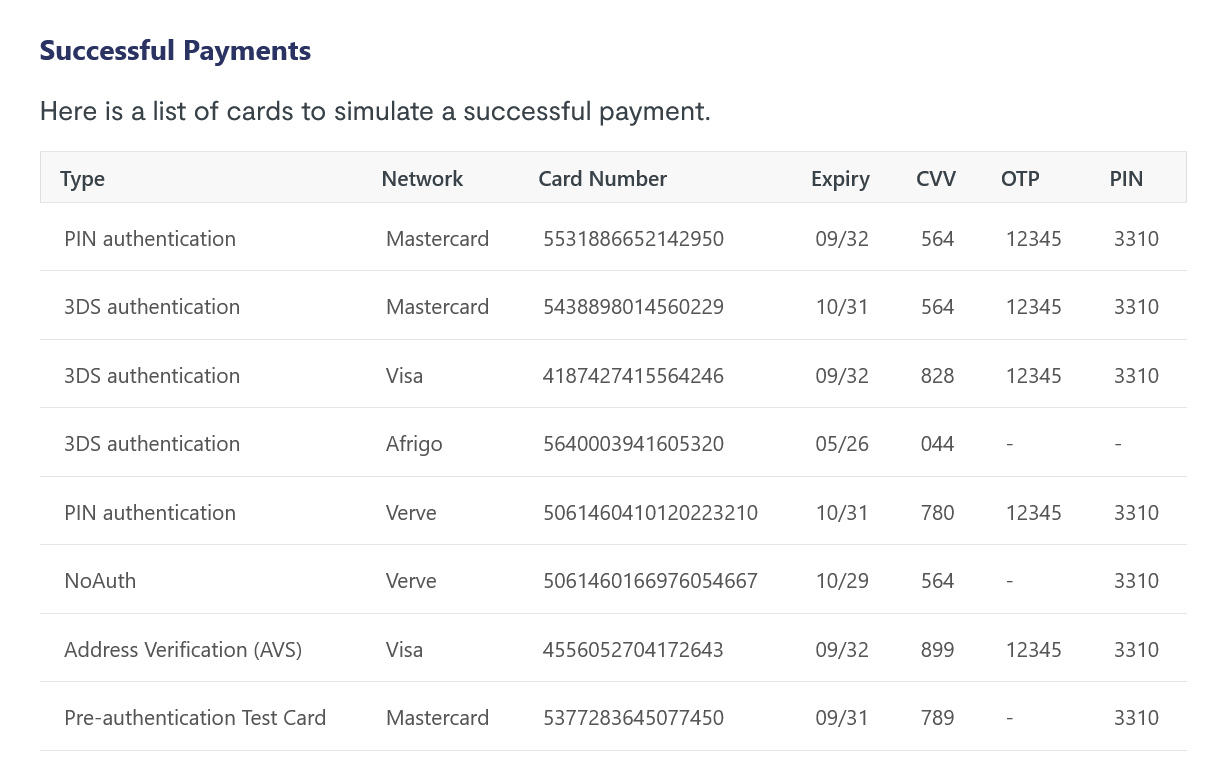
- If your Flutterwave account is in test mode, set the Flutterwave settings in Selldone Payment to "Debug Mode".
- Payments made in test mode are not real.
- You can find test card details here: Flutterwave Test Cards
🔥 Webhook Setup for Multiple Currencies with Flutterwave in Selldone
When setting up Flutterwave payments in Selldone:
Setup First Payment Method: After adding and configuring your first payment method, you'll receive a Webhook URL and a Secret Hash. Enter both of these into your Flutterwave account settings.
Adding Additional Currencies: When enabling Flutterwave for other currencies, the Webhook URL remains unchanged. Simply copy the same Secret Hash from your initial setup and paste it into the "Webhook Secret Hash" field for each additional currency.
No extra adjustments are needed beyond copying the existing Secret Hash for new currencies.
Done!
Congratulations! You have successfully integrated Flutterwave with Selldone. Your customers can now make secure and seamless payments using Flutterwave. If you experience any issues, refer to Flutterwave’s documentation or contact Selldone support.
Make Your Business Online By The Best No—Code & No—Plugin Solution In The Market.
30 Day Money-Back Guarantee
Create Your E-commerce StoreStart now — it's free
Say goodbye to your low online sales rate!





Share your thoughts with us