


How to Set Up Custom Checkout Forms to Meet Country-specific Regulations
Ensuring your ecommerce store complies with international regulations is crucial, particularly during the checkout process. Different countries often have unique requirements for customer information, such as Customer IDs, CPR numbers, or VAT numbers. A well-customized checkout form helps streamline order processing, avoid compliance issues, and significantly enhance the shopping experience.
Why Customizing Checkout Forms Matters
Collecting specific customer information based on country regulations isn't just about legal compliance—it's about providing a seamless customer experience. When customers clearly understand what's required, they're less likely to abandon their carts due to confusion or frustration. Additionally, gathering necessary information upfront reduces order processing delays, enhances security, and improves overall efficiency.
Step-by-Step Guide to Customizing Checkout Forms
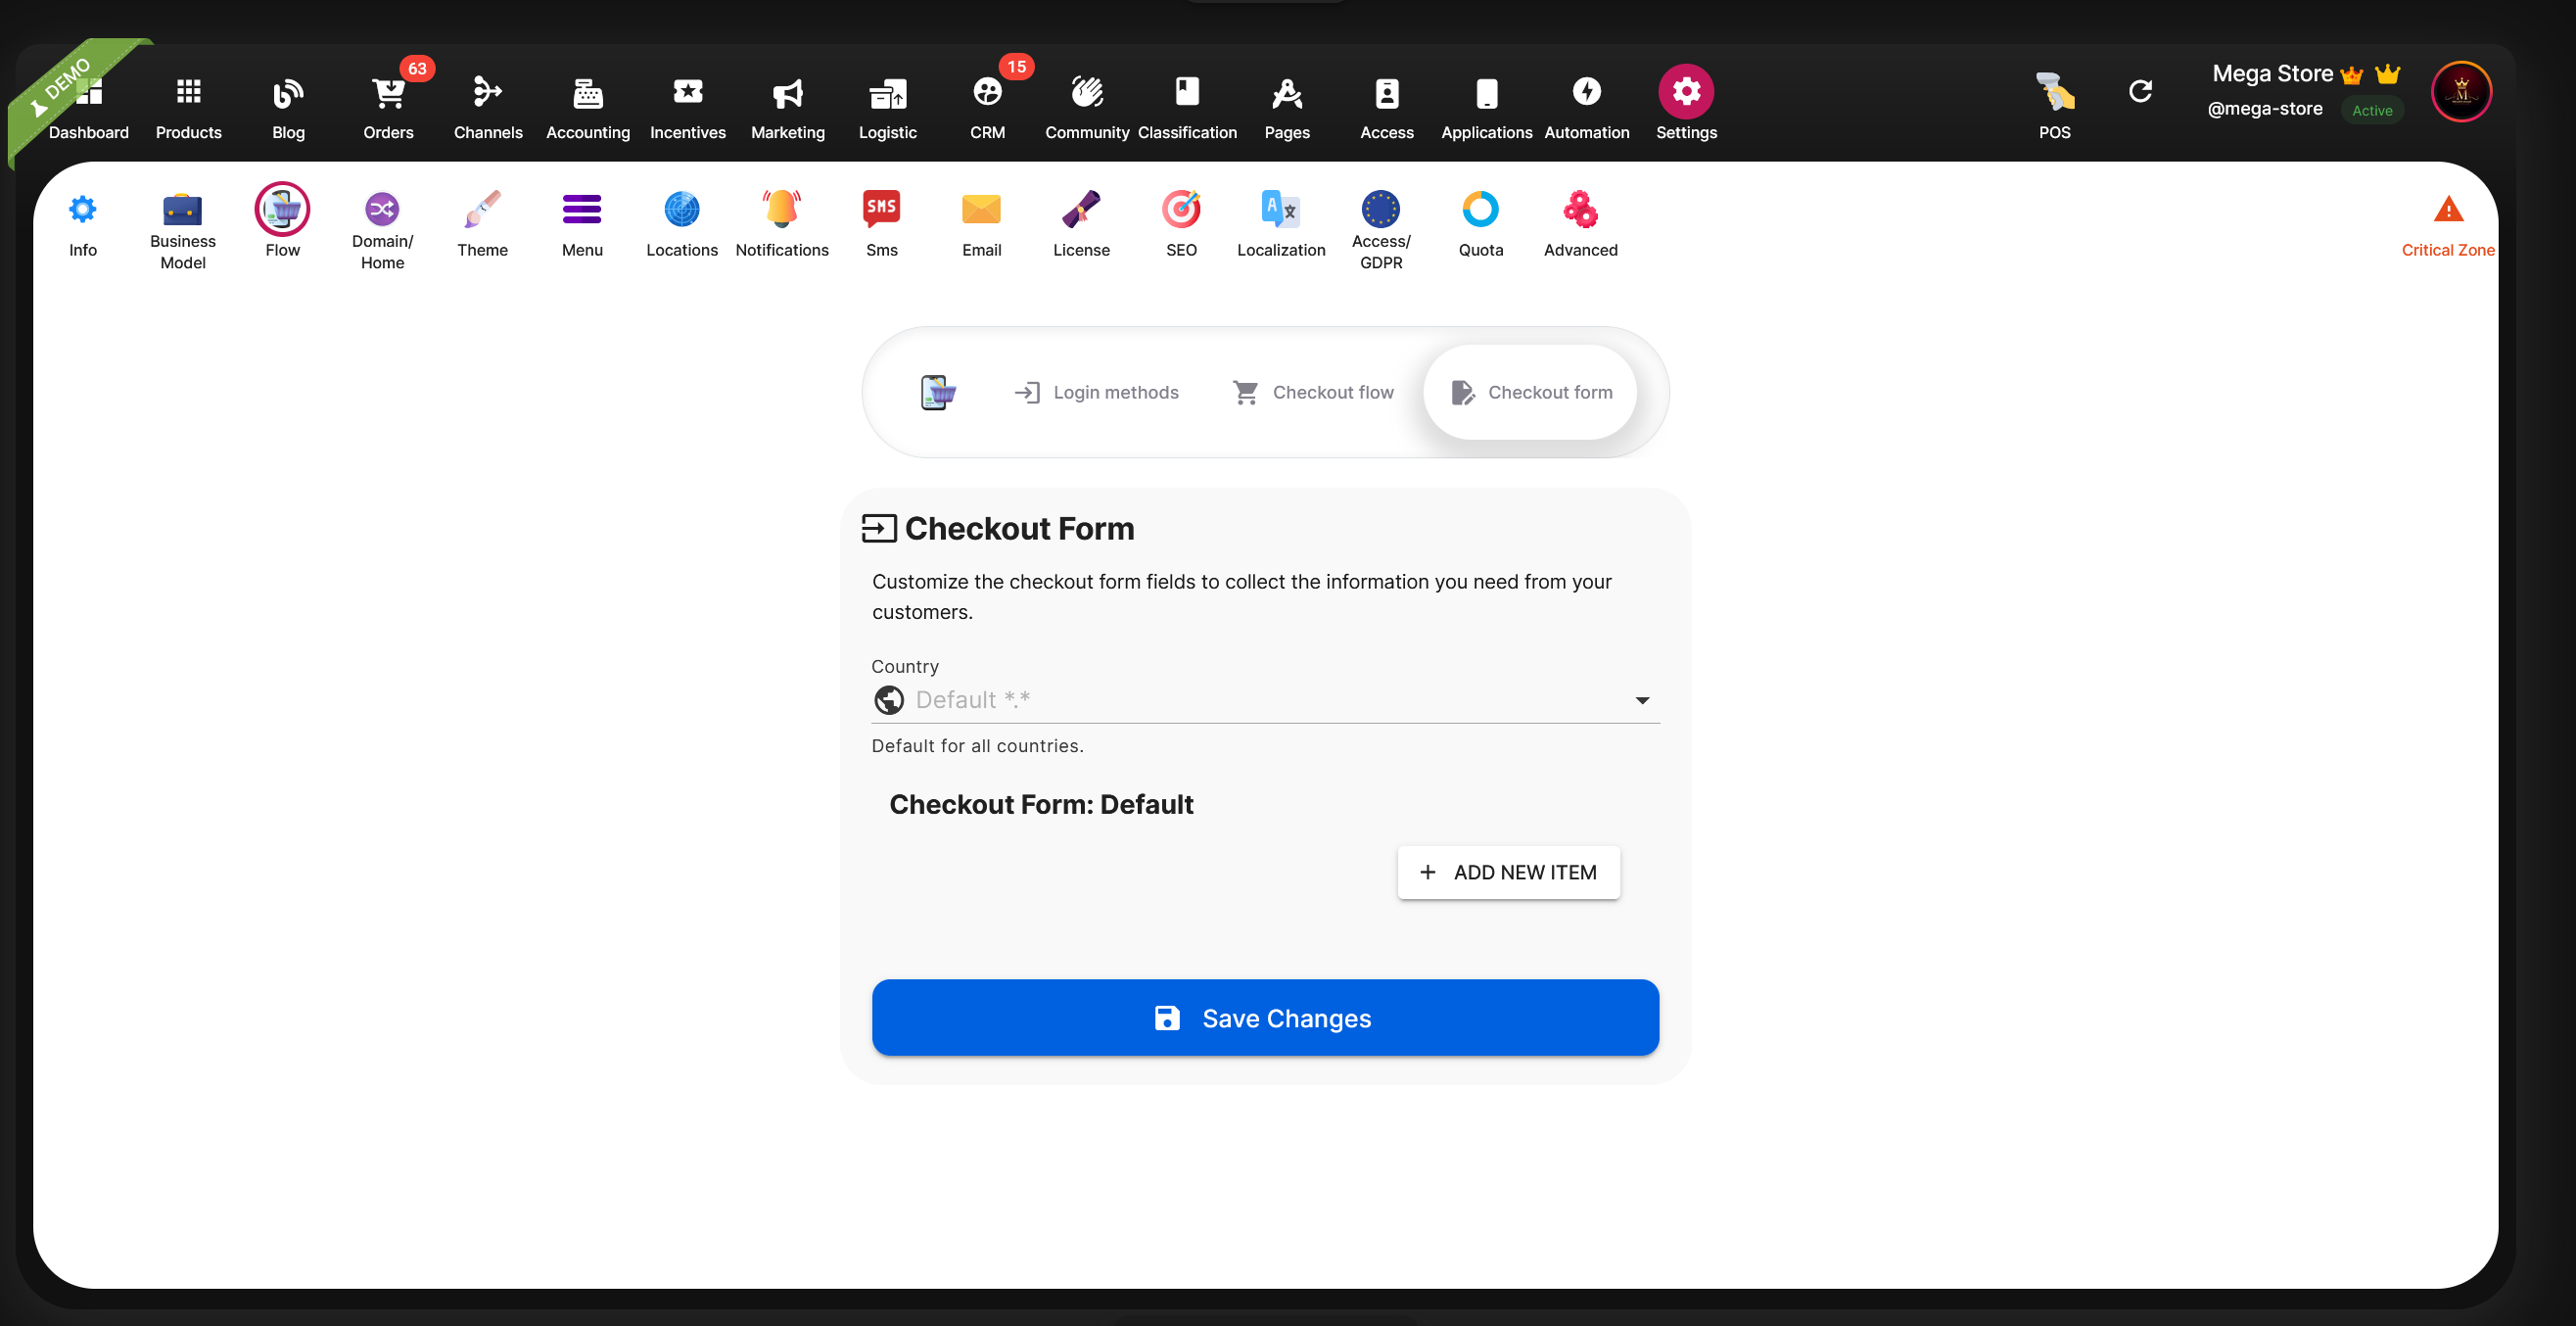
Go to the Settings > Flow > Checkout Form Tab
- Log in to your admin dashboard.
- Navigate to Settings from the main menu.
- Click on the Flow section.
- Select the Checkout Form tab.
Here, you'll see a default checkout form. Fields defined in the default form will be presented to customers from all countries unless specifically overridden.
Define Default Checkout Form
You can define fields that apply universally across all countries. Typical universal fields include email, phone number, and general address information. To add custom universal fields:
- Click + ADD NEW ITEM.
- Choose the type of information (e.g., text, number, checkbox).
- Enter a title and a variable name.
- Save your changes.
Override Form for Specific Countries
To address country-specific regulations:
- Select the desired country from the Country dropdown menu.
- The system will indicate you're editing fields specific to this country.
- Click + ADD NEW ITEM.
- Enter required fields unique to that country, such as CPR number for Denmark, fiscal codes for Italy, or VAT numbers for European Union countries.·
- Configure each field clearly, setting labels that customers recognize and understand.
This targeted approach ensures your customers only see relevant fields, improving clarity and reducing checkout abandonment rates.
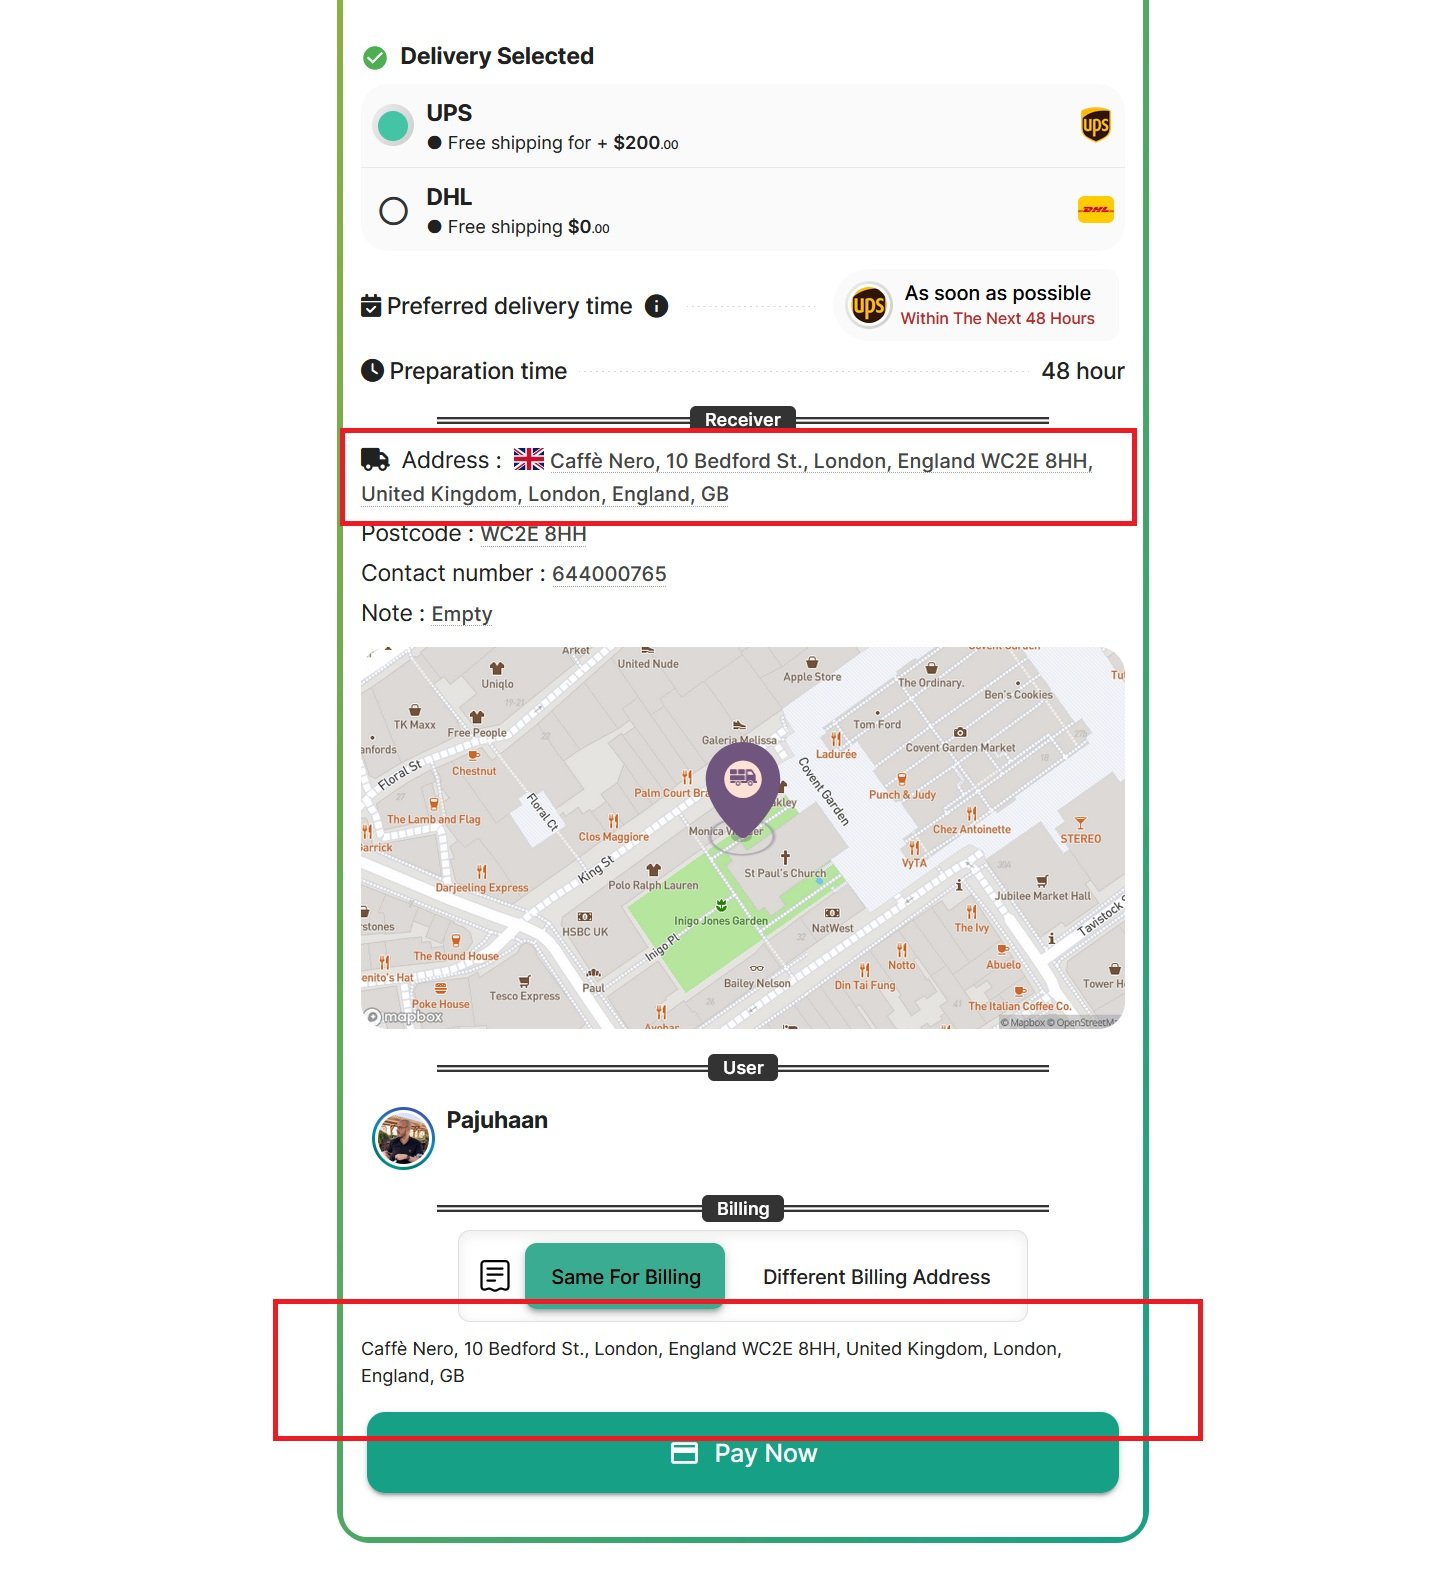
Customer Country Determination
The customer's country during checkout is identified primarily through the provided shipping address. If no shipping address is entered, the billing address determines the customer's country.
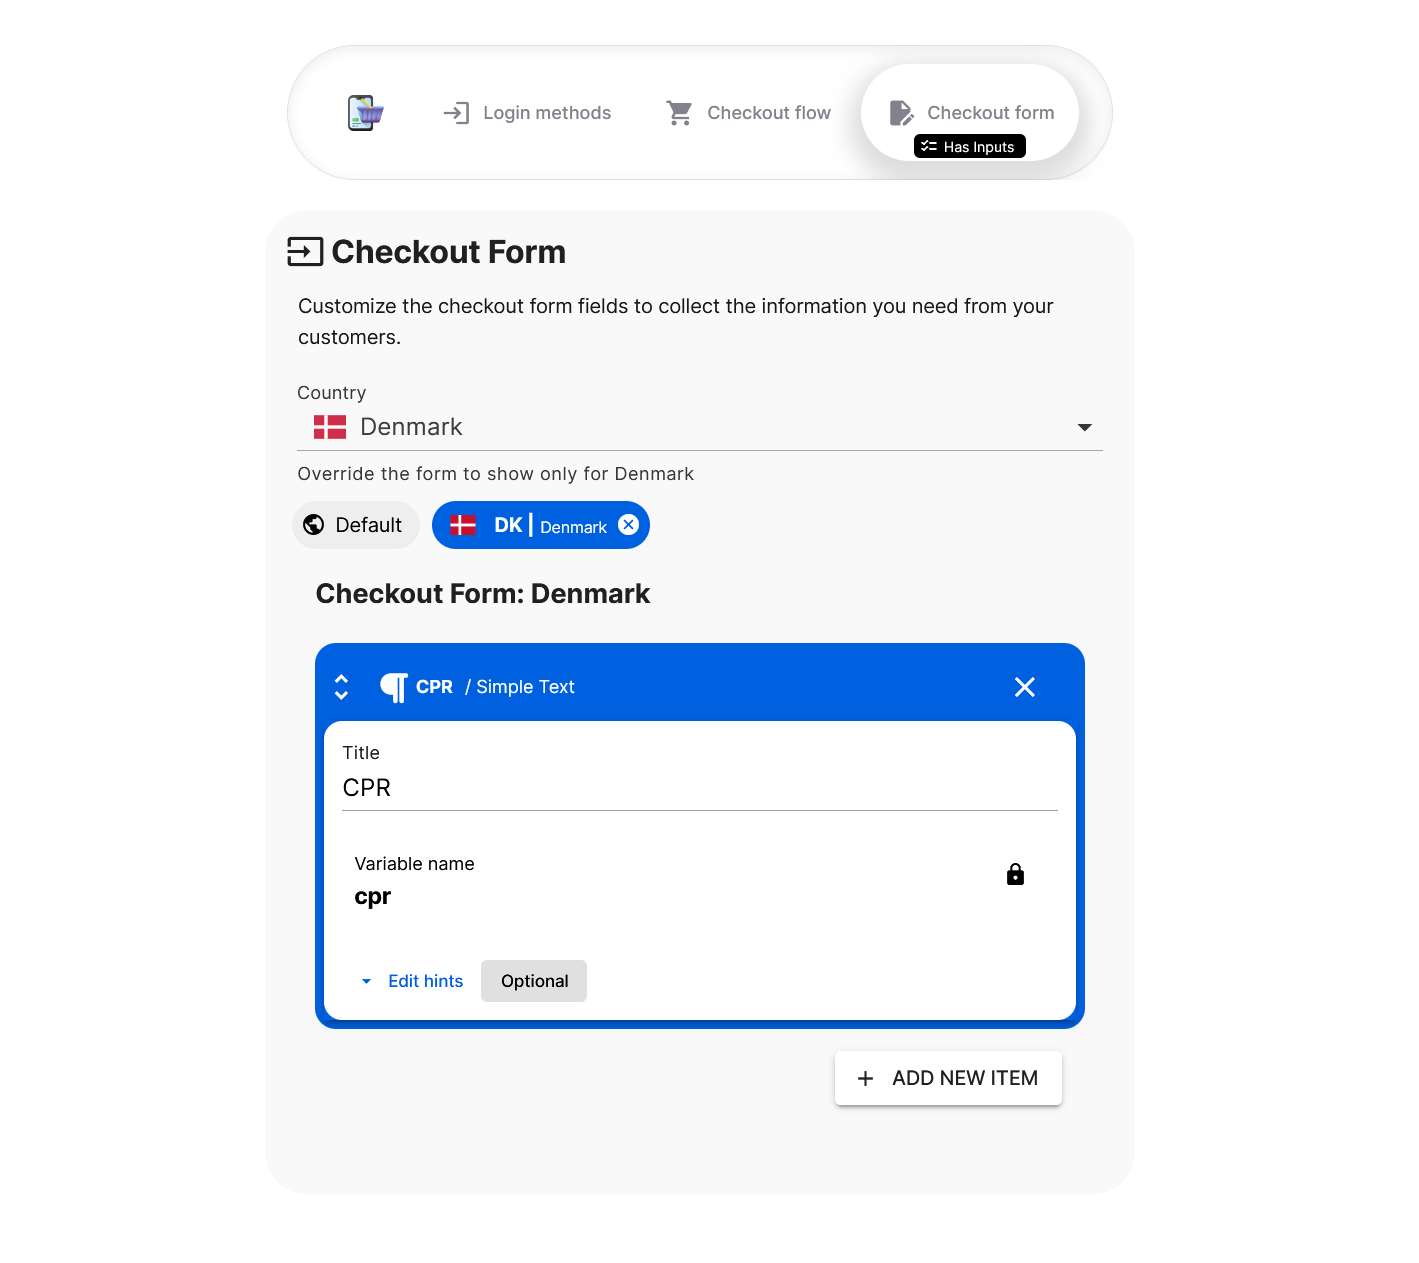
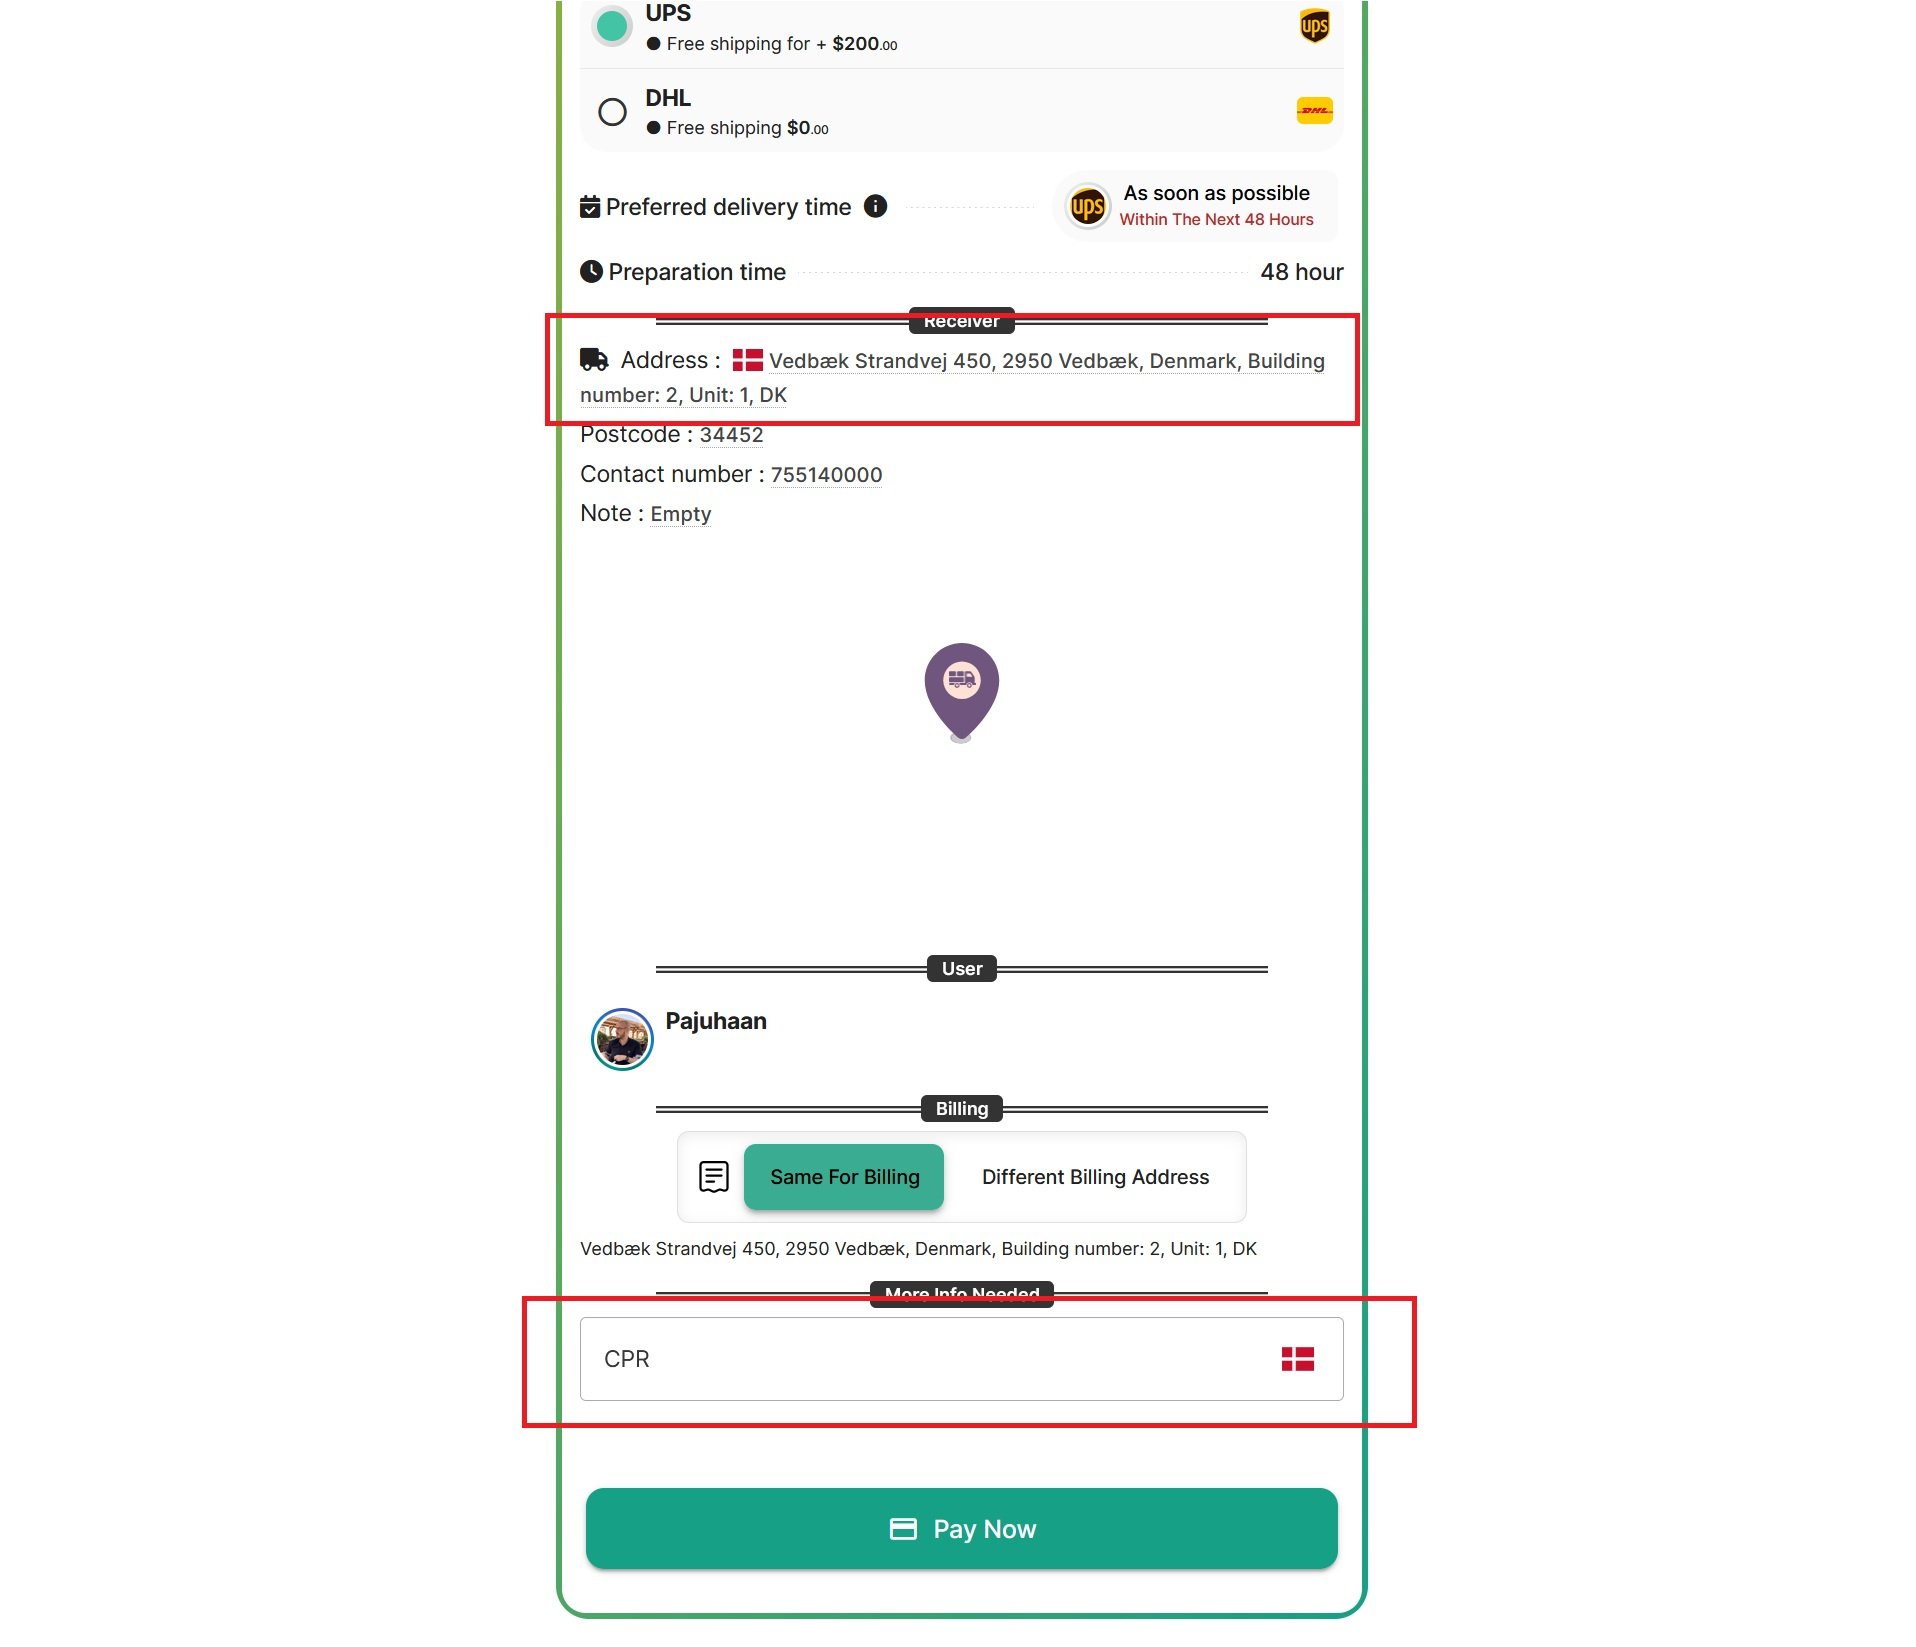
Example: Setting Up CPR Field for Denmark
For example, in Denmark, the CPR number (Civil Personal Registration) is often required:
- Select Denmark from the country dropdown.
- Add a new field titled "CPR".
- Assign the variable name cpr.
- Mark as required or optional as needed.
- Save your settings.
For London:
For Denmark:
Final Thoughts
Customizing your checkout form by country is an effective way to comply with global regulations while providing a smoother experience for your customers. By collecting precisely what you need upfront, your ecommerce operations become more efficient, secure, and customer-friendly.
Take the time to configure these forms thoughtfully—it's a small step that leads to substantial long-term benefits for both your business and your customers.
⚡ IMPORTANT: Show Checkout Form Only for One Country (e.g., South Africa) to Collect Customer ID
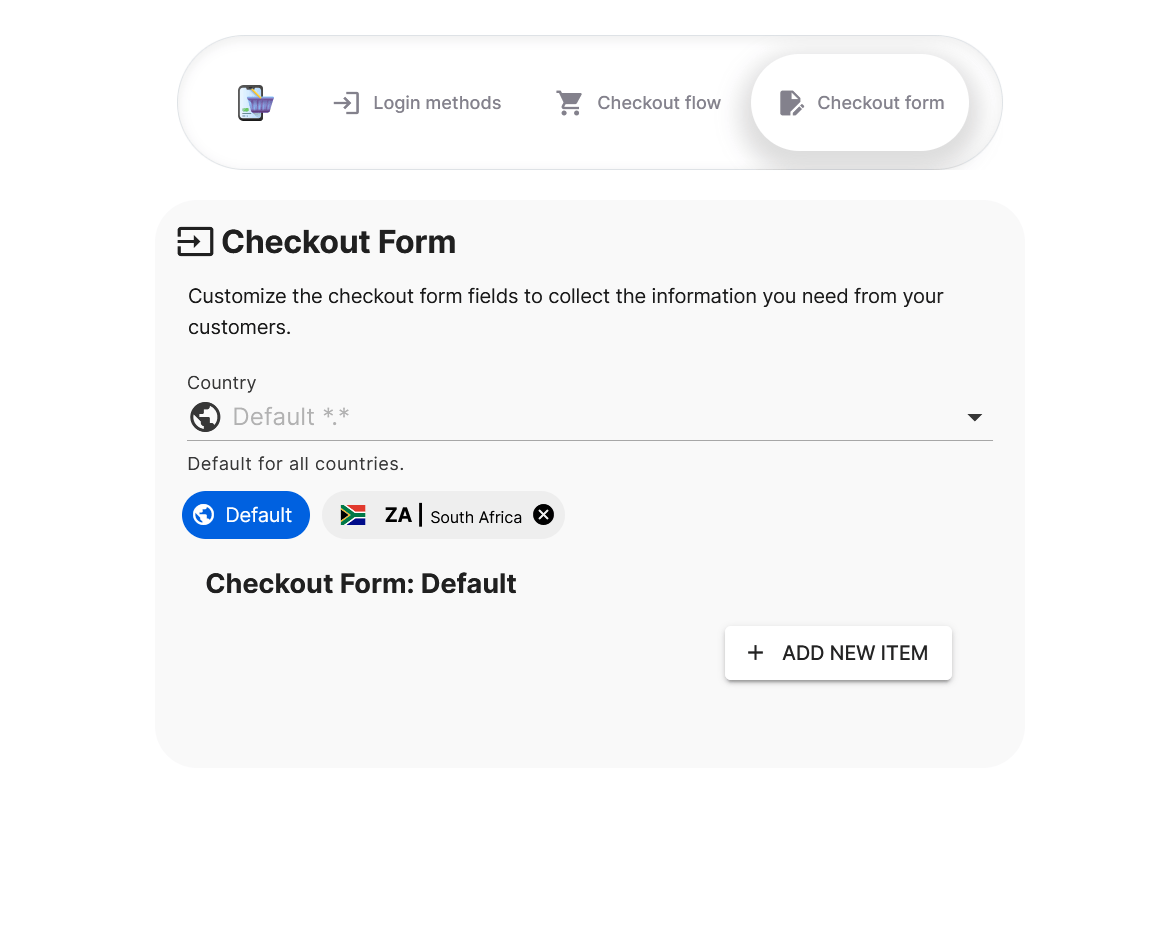
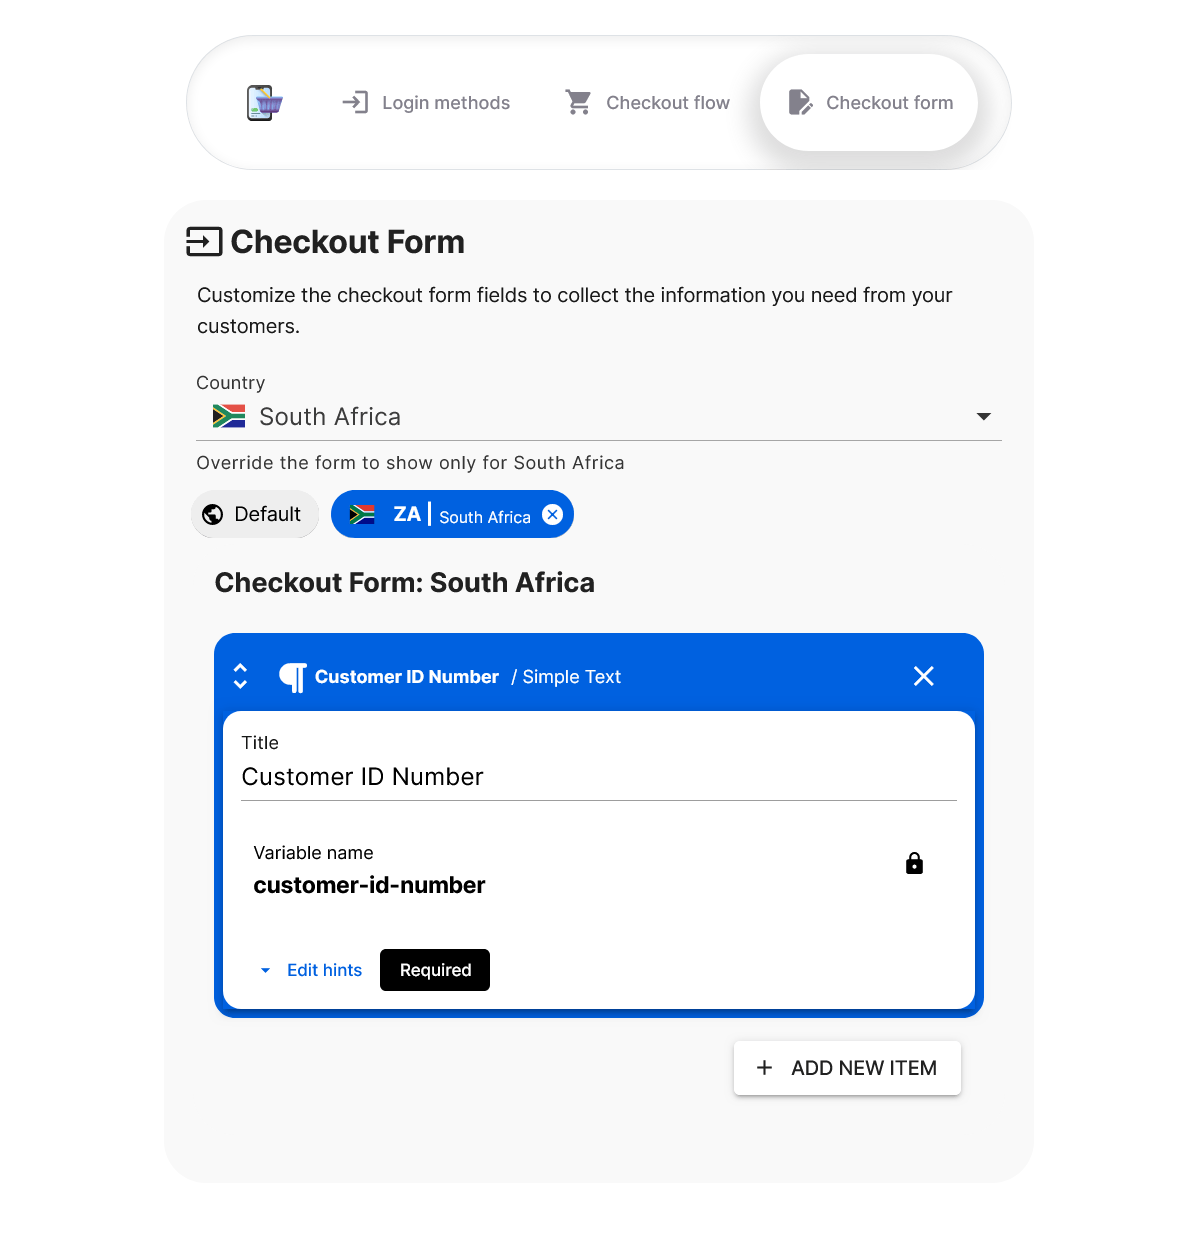
If you want to display a custom checkout form only for one specific country—like South Africa—to collect something like a Customer ID, make sure your Default form is completely empty. Do not add any fields in the default section; otherwise, they will appear for all countries. Instead, go to the country selector, choose South Africa, and define your custom form fields there. This ensures that only customers from South Africa will see the special form, while others will not see any additional fields.
For Default:
And for South Africa:
Make Your Business Online By The Best No—Code & No—Plugin Solution In The Market.
30 Day Money-Back Guarantee
Create Your E-commerce Store Start now — it's freeSay goodbye to your low online sales rate!
FAQ
How can I show a custom checkout form only for one specific country?
To show a custom form only for one country:
- Go to Settings > Flow > Checkout Form.
- Leave the Default form empty.
- Select the target country from the dropdown.
- Click + ADD NEW ITEM and add your custom fields (e.g., Customer ID).
- Save the form.
How do I switch between countries when editing checkout forms?
Use the country chips at the top of the form editor. Each chip shows a country with a custom form defined.
- Click a chip to load that country’s form.
- If no chip is selected, you’re editing the Default form.
How do I remove a country-specific checkout form?
To delete a custom form for a specific country:
- Find the country chip at the top of the editor.
- Click the × icon (X) next to it.
- Confirm the deletion when prompted.
What happens if both Default and Country-specific forms are defined?
The customer will see the country-specific form based on their shipping address. If no match is found, the Default form is used.
How is the customer’s country determined during checkout?
The system checks the shipping address first. If unavailable, it falls back to the billing address to determine the customer’s country.