

Selldone GenesisBusiness templates

Genesis business template Host-led stays and accommodation

A host-led stay discovery experience, ready to adapt with AI.

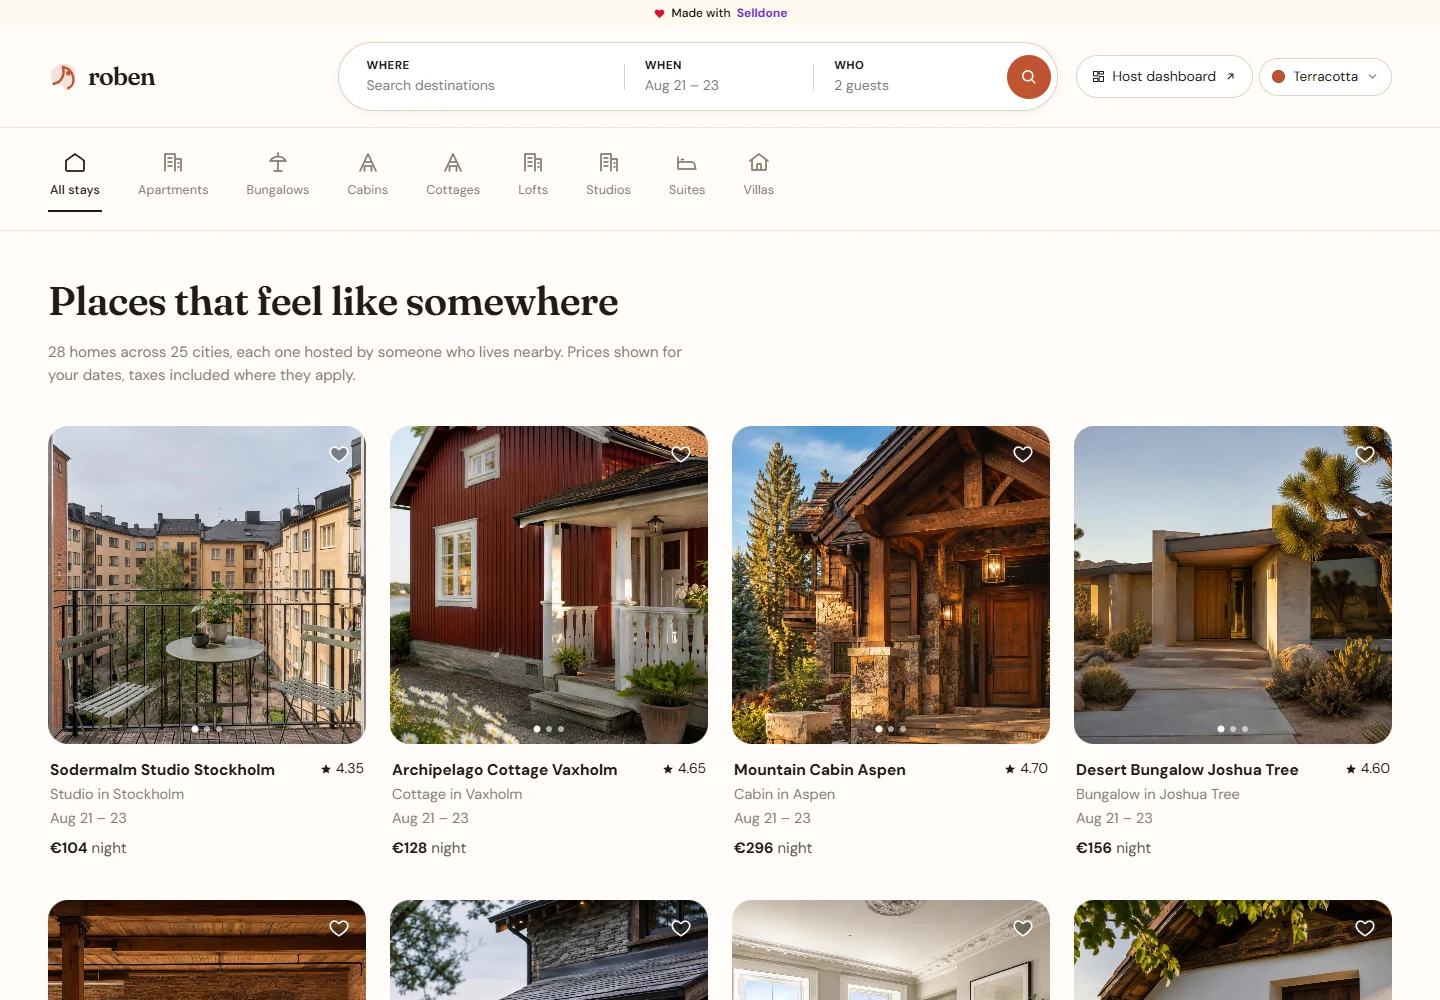
Roben is a customer storefront reference for location and date discovery, property media, amenities, guest context, availability, and a connected booking handoff.

roben.selldone.shop Live
Roben live storefront preview
Host-led stays, built on Selldone Real shop data. Custom front end.
MCPAudit the shop first LivePublic reference GitHubOfficial starter ResponsiveDesktop brief

Everything needed to discover, transact, and operate stays connected.

Customer journeys and operator workflows share the same Selldone catalog, pricing, customers, and orders.

01

Host-led stay discovery with location, date, guest, and property context

02

Listing detail patterns for media, amenities, availability, house rules, and booking handoff

03

Search, stay-type navigation, property cards, and responsive review requirements

04

A shop audit before any listing data is created or changed

05

Reviewable repository and deployment preparation for an authorized destination

See one connected business in action.

01

Stay discovery

The supplied customer reference shows a host-led home experience that brings location search, guest context, and stay cards together.

One connected build

From shop data to a live business experience.

AI works through Selldone MCP, turns approved business data into the experience, then prepares a reviewable launch.

  1. 01 Connect the shop Scoped Selldone MCP access
  2. 02 Shape real data Catalogue, products, pricing, and operations
  3. 03 Build the experience AI creates every responsive surface
  4. 04 Review and launch GitHub to Cloudflare, with approval
See the complete build logAll 4 verified steps and outcomes
  1. 01

    Connect the intended shop

    Use an approved Selldone MCP connection for the shop that should receive the storefront. Keep listing data, prices, availability, policies, and settings as the source of truth.

    A clear, authorized scope for the storefront work.
  2. 02

    Audit stay data

    Review property names, location, media, guests, dates, amenities, availability, pricing, house rules, and booking handoff before changing the interface or filling any gaps.

    A factual accommodation brief grounded in the connected shop.
  3. 03

    Adapt the visual pattern

    Apply the host-led discovery and listing pattern while replacing the reference content, assets, copy, and brand treatment with approved materials.

    A business-specific interface without copied protected identity.
  4. 04

    Review before launch

    Check the storefront at responsive widths, verify search and booking flows, then prepare a repository, Cloudflare build, and domain only when their owners approve them.

    A reviewable path from local build to authorized launch.

AI + MCP handoff

Build your stay-discovery storefront with AI.

Give your agent the Skill, connect one approved shop, and review the result before anything is published.

Build with the AI you already use

ChatGPT Claude Codex Any MCP client
  1. 01
    Attach SkillBusiness context
  2. 02
    Connect MCPScoped shop access
  3. 03
    ReviewResponsive build
  4. 04
    PublishYour domain
Repository commandsOptional setup and future upstream sync

Your AI can wire these commands for you. The reference repository stays upstream, while your private repository remains the deployable source.

01

Create your repository

Clone the base once, then push it to your own GitHub repository.

Initial repository wiring
git clone https://github.com/alireza-selldone/official-roben.git my-roben-stays
cd my-roben-stays
git remote rename origin upstream
git remote add origin YOUR_GITHUB_REPOSITORY_URL
git push -u origin main
02

Sync without overwriting

Review upstream changes on a branch before merging or publishing.

Future reference sync
git fetch upstream
git switch -c sync-upstream-YYYY-MM-DD
git merge --no-ff --no-commit upstream/main
npm run build:static
git commit -m "Sync upstream"
git push -u origin sync-upstream-YYYY-MM-DD

From reviewed code to your own domain.

Publish a Selldone Genesis storefront from GitHub to Cloudflare Workers & Pages, connect a custom domain, and keep future updates deploying automatically from the repository. Open the complete Selldone guide ↗

1
Launch stepCreate a new GitHub repository

Create an empty repository that will become the source Cloudflare watches for this storefront.

  • Sign in to GitHub and choose Create repository.
  • Give the repository a clear name, such as 1-shop-your-store, so it is easy to identify when directing an AI agent.
  • Choose Private unless you intentionally want the storefront source to be public.
  • Create the repository and copy its HTTPS repository URL from Quick setup.
From your GitHub home page, click Create repository.
Enter a clear repository name, choose the appropriate visibility, and create the repository.
Copy the repository URL from the HTTPS field; you will give this address to your AI agent in the next step.
2
Launch stepAsk your AI agent to push the project

Return to the Codex or Claude project chat and tell the agent to publish the current storefront into the new repository.

  • Paste the exact HTTPS repository URL you copied from GitHub.
  • Ask the agent to push the current project to that repository.
  • Wait for the upload to finish, then verify that the project files appear on GitHub.
AI handoff A request flows through AI into Selldone and returns as approved work The agent reads the request, uses approved Selldone tools, and returns a reviewable repository change.

Your AI prepares the repository, pauses for approval, and returns a reviewable build.

3
Launch stepConnect GitHub in Cloudflare Workers & Pages

Open Cloudflare's application workflow and authorize it to read the storefront repository from GitHub.

  • Sign in to Cloudflare and open Compute, then Workers & Pages.
  • Choose Create application and then Connect GitHub.
  • Authorize only the storefront repository when you want to keep Cloudflare's access narrowly scoped.
  • Finish with Install & Authorize and return to Cloudflare.
From the Cloudflare left menu, go to Compute, then Workers & Pages.
Click Create application to open the Ship something new workflow.
Select Connect GitHub so Cloudflare can open the GitHub authorization window.
Choose only the storefront repository when appropriate, then click Install & Authorize.
4
Launch stepSelect the storefront repository

Choose the GitHub account and the repository that contains the Genesis storefront source.

  • Confirm the correct GitHub account.
  • Select the repository created in step 1 and populated in step 2.
  • Click Next to continue to the application build settings.
Choose the GitHub account, select the repository you created earlier, and click Next.
5
Launch stepConfigure the build and deploy

Keep a recognizable project name, enter the Genesis static build command exactly, and let Cloudflare build the repository.

  • Keep the project name the same as the repository name or choose another unique Cloudflare project name.
  • Enter the static build command exactly as shown.
  • Click Deploy and follow the Initializing, Cloning, Installing, and Deploying stages.
  • Wait for Success! Build completed and use the temporary workers.dev address to verify the result.
npm run build:static
Keep or edit the project name, enter npm run build:static in the Build command field, and click Deploy.
Cloudflare may spend a few seconds setting up the repository before opening the Deployments page.
Watch the Initializing, Cloning, Installing, and Deploying stages, and wait until the build completes.
A successful deployment shows Success! Build completed and creates a temporary workers.dev URL.
6
Launch stepAdd your custom domain

Attach a domain already managed by your Cloudflare account to the deployed storefront.

  • Open the deployed project, choose Domains, and click Add Domain under Custom Domains and Routes.
  • Enter either the main domain or a subdomain, then confirm Add domain.
  • Use View domain or the Overview page's Visit button after Cloudflare activates the route.
  • Verify that the live domain opens the deployed storefront over HTTPS.
Under Custom Domains and Routes, click Add Domain.
Connect your main domain or enter the subdomain you want to use, then click Add domain.
Open the three-dot menu beside the connected domain and choose View domain, or use Visit from Overview.
Your Genesis storefront is now live on the connected domain.
7
Launch stepReplace the reference shop configuration

If the deployed site still shows the reference merchant, ask the AI agent to switch the project to your connected Selldone shop and publish the update.

  • Tell Codex or Claude that the domain works but the reference storefront is still visible.
  • Ask it to replace the reference settings with your own connected Selldone shop configuration.
  • Have the agent commit and push the verified update to the same GitHub repository.
  • Wait for Cloudflare's automatic deployment, then confirm that your shop content appears on the live domain.
AI handoff GitHub to Cloudflare to a live custom domain A reviewed repository flows through Cloudflare deployment and becomes a live storefront on the merchant domain.

Your AI verifies the production domain and returns the live storefront for review.

Make it yours

Start from Roben.
Make every surface yours.

Your AI follows the Skill, works through shop-scoped MCP access, and keeps Selldone underneath as the commerce engine.

Copied to clipboard