How to Set Up Listing & Directory Website- Owner Panel
Introduction: Understanding Listing, Vendors & Marketplace Model
Before we begin the technical setup, it’s important to clarify a few key concepts used throughout this guide.
In this article, when we refer to a Vendor, we mean business owners whose services are listed on your platform. These vendors can be doctors, lawyers, salon owners, consultants, agencies, or any professional offering services. They are the individuals or businesses that create profiles and offer bookable or purchasable services inside your marketplace.
The terms Listing and Directory are often used interchangeably. Some users are more familiar with the term “Directory Website,” while others know it as a “Listing Platform.” In practice, both refer to the same concept: a structured system where service providers are categorized, displayed, and searchable.
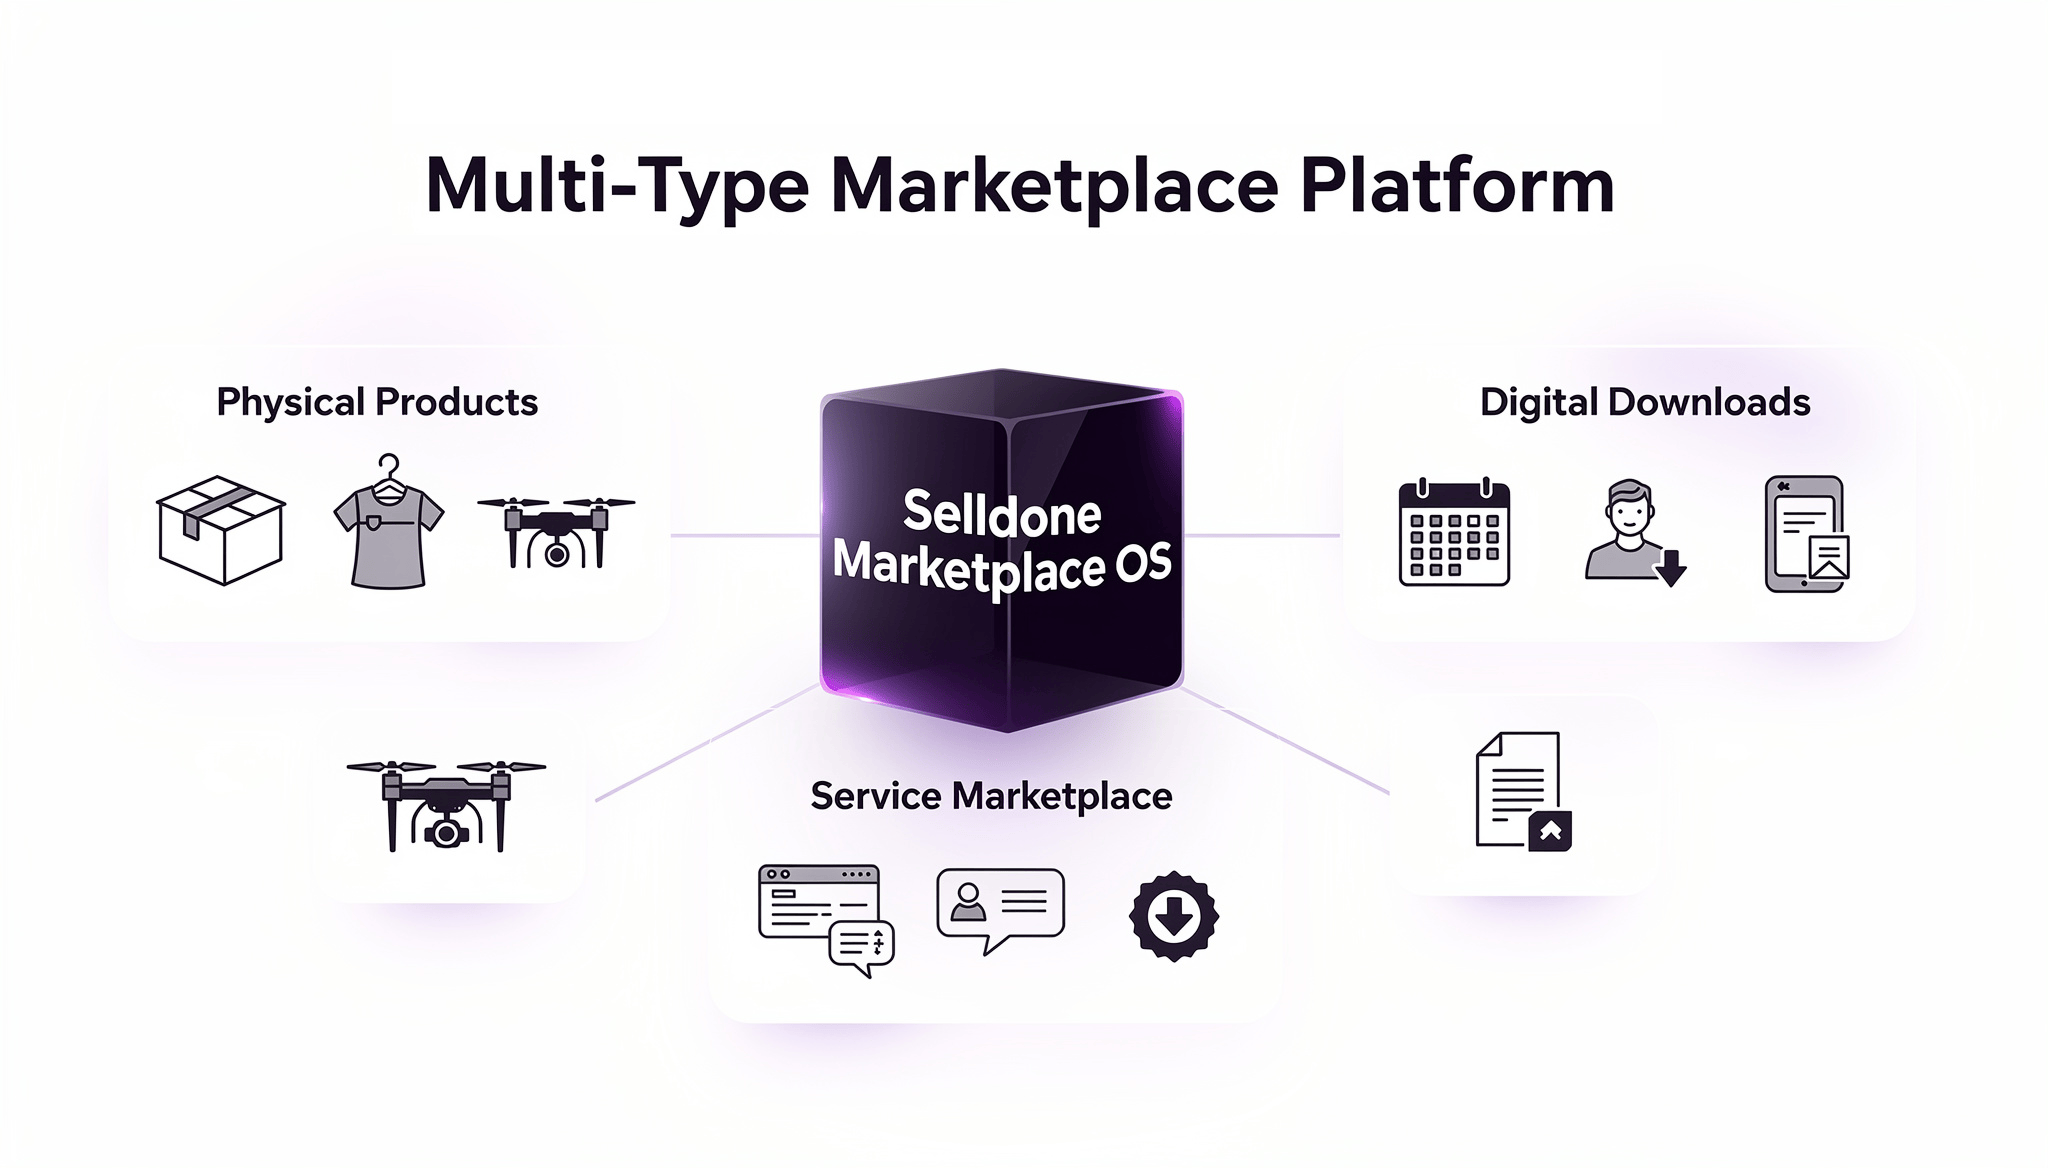
However, this feature goes beyond a simple profile builder. What you are building is a Multi-Vendor Service Marketplace Builder, not just a directory of profiles. This means vendors are not only displayed — their services can be booked, reserved, or purchased directly through your platform.
All listings created under this system are considered service-based offerings. This allows your marketplace to function as a fully operational service ecosystem.
Most importantly, this feature enables powerful monetization models. As a marketplace owner, you can generate revenue through multiple methods, including:
Subscription plans for vendors
Sponsored listings or premium badge placements
Commission on each booking or transaction
Featured vendor upgrades
Custom membership tiers
This means your platform is not just organizing businesses — it is creating a scalable revenue-generating service marketplace. With this understanding, let’s move forward to the technical setup process. Creating a professional Listing & Directory website using Selldone is simple and powerful — especially if you are building a Service Marketplace.
In this guide, we’ll walk you step-by-step through activating the Listing feature and setting up the foundational structure.
Step 1: Make Sure You Have the Enterprise Plan
The Listing feature is available only for Enterprise plan users. If you want to create a directory website or service marketplace (such as doctors, lawyers, salons, etc.), you must upgrade your store to the Enterprise plan to access this functionality.
Learn how to subscribe to a plan:
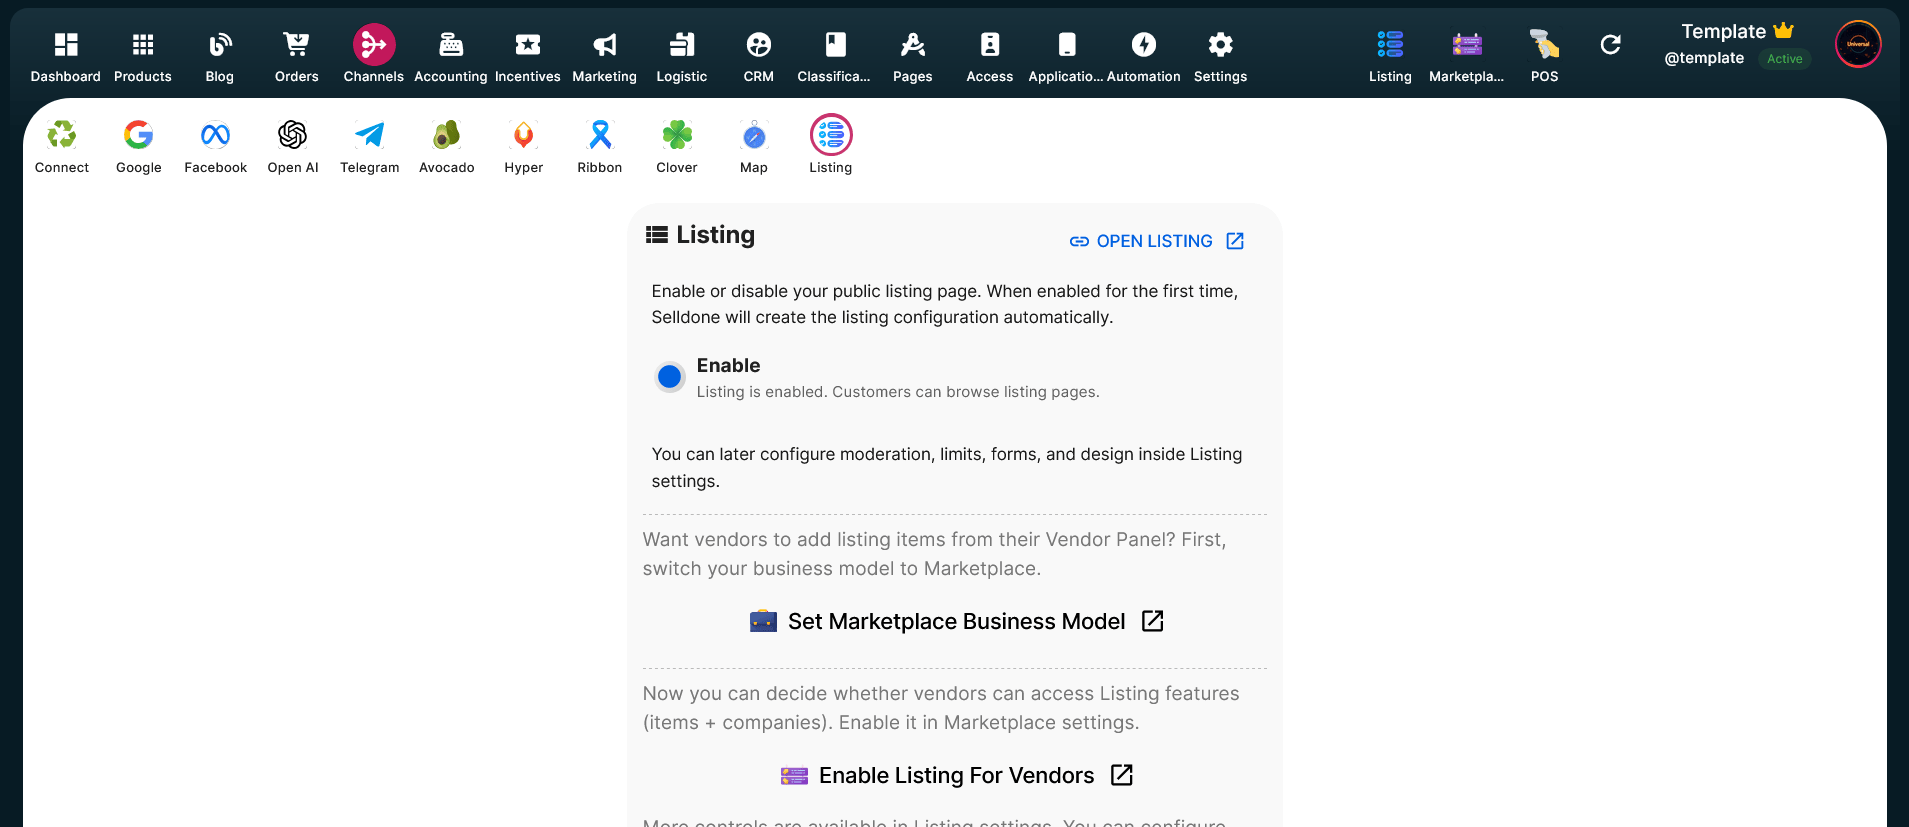
Step 2: Activate the Listing Feature
Once you are on the Enterprise plan:
Go to your Store Dashboard
From the top menu, click on Channels
Select Listing
Listing is one of the core features of the Service Marketplace system.
When you enter the Listing section, you will see the feature status set to Disable by default. After enabling the feature, the Listing panel will automatically appear in the top menu of your store dashboard.
To activate it:
Click on Disable
Switch it to Enable
Step 3: Enable Marketplace Business Model (Optional – If You Want Vendor Panels)
If you want business owners (vendors) to have their own dedicated management panels — for example:
Doctors managing their profiles
Lawyers managing their services
Salon owners editing their listings
Then you need to activate the Marketplace business model.
To do this:
Go to Channels → Listing
Click on Set Marketplace Business Model
You will enter the Business Model section
From the list, select Marketplace
Once selected, the Marketplace panel will be added to the top menu of your store.
From this Marketplace panel, you can manage Vendors (business owners).
Step 4: Add and Configure Categories (Core Structure of Your Directory)
Before vendors can submit listings, OR you personally add their profiles, you must define the structure of your directory by creating Categories. From the top menu, go to Listing → Categories and click Add Category.
A category defines the main structure of your directory. For example:
If your platform is for doctors → Dentist can be a category.
If it is for lawyers → Family Law can be a category.
If it is for salons → Makeup can be a category.
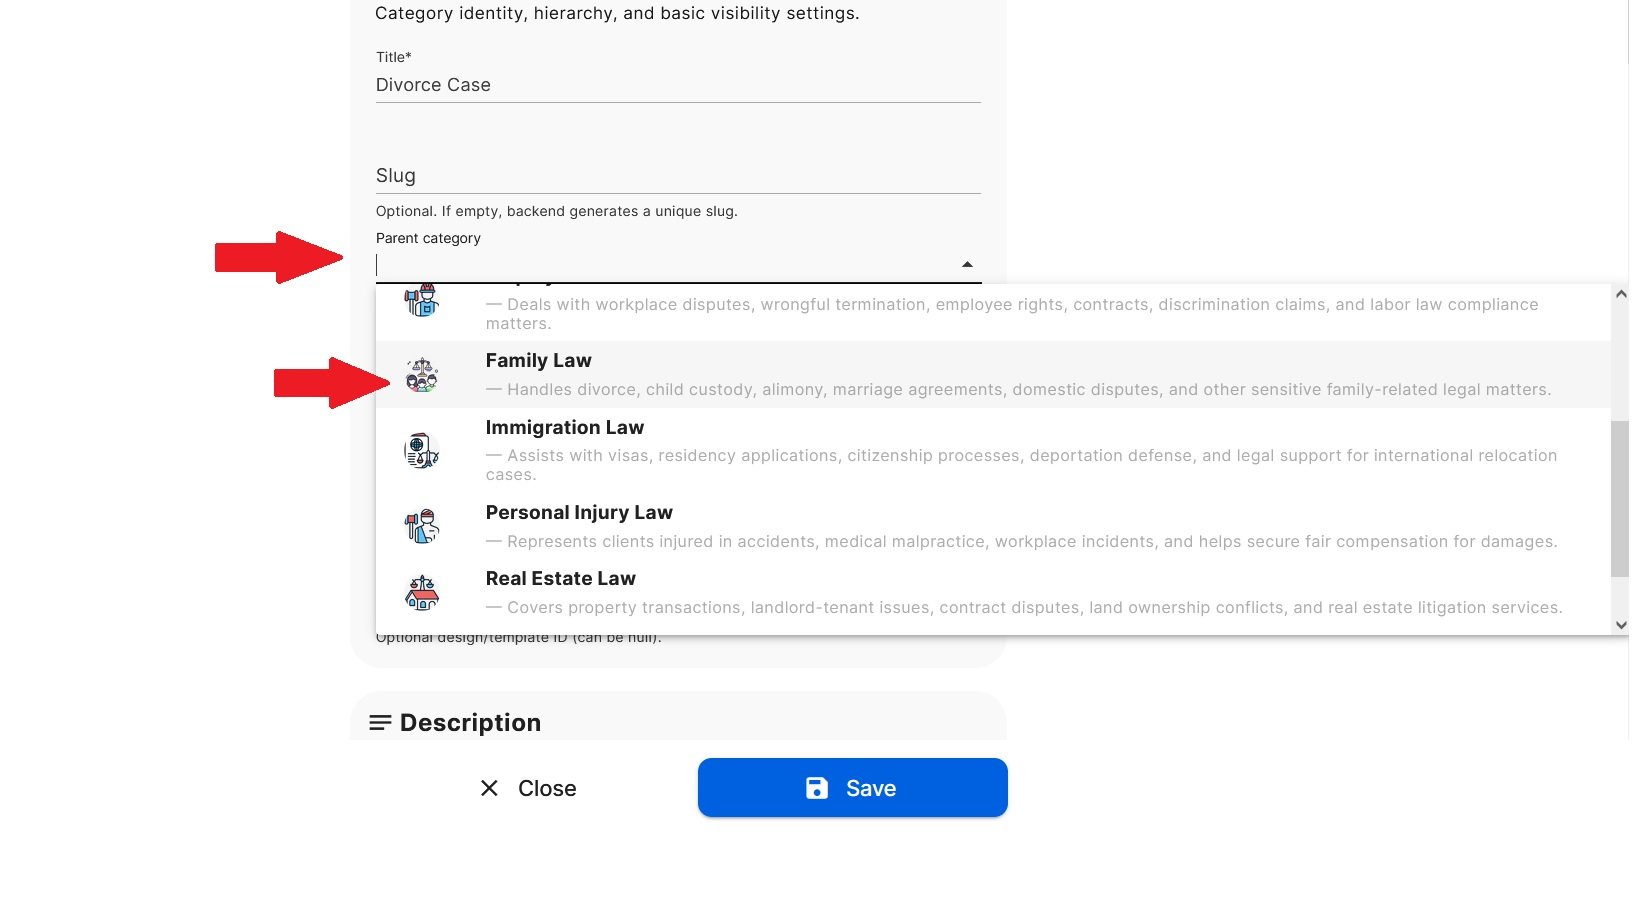
If you want to create a subcategory (a category under another category), you can select a Parent Category when adding the new one. For example, if the main category is Family Law, you can create a subcategory like Divorce Case and set Family Law as its Parent Category.
Category Creating Explanation
Title: Enter the category name (e.g., Family Law, Dentist, Makeup).
Slug: You can leave this empty. Selldone automatically generates it.
Parent Category: Select a parent if this is a subcategory; otherwise, leave it empty.
Order: Determines display position. Lower numbers appear first. If set to 1, it will appear at the top. If left as 0 (default), categories are added sequentially.
Active: Click to enable or disable the category.
Price Format: Define how pricing appears, such as Per Hour or Fixed.
Design ID: Can be left empty.
Description (Very Important for SEO): Add a short 2–3 line explanation describing the purpose of the category. Selldone uses this for SEO to improve search engine visibility. Writing clear, meaningful descriptions helps your directory rank higher.
Category Form Fields (Advanced Form Builder)
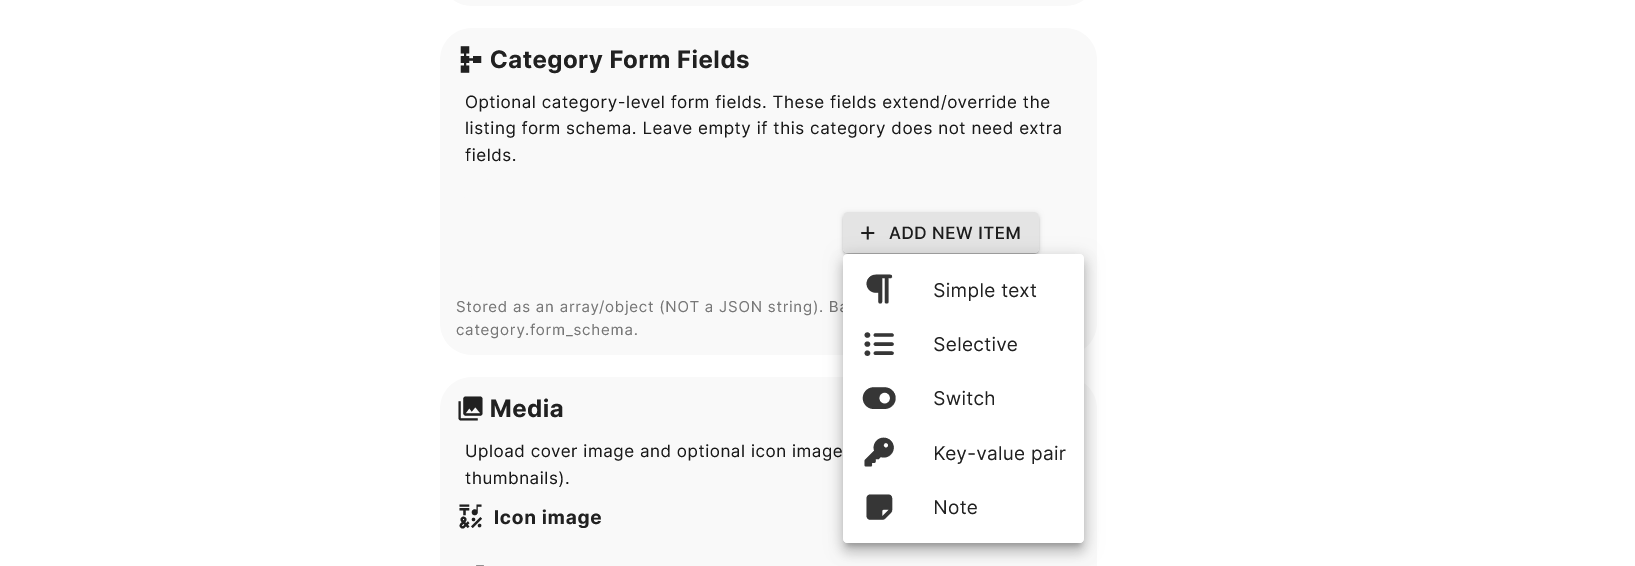
To create a professional and structured directory, use Category Form Fields. This allows you to define exactly what vendors must fill out when creating their profile, such as Education, Years of Experience, Certifications, Awards, Languages, or Insurance Acceptance.
When adding a field, choose the correct type:
Simple Text: For paragraph-style content like Biography or About Section.
Selective – Single Item: Allows selecting only one option. Example: Experience Level → 5+ Years Experience OR 10+ Years Experience OR 20+ Years Experience.
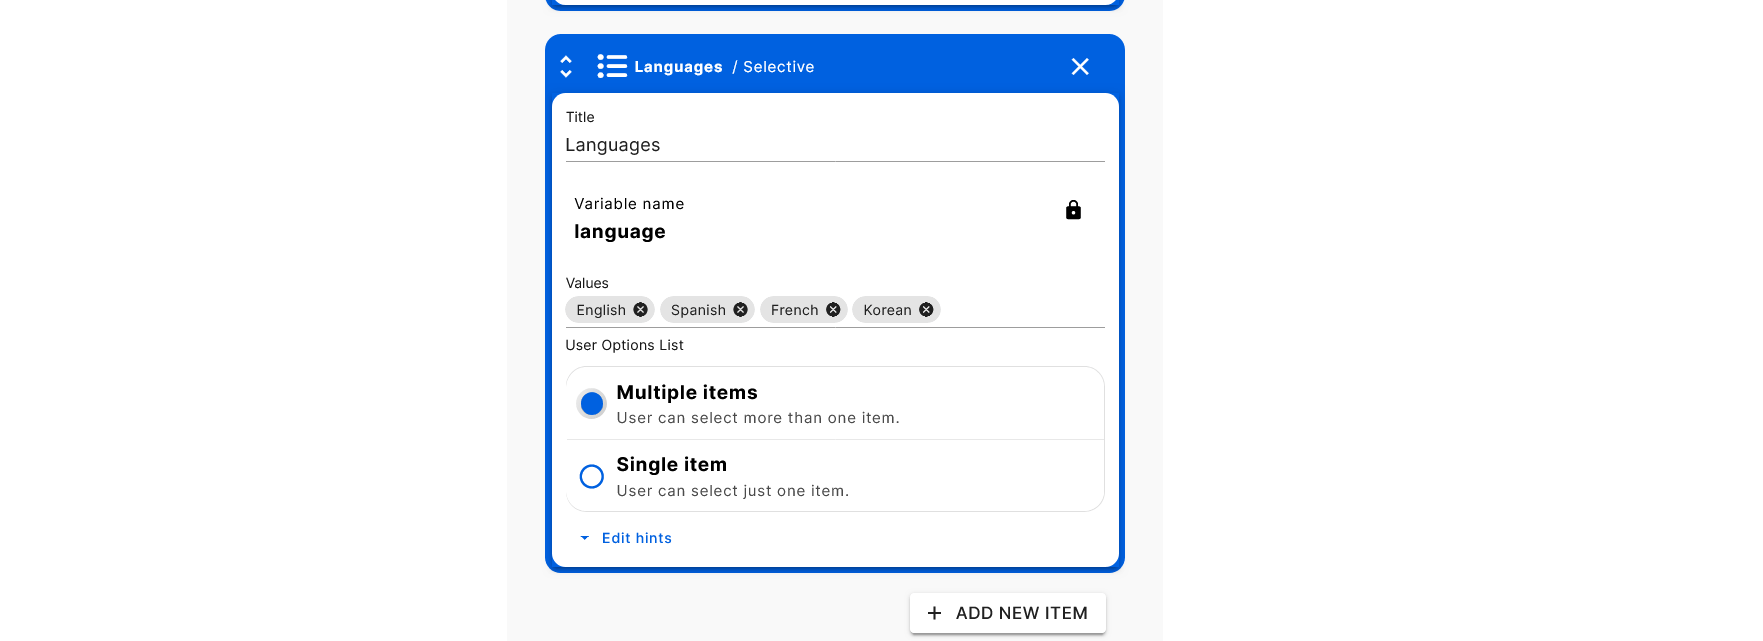
Selective – Multiple Items: Allows selecting multiple options. Example: Languages → English, Spanish, French.
In order to add more values, write the first value, then PRESS ENTER KEY.
Switch: A Yes/No toggle, such as Accepts Insurance? or Offers Online Consultation? You can set the Default Value to True or False.
Key-Value Pair: Used for structured sections like Education, where each item has a subtitle and its own description. For example:
Bachelor's Degree → University details
Doctorate Degree → Specialization details.
Note: Displays informational text inside the form to the End user/ Buyer, not on the profile page.
Media Section
Inside category settings, you can upload an Icon Image (small representative icon such as a tooth for dentists, a gavel for lawyers, or scissors for salons) and a Cover Image (banner-style image for listing pages). These elements improve visual presentation and branding.
Save or Duplicate
After configuring everything, click Save to add the category to your system. If you want to create a similar category with the same structure, click the three dots (⋮) next to a category and select Duplicate to copy its settings.
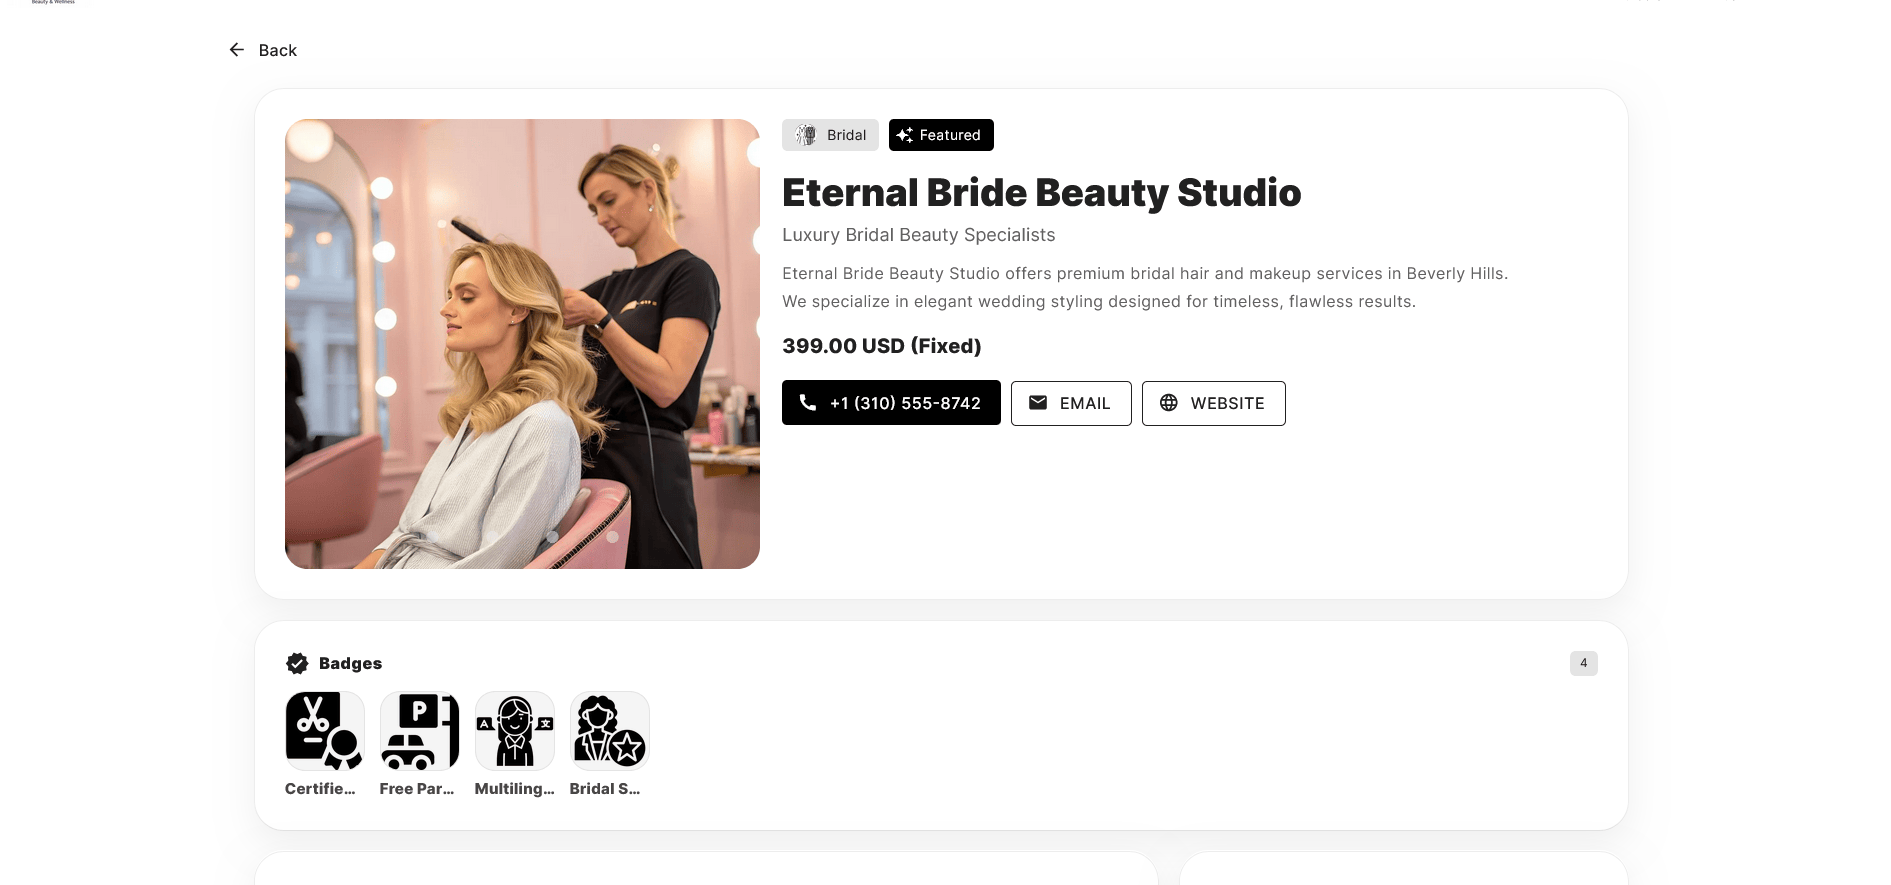
Step 5: Create and Manage Badges (Vendor Profile Highlights)
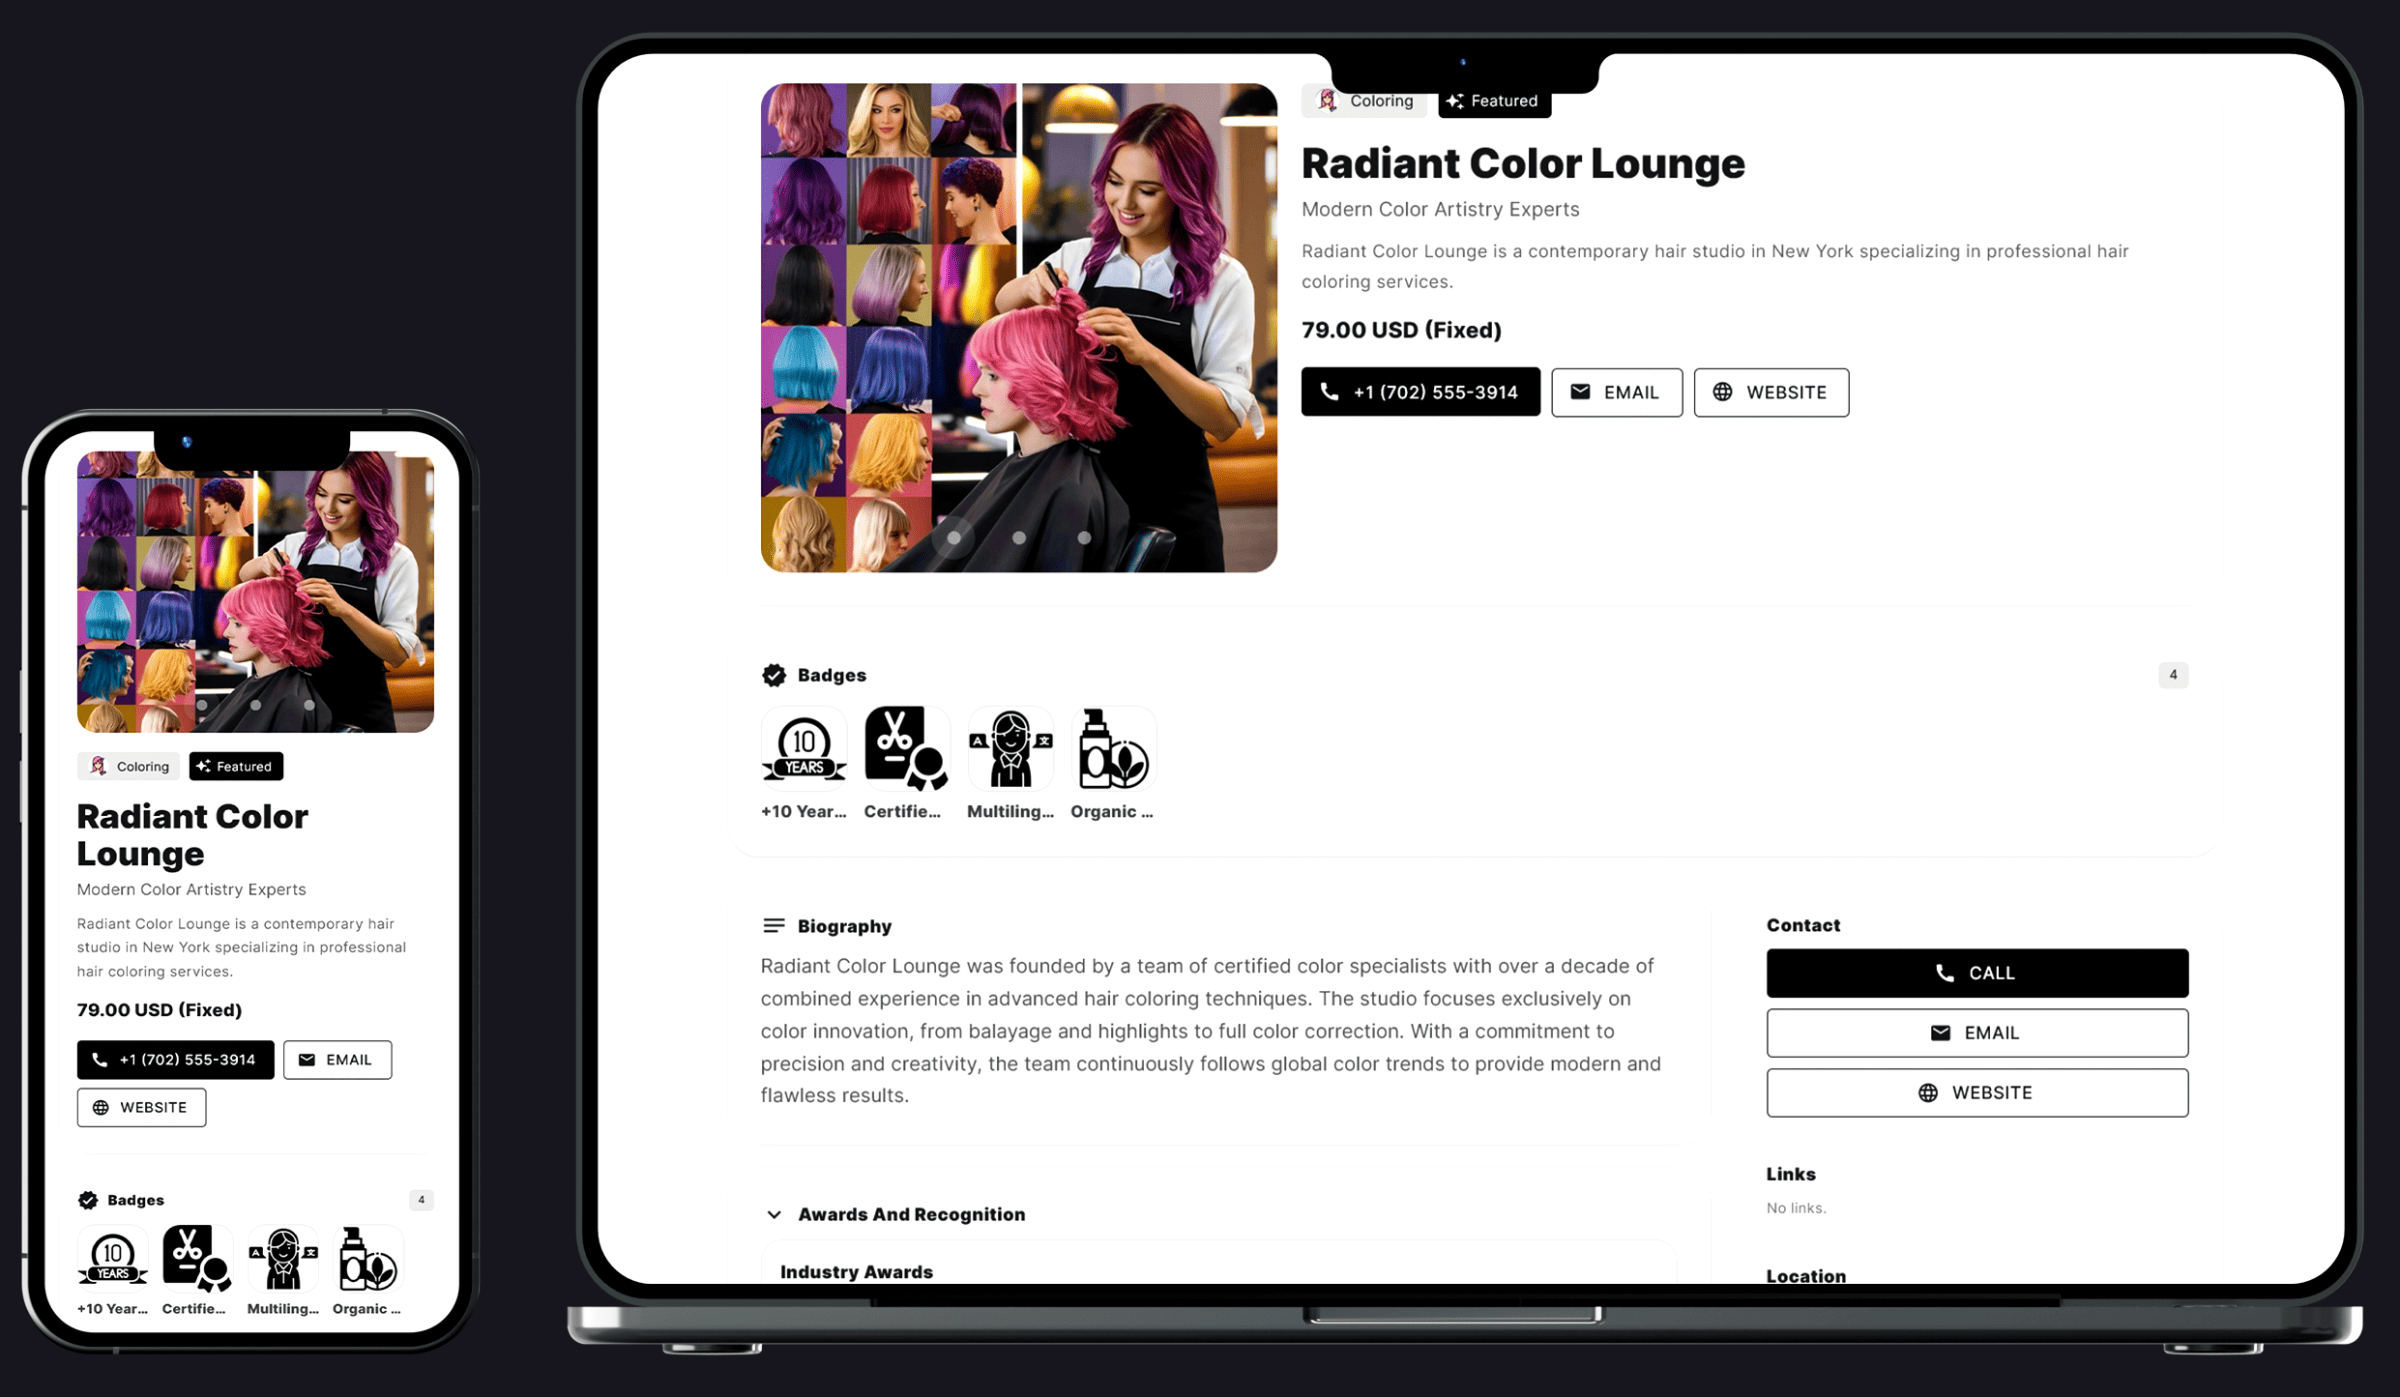
Once your categories are created, the next important step is defining Badges. Badges are visual labels that appear on the vendor profile page, usually displayed under the vendor’s image. They help highlight special features, credibility, or premium status.
Badges improve trust, increase conversion rates, and can even become a monetization tool for your marketplace.
For example:
For lawyers, badges can include:
Free Consultation, Virtual Conference, Top Rated, Claimed Profile
For salons, badges can include:
Free Parking, Premium Salon, Award Winning, Luxury Studio
Badges allow visitors to quickly identify important qualities of a vendor.
How to Add a Badge
To create a badge:
- Go to Listing → Badge
- Then click Add Badge.
You will see the following fields:
Title: The name of the badge (e.g., Top Rated, Free Consultation, Premium Salon).
Description: A short explanation describing what the badge represents. Keep it concise and clear.
Order: Determines the display priority. Lower numbers appear first in the profile.
Media: You can upload an icon or small image representing the badge visually.
After saving, the badge becomes available and can be assigned to vendors.
Why Badges Are Important (Monetization Strategy)
Badges are not only for design — they are a strong revenue opportunity.
You can use badges as part of your monetization model. For example:
When a vendor reaches a certain performance level, you can assign Top Rated as a premium recognition.
You can charge vendors for premium badges such as Featured Profile, Premium Vendor, or Verified Business.
You can offer promotional badge packages as part of subscription upgrades.
For instance, when a vendor reaches a high rating threshold, you may charge a fee to activate the Top Rated badge on their profile.
Badges create visual differentiation, increase vendor motivation, and give you flexible monetization options within your Service Marketplace.
Badges in your panel

Badges on the profile page
Step 6: Adding Companies (Group Structure for Vendors)
In many service marketplaces, vendors are not always independent individuals. Sometimes they operate under a company, organization, or office structure.
For example:
A law firm with multiple lawyers
A medical clinic with several doctors
A beauty salon with multiple stylists
A cleaning company with multiple staff members
In this system, a Company acts as a parent entity, and individual professionals have their own profiles under that company. This creates a clean, professional hierarchy inside your marketplace.
What Is a Company in Listing?
A Company represents an organization that contains multiple vendor profiles under its structure. For example, Silverstone & Parker Law Associates may include multiple lawyers such as James Whitman, Emily Carter, and Jack Reynolds. Each lawyer has their own personal profile, but their profile clearly shows that they are part of Silverstone & Parker Law Associates.
The company name will appear on the individual profile page, indicating that the person operates under that organization.
Who Can Create a Company?
A company can be created in two ways:
By the marketplace owner (from your admin panel)
By the vendor (from their Vendor Panel, if permissions are enabled)
This flexibility allows structured growth as your marketplace expands.
How to Add a Company
To create a new company, go to:
- Listing → Company
- Then click Add Company.
You will need to complete the following fields:
Title: The name of the company (e.g., Silverstone & Parker Law Associates).
Description: A short professional overview of the organization.
Website: Official company website (optional but recommended).
Email: Contact email for the company.
Phone: Company contact number.
Order: Determines display position if multiple companies are shown in listings.
Media: Upload the company logo or representative image.
After saving, the company becomes available in the system.
How It Appears on Vendor Profiles
When assigning a company to a vendor profile, the company name will appear on the vendor’s profile page, showing that the individual belongs to that organization.
This is especially useful for law firms with multiple attorneys, clinics with multiple doctors, salons with multiple stylists, and service agencies with multiple professionals. It creates a more professional and scalable marketplace structure.
With Companies configured, your marketplace now supports independent vendors, multi-member organizations, and structured professional groups.
If you're ready, the next step would be Adding Individual Vendor Profiles and assigning categories, companies, and badges to them.
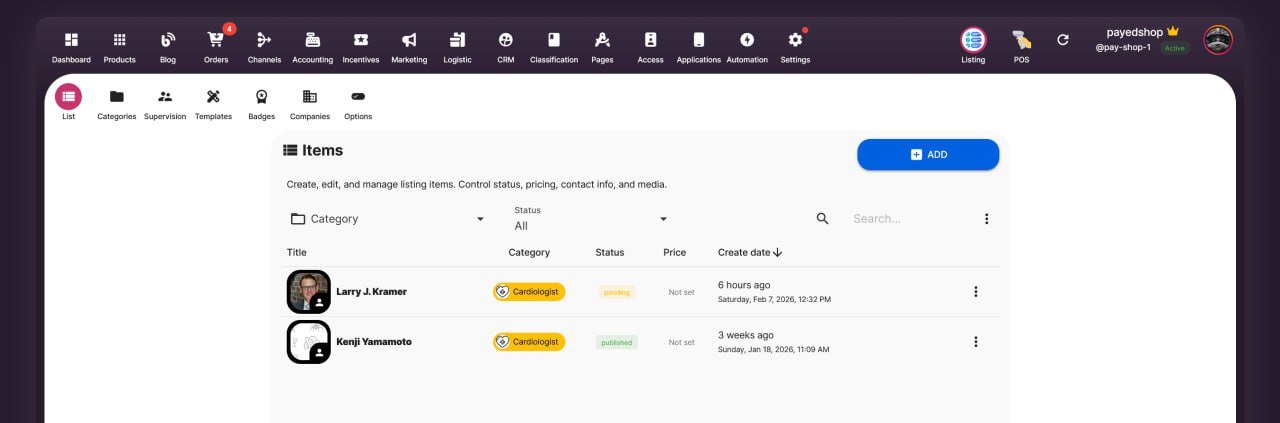
Step 7: Creating a Vendor Profile
To add a new vendor profile, go to:
Listing → Add
The profile creation process includes 8 structured steps:
General
Description
Finance
Contact Info
Location
Opening Hours
Form Fields
Media
Each step is responsible for a different part of the vendor’s public profile and operational settings. Completing all sections correctly ensures that the vendor profile is professional, searchable, and fully functional inside your Service Marketplace.
1. General
In the General section, you define the core identity of the profile.
Title: Enter the name of the service provider. This can be the individual’s full name (e.g., Dr. John Carter) or the professional display name.
Slug: Leave this empty. Selldone automatically generates it for you.
Company: If you previously created a company (e.g., Silverstone & Parker Law Associates), you can select it here to link this vendor to that organization.
Badges: You can search and assign previously created badges (e.g., Free Consultation, Top Rated, Premium Salon).
Status: Approved means the profile is verified but not yet visible publicly. To make it visible on the website, you must set it to Published.
Featured: If enabled, a featured label will be added to the profile section, giving it more visual emphasis.
2. Description
In this step, you define how the vendor introduces their services.
Short Title: A concise headline summarizing their expertise.
Main Description: A comprehensive description explaining services, experience, and professional background. This section is important for both credibility and SEO.
3. Finance
This section defines pricing structure. You can set the Price Range, Currency, and Price Unit. Price Unit examples include Fixed, Per Hour, or Per Session. This helps users understand how the service is billed.
4. Contact Info
Here you enter the vendor’s communication details including phone number, email address, and website. In the Links field, you can add multiple additional links such as social media profiles. Simply press Enter after each link to add more.
5. Location
In this section, you define the vendor’s physical location. When you select the address, Selldone automatically generates the latitude and longitude and displays the location on the map. This dynamic map feature allows users to find vendors near their location and enhances local discovery.
6. Opening Hours
This section allows you to define working hours. The information entered here will be displayed on the vendor’s public profile page so customers know when the service provider is available.
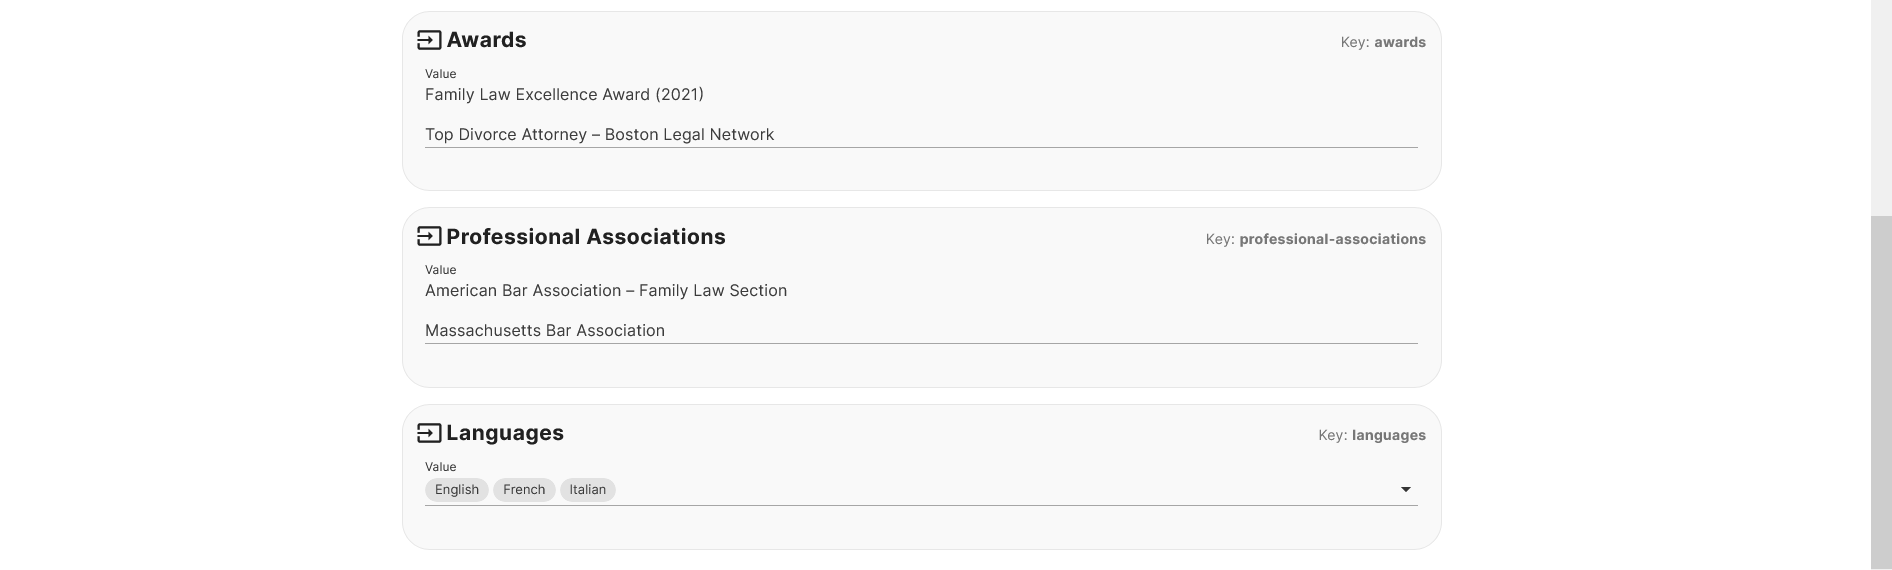
7. Form Fields
This section displays the Category Form Fields you previously created for that category. For example, you may see fields for Languages, Education, Experience, Certifications, Awards, and Standards. Here, you complete the structured information that makes the profile searchable and filterable.
8. Media
In the final step, you can upload images and videos for the profile, including a profile image, gallery images, and an introduction video. Strong visual content increases engagement and trust.
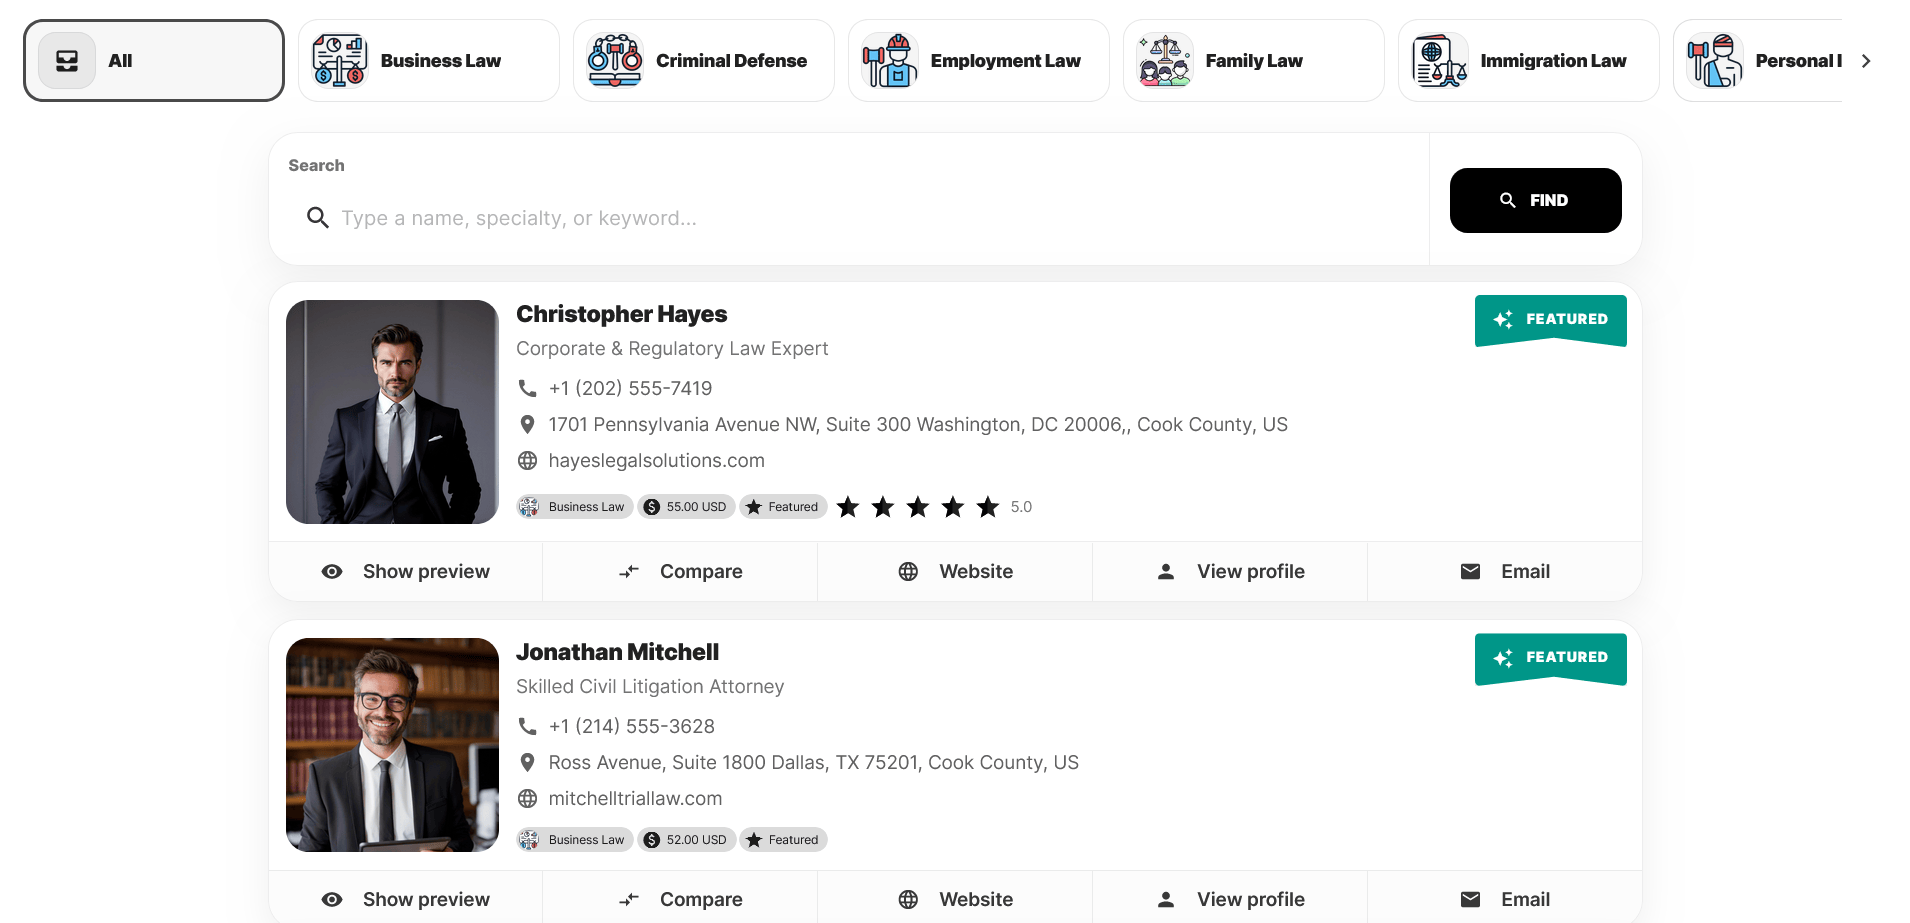
Once all 8 sections are completed and the profile status is set to Published, the vendor profile becomes visible on your marketplace.
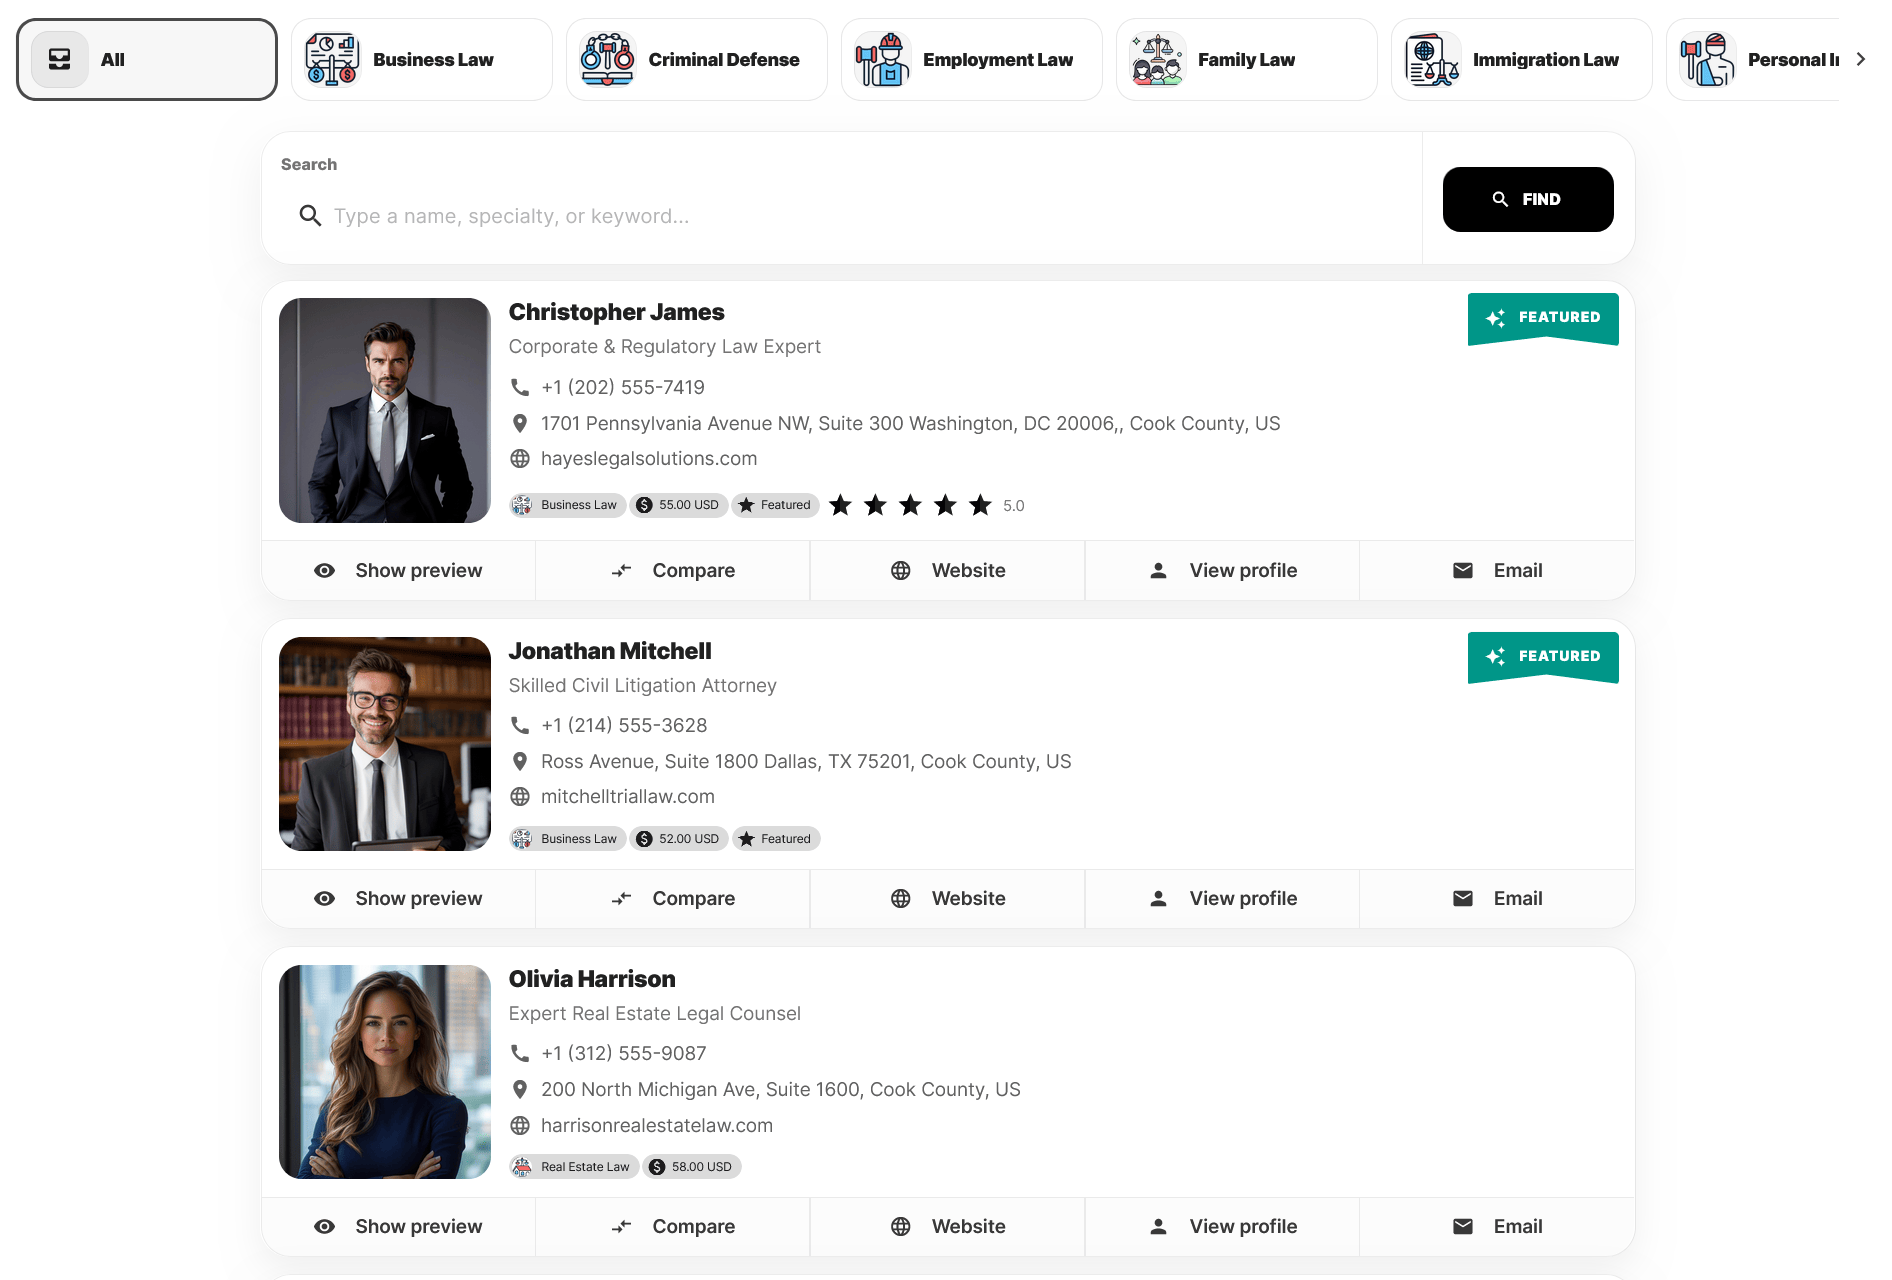
Final Step: How to View Your Listing Website Live
After completing all setup steps, you can now view your Listing website live.
In the current version, your Listing website will be available by adding /listing to the end of your domain.
Example: yourdomain.com/listing
This URL displays your full Listing & Directory website. In upcoming updates, the /listing path will be removed. You will be able to switch between business models without any additional word added to your domain URL. This means your Listing system will run directly under your main domain without extra extensions.
To access your Listing link quickly from the dashboard:
Go to the Listing tab in your top menu>List
Click on OPEN LISTING
Your multi-vendor service marketplace is now fully operational and ready to grow.
Make Your Business Online By The Best No—Code & No—Plugin Solution In The Market.
30 Day Money-Back Guarantee
Create Your E-commerce Store Start now — it's freeSay goodbye to your low online sales rate!