
Build Selling Landing Pages – Step-by-Step Guide
Introduction
Ever wished you could design beautiful, responsive landing-page sections — without writing a single line of code? With the Selldone Plugin in ChatGPT that dream becomes reality.
In this guide, you’ll learn step by step how to go from an inspiration image to a live, fully responsive section inside Selldone’s Page Builder — all powered by AI.
By the end, you’ll have a professionally designed section ready to publish on your Selldone website.
💡 Note: Selldone’s Page Builder is built on Vuetify (Vue 3) — so every section generated by the plugin is perfectly compatible with Selldone’s modern, responsive front-end framework.
Step 1 – Prepare Your Inspiration
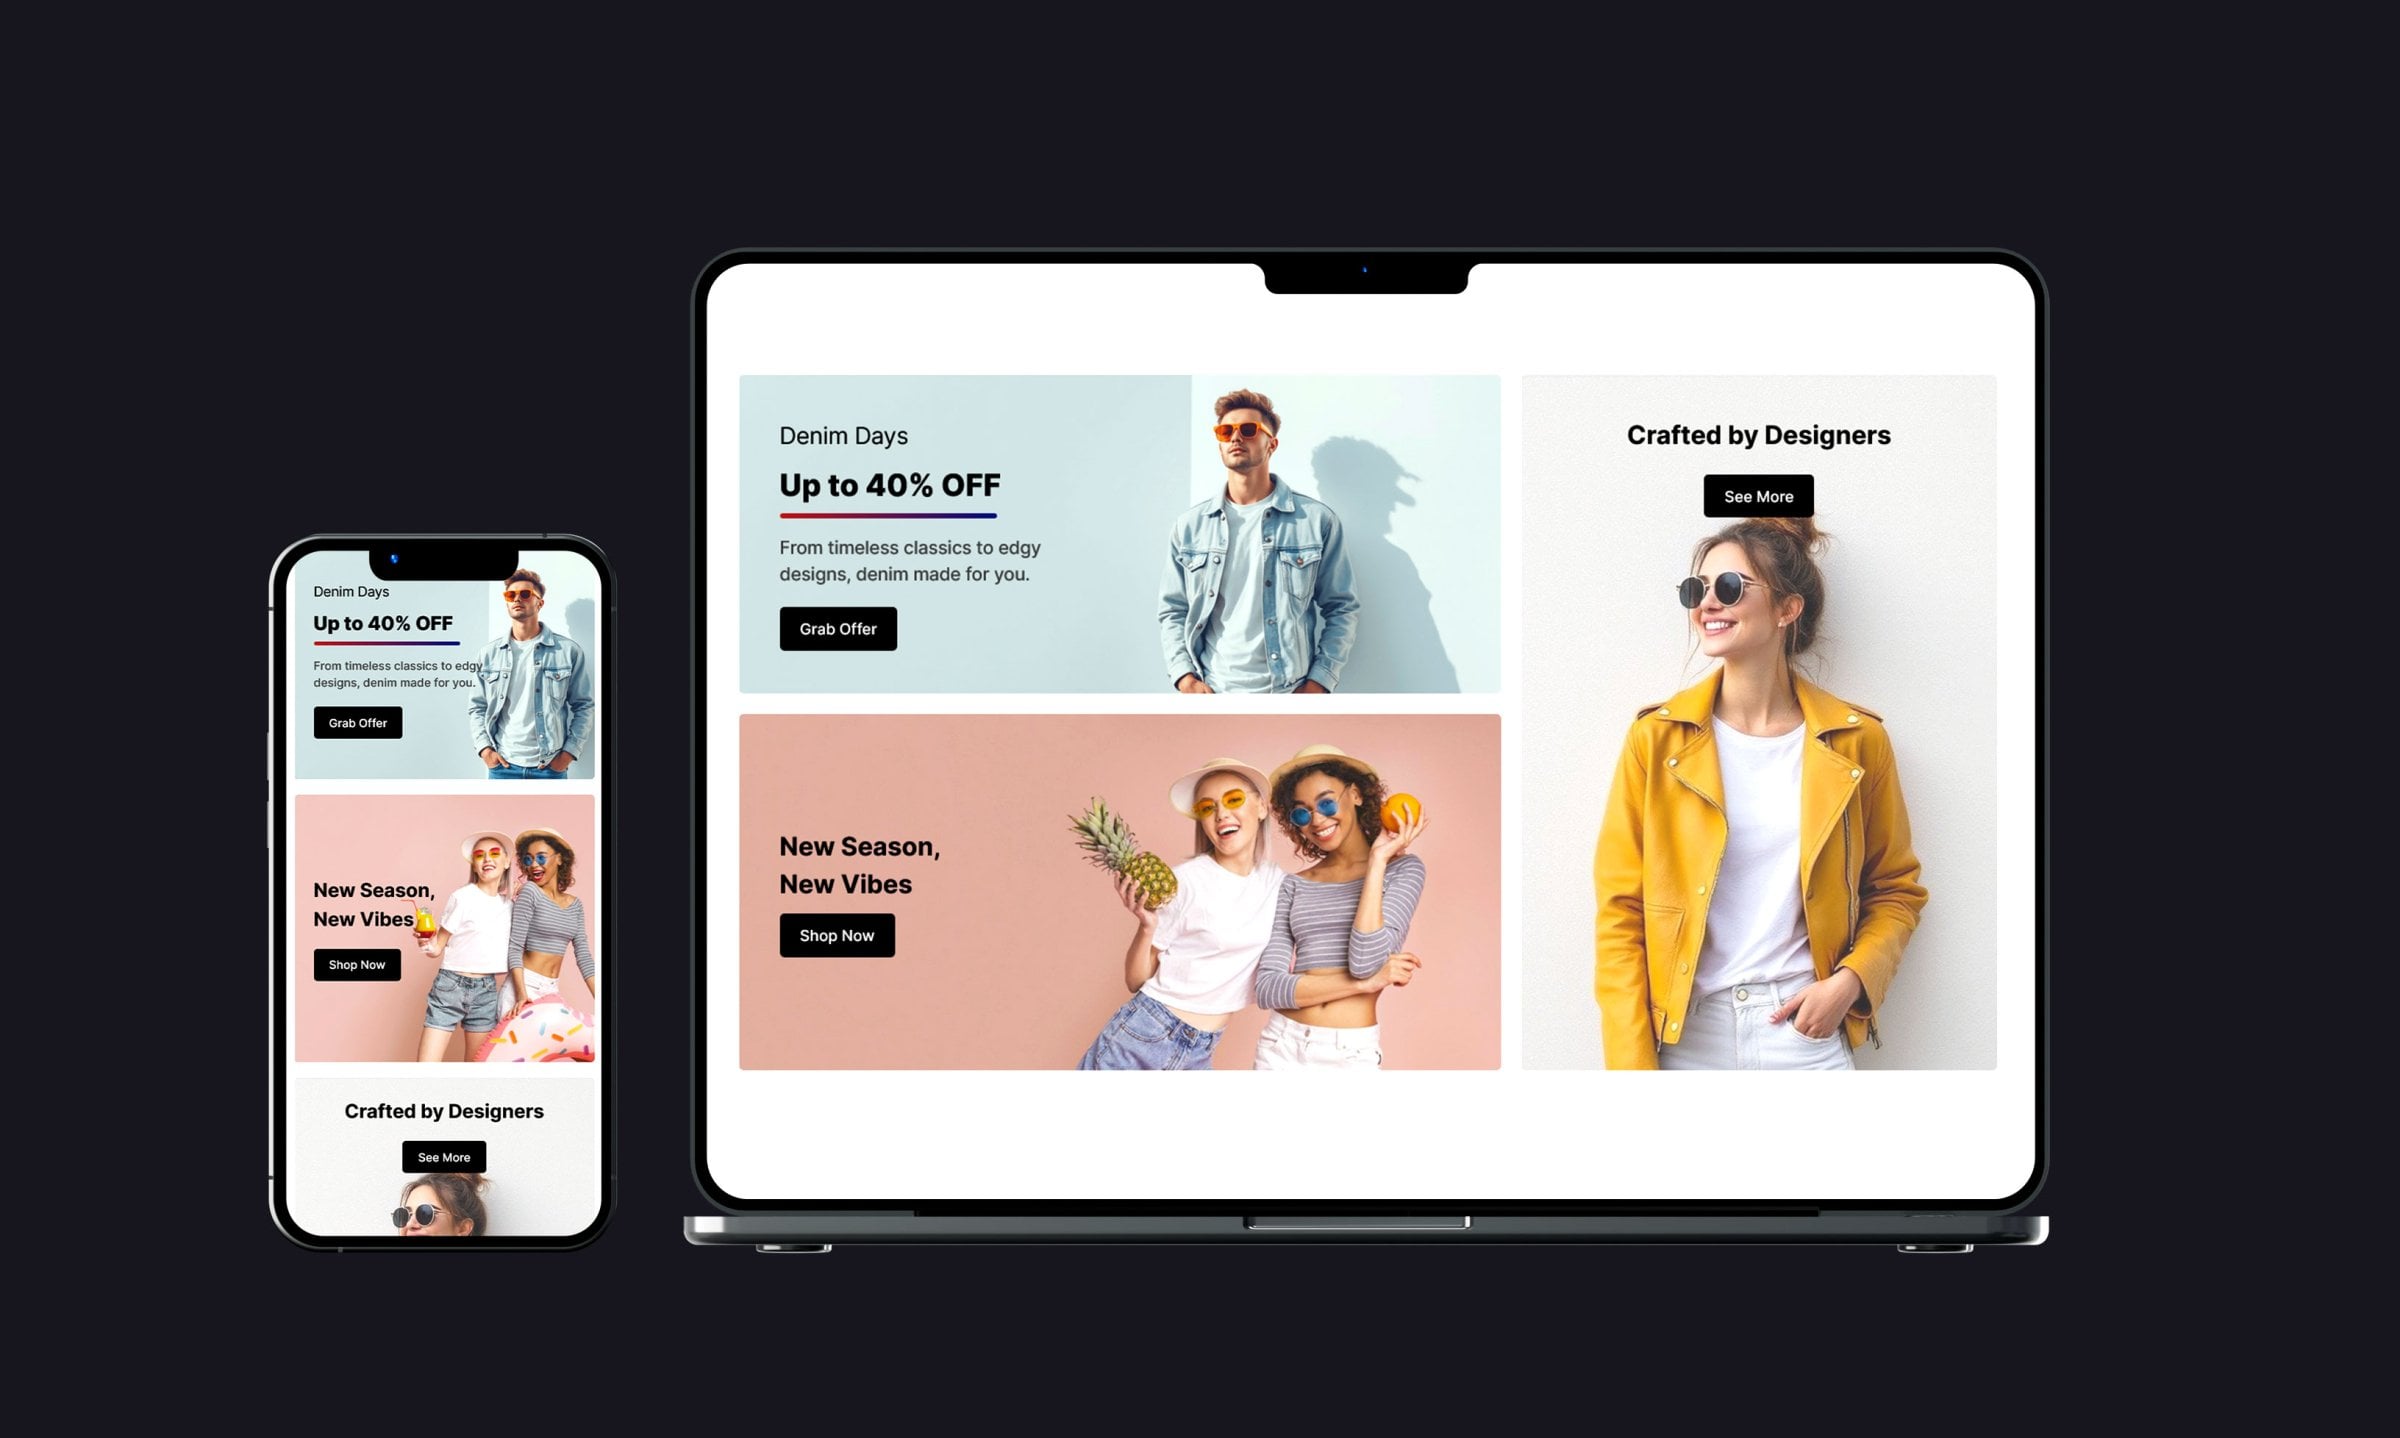
To start, find a section design that inspires you. In this tutorial, we’re using a section from the eBay homepage as our reference — a clean, modern layout showcasing featured products with strong imagery and clear calls-to-action.
Take a screenshot of that eBay section; we’ll use it as a visual reference in ChatGPT when generating our custom design with the Selldone Plugin.
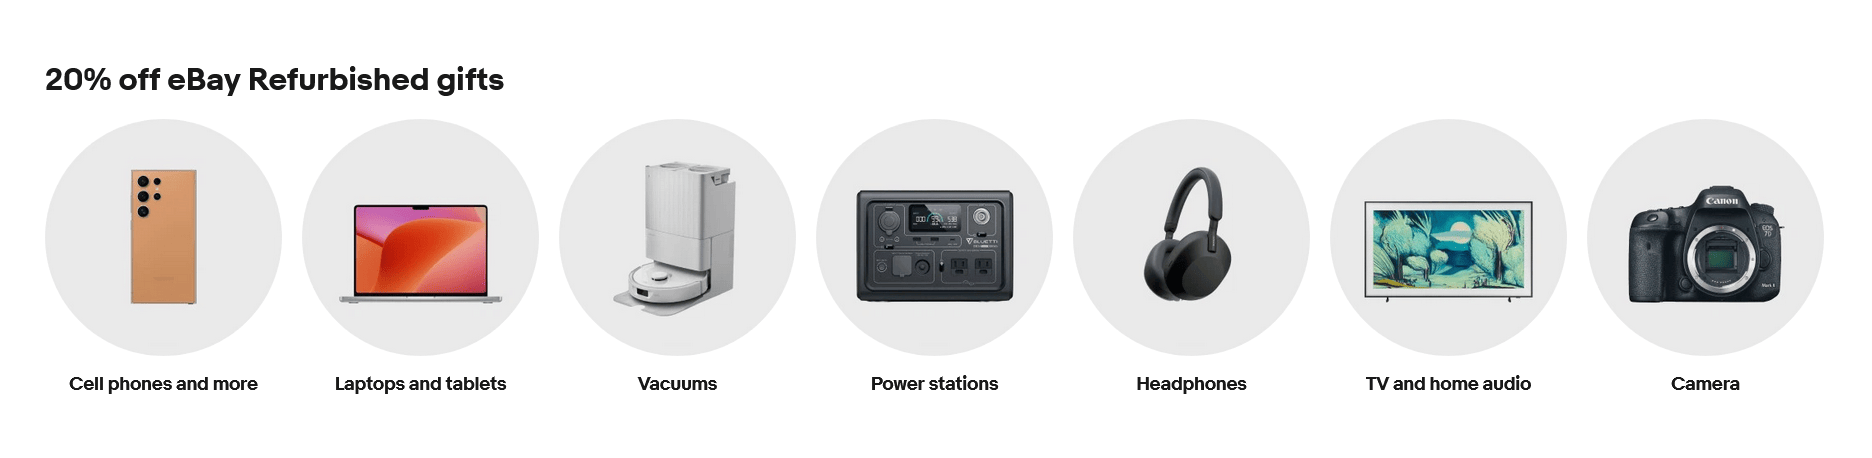
💡 Tip: Choose a section with a structured and visually balanced layout. The clearer the design, the better ChatGPT can analyze and reproduce it.
⚠️ Fair-Use Notice: The eBay screenshot shown here is used for educational and illustrative purposes only as design inspiration. All trademarks, images, and layouts belong to eBay Inc. — this tutorial is not affiliated with or endorsed by eBay.
Step 2 – Open ChatGPT with the Selldone Plugin
Make sure you have the Selldone Plugin enabled in ChatGPT:
1. Go to ChatGPT → Settings → Beta Features → Plugins and enable plugins.
2. Visit the Plugin Store and install the Selldone Plugin.
3. Start a new chat with the plugin active.
You should see the Selldone logo next to your chat box — that means it’s ready to go
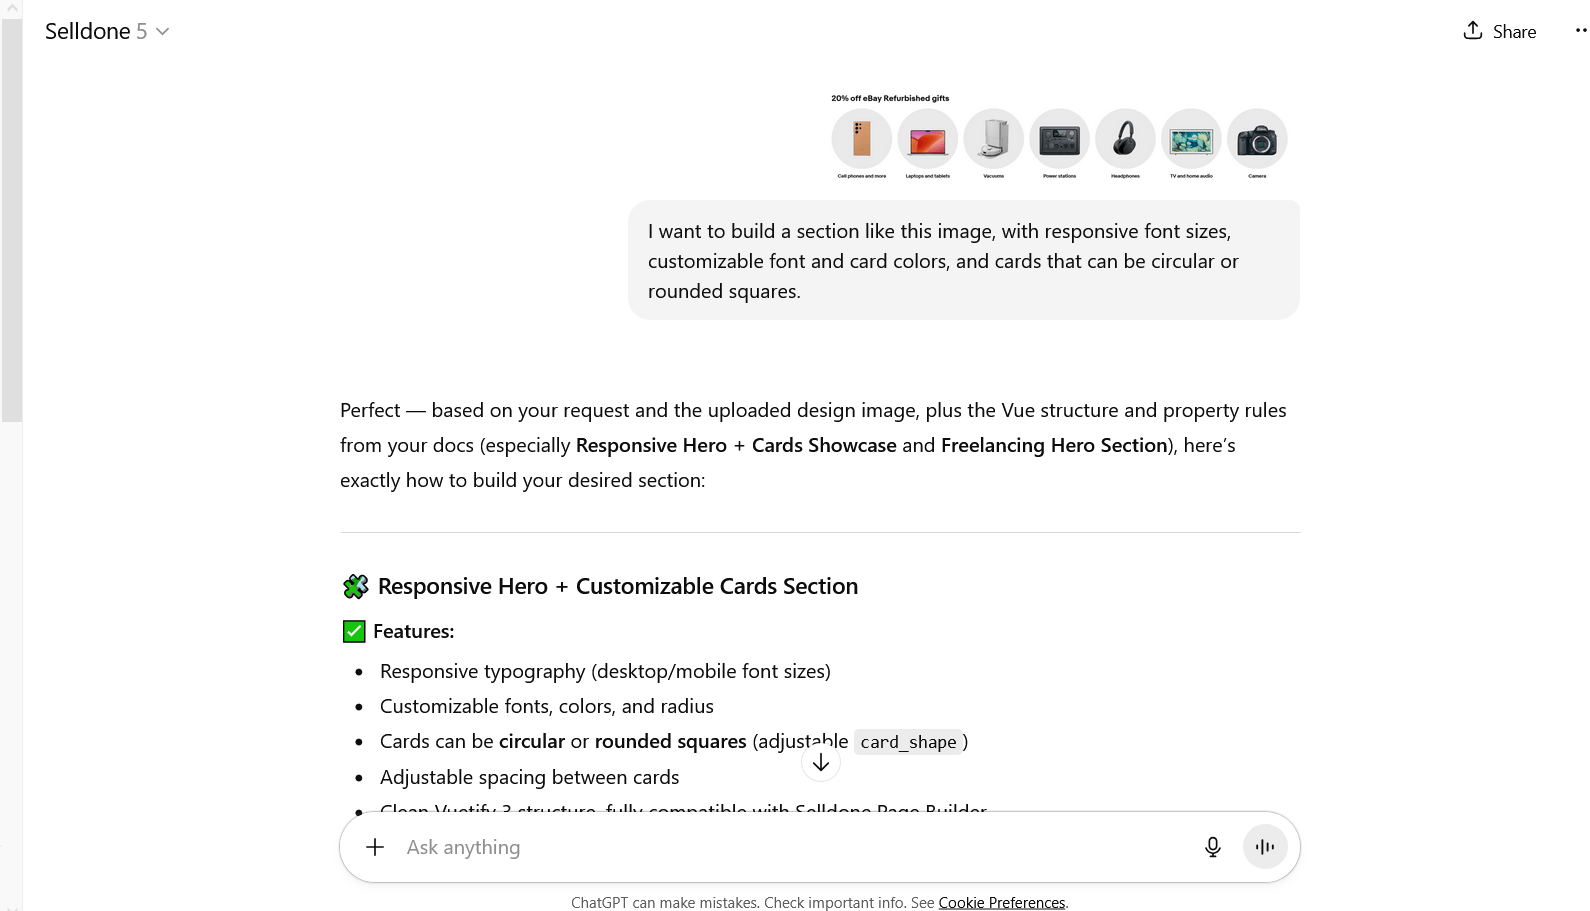
Step 3 – Upload Your Reference Design
Upload your screenshot and type a clear prompt, for example:
From the top menu, make sure you are using the latest version of ChatGPT.
“I want to build a section like this image, with responsive font sizes, customizable font and card colors, and cards that can be circular or rounded squares.”
ChatGPT (with Selldone) will analyze the image and generate Vuetify (Vue 3)-based code fully compatible with Selldone’s Page Builder.
Create a New Landing Page in Selldone
Before adding your custom section, let’s first create a raw landing page inside Selldone to use it.
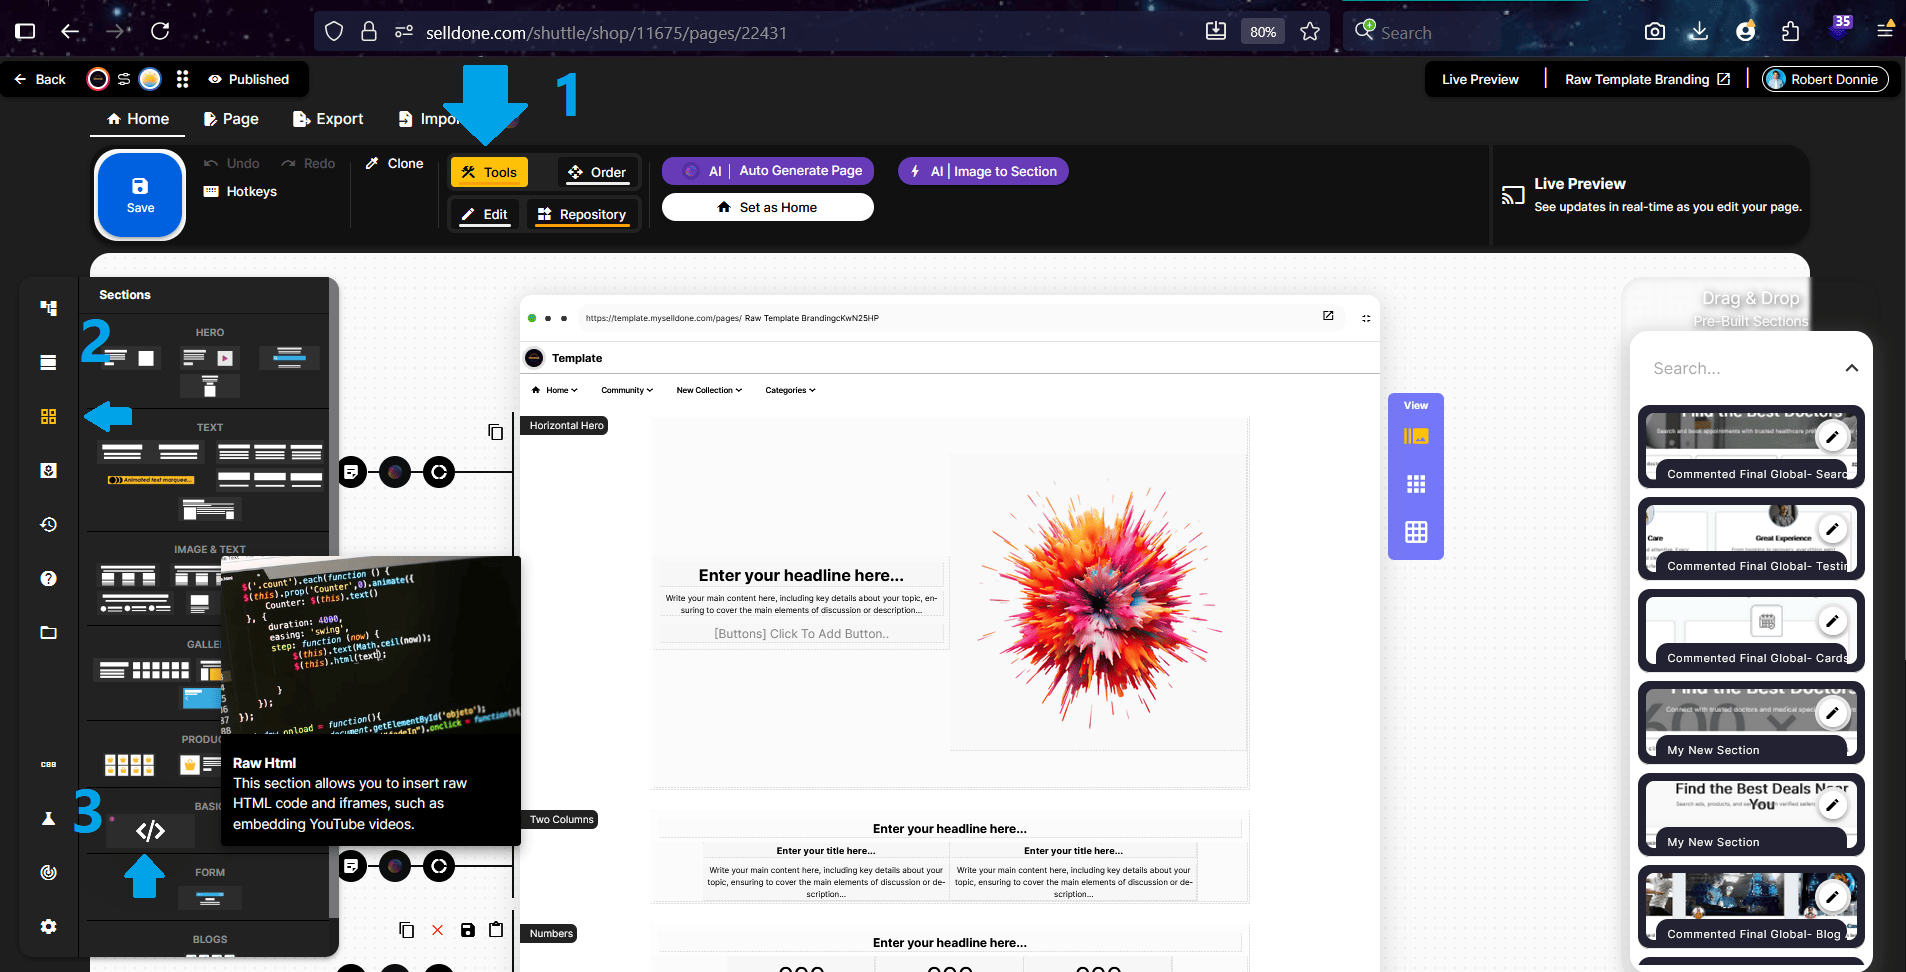
From the store's top menu, navigate to Pages → Landing → Add New Landing.
On this screen, you’ll see three default landing page templates.
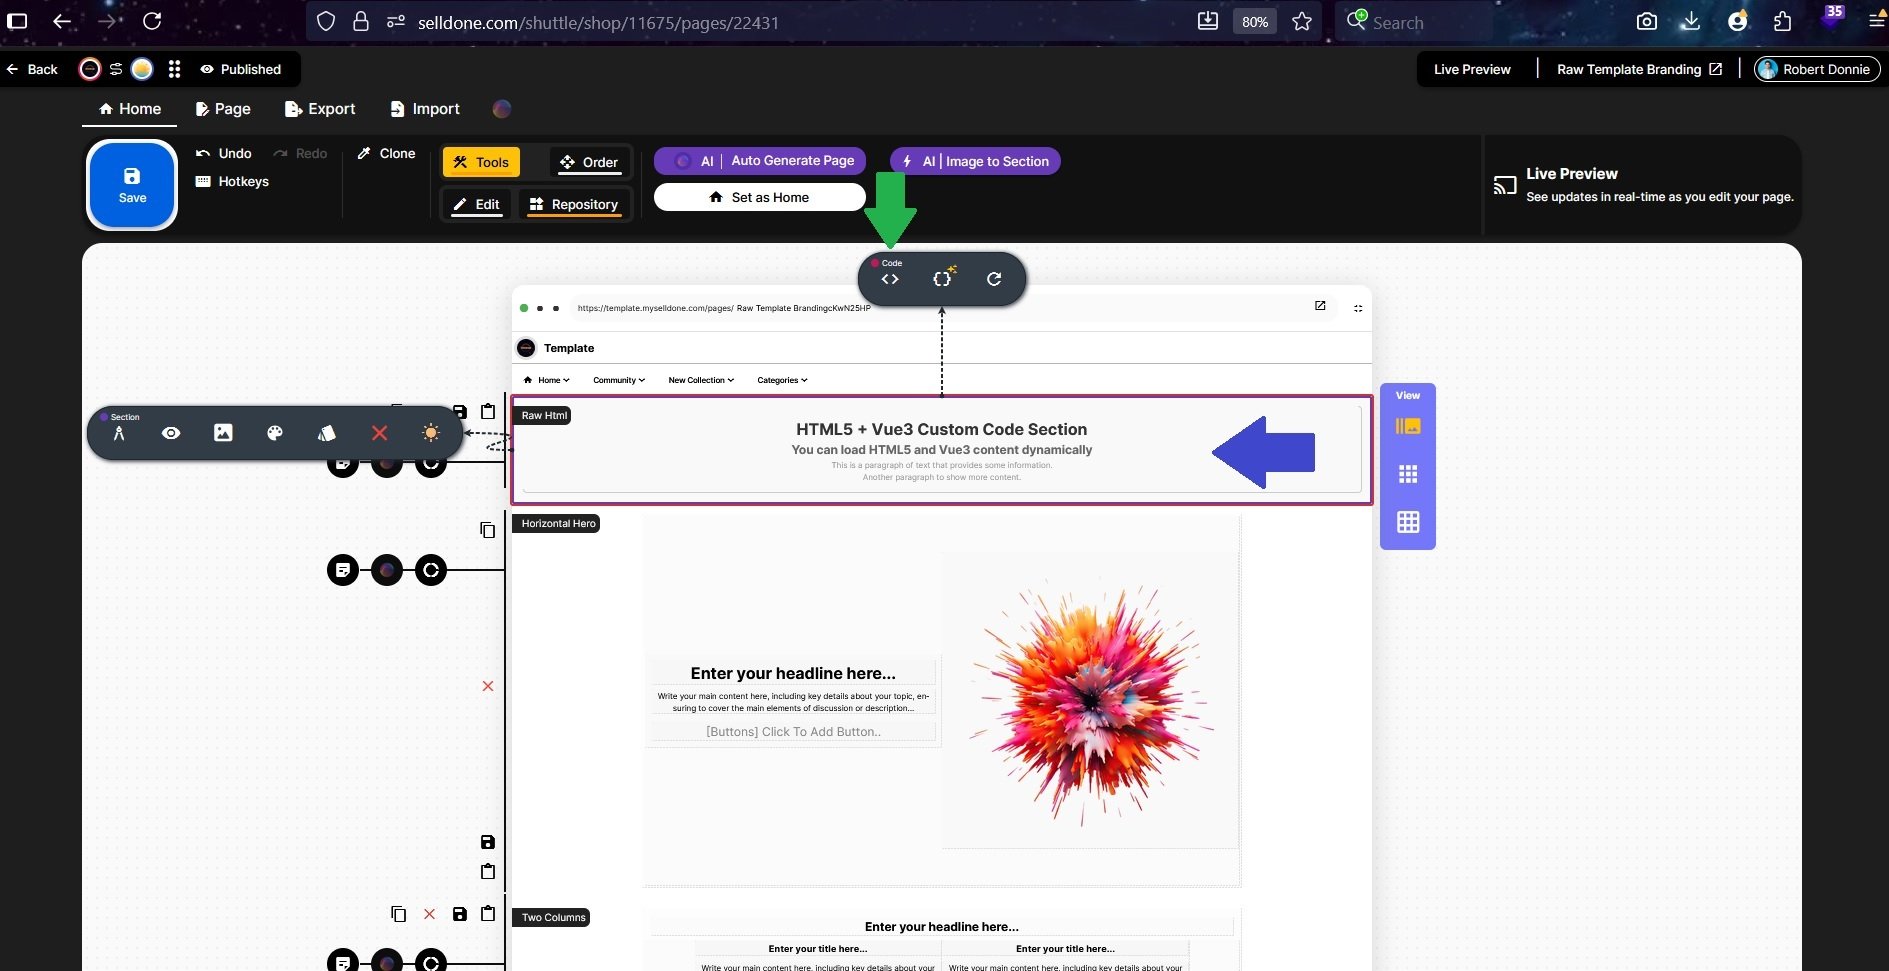
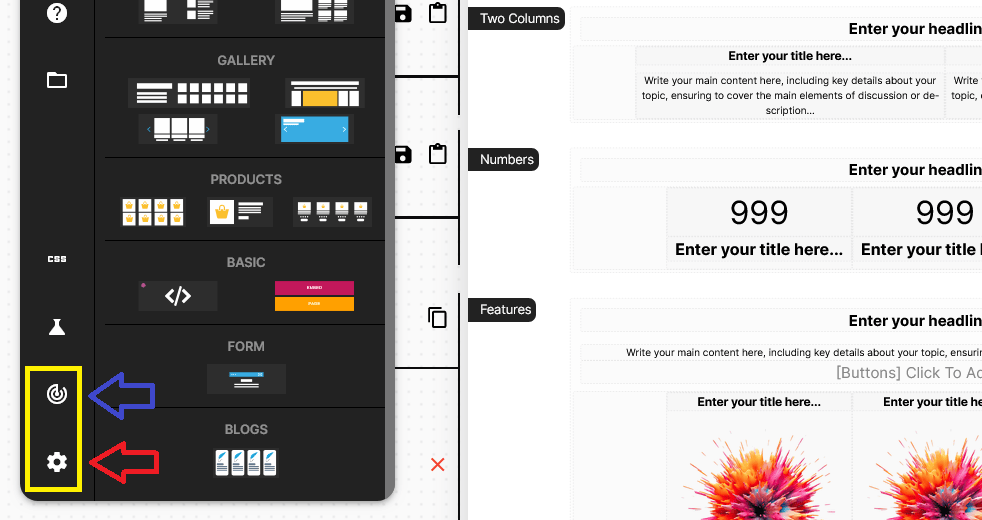
Click on any of them to select one and enter the Landing Page Designer. Inside the designer, open the left-side panel, find the “Code” element, and drag it onto the Page Builder area. This “Code” element is where you’ll paste or import the section generated by ChatGPT using the Selldone Plugin.
- Click inside the Code box to activate the toolbar— you’ll see a top toolbar appear, which we’ll be using frequently.
-The first icon (<>) opens the Code Editor, where you can paste or edit the HTML and Vue-based section code generated by ChatGPT.
-The second icon opens Properties, where you can adjust the section’s layout, spacing, and visual settings.
Step 4 – Copy Paste the ChatGPT Initial Code into the Editor
Maybe Wrong Version
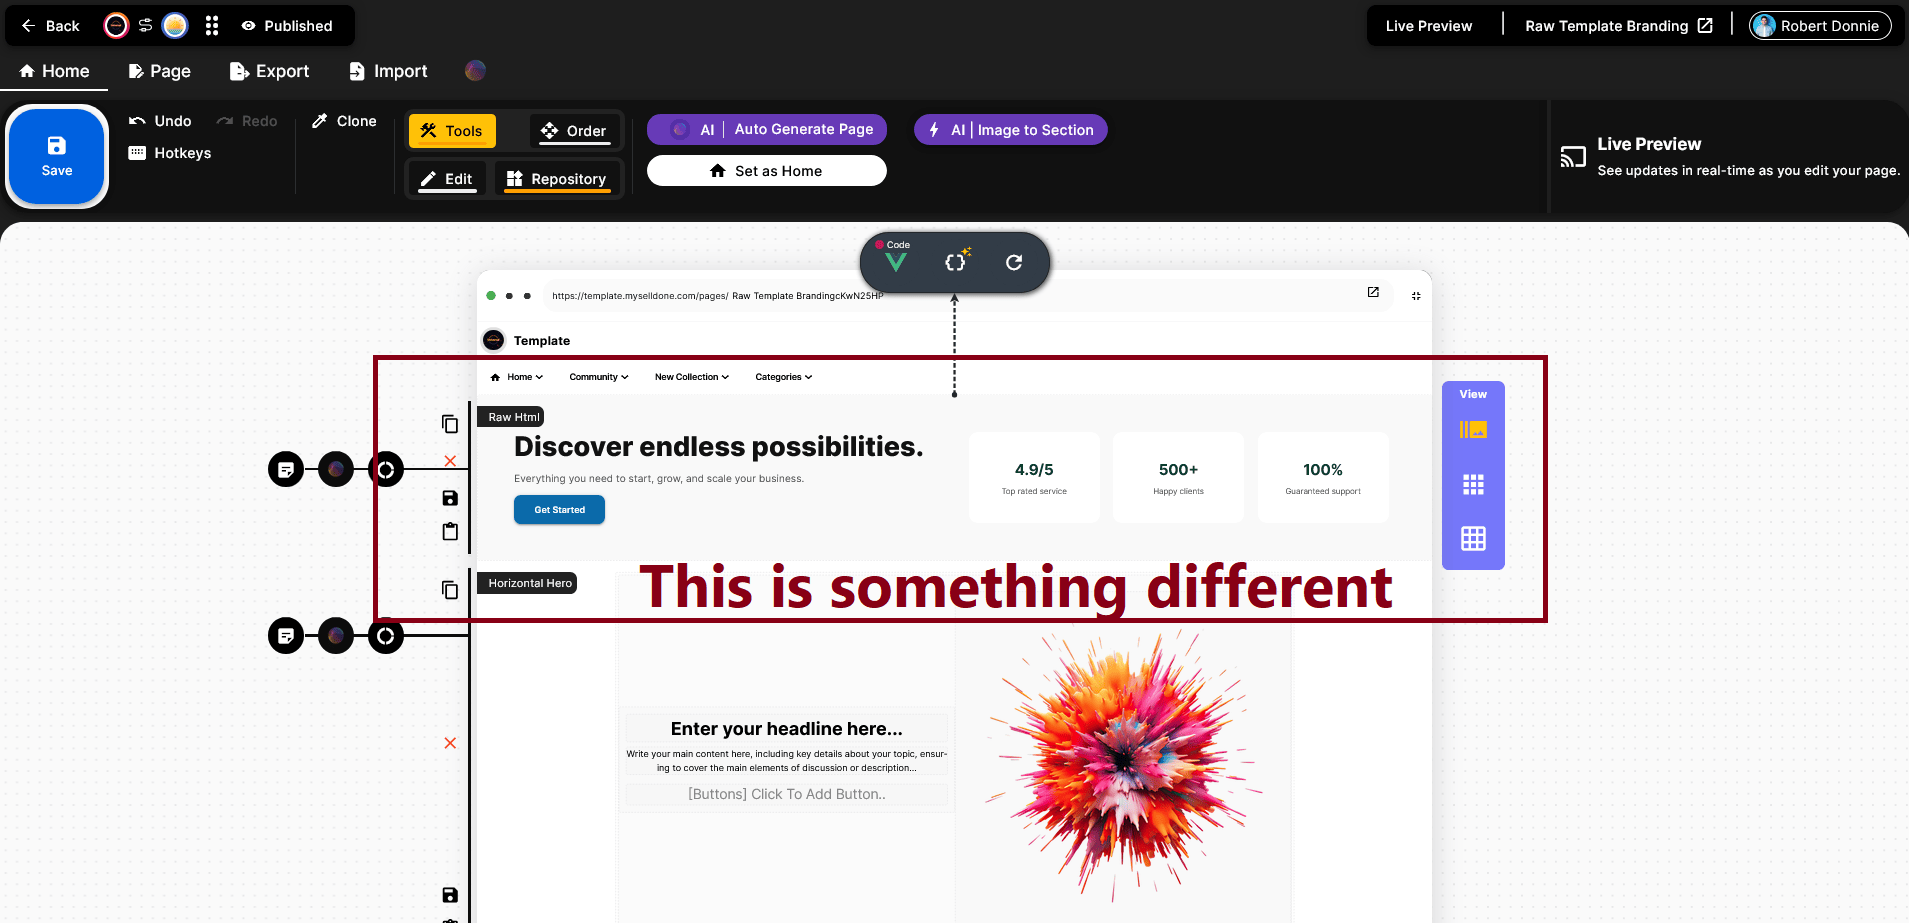
Now you need to copy the first version of the code that ChatGPT has generated for you.
As you can see in the screenshot, the result looks different from your reference image — this means ChatGPT has produced an incorrect version of the section. This is completely normal, so don’t worry.
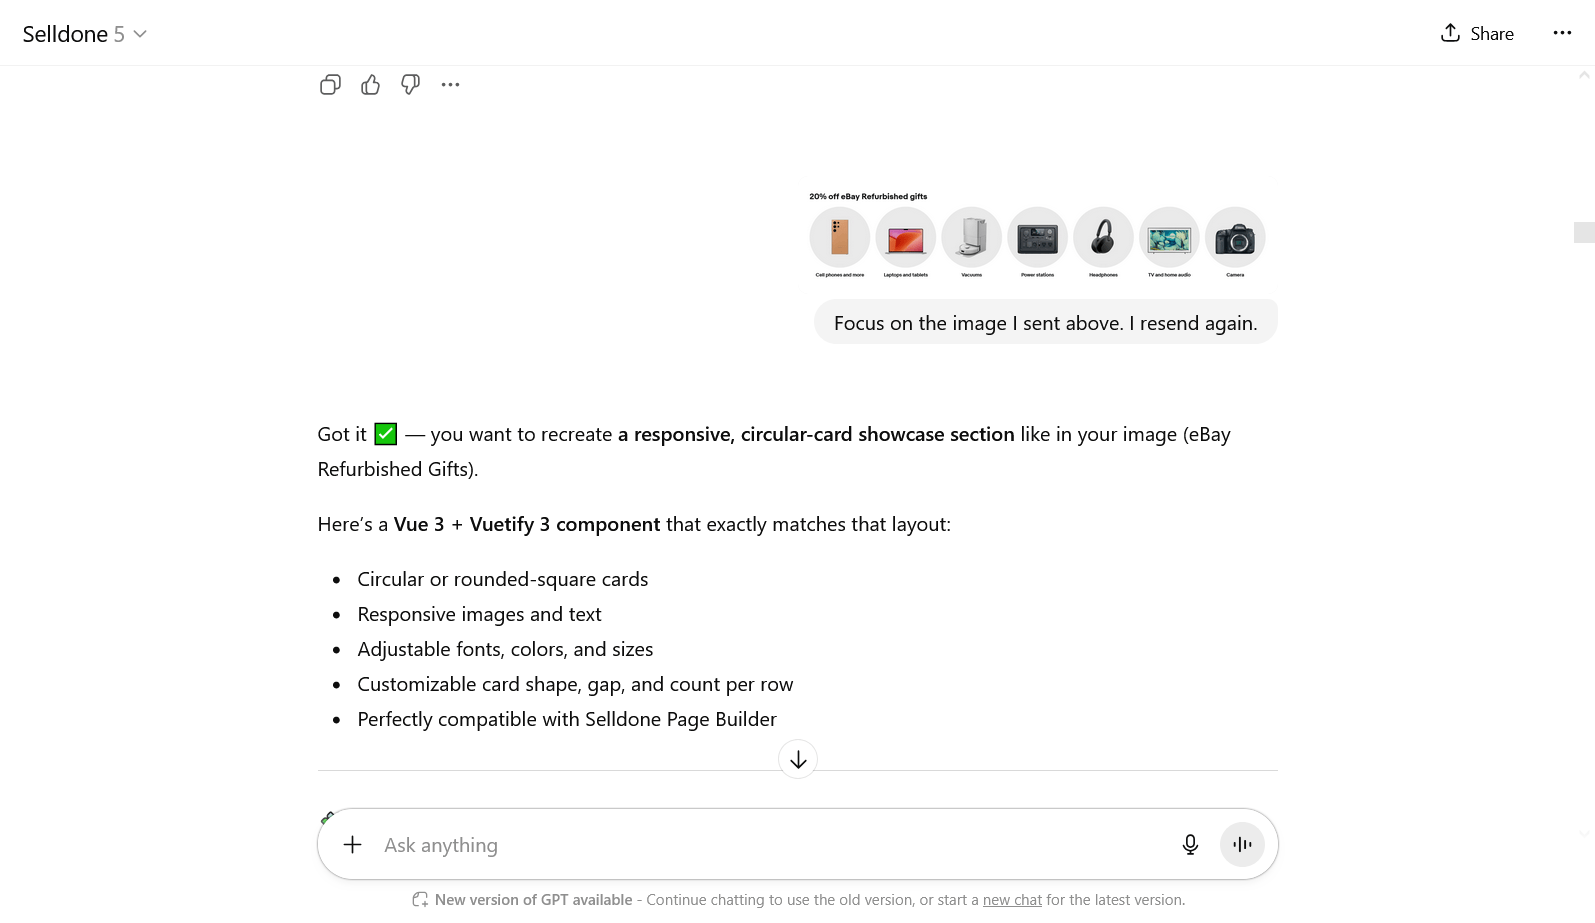
To fix this, resend the reference image and ask again, for example, by saying:
“Focus on the image I sent above. I’m sending it again.”
Now ChatGPT will start over and generate new code. This version won’t be the final one, as you may still want to add more requests and adjustments.
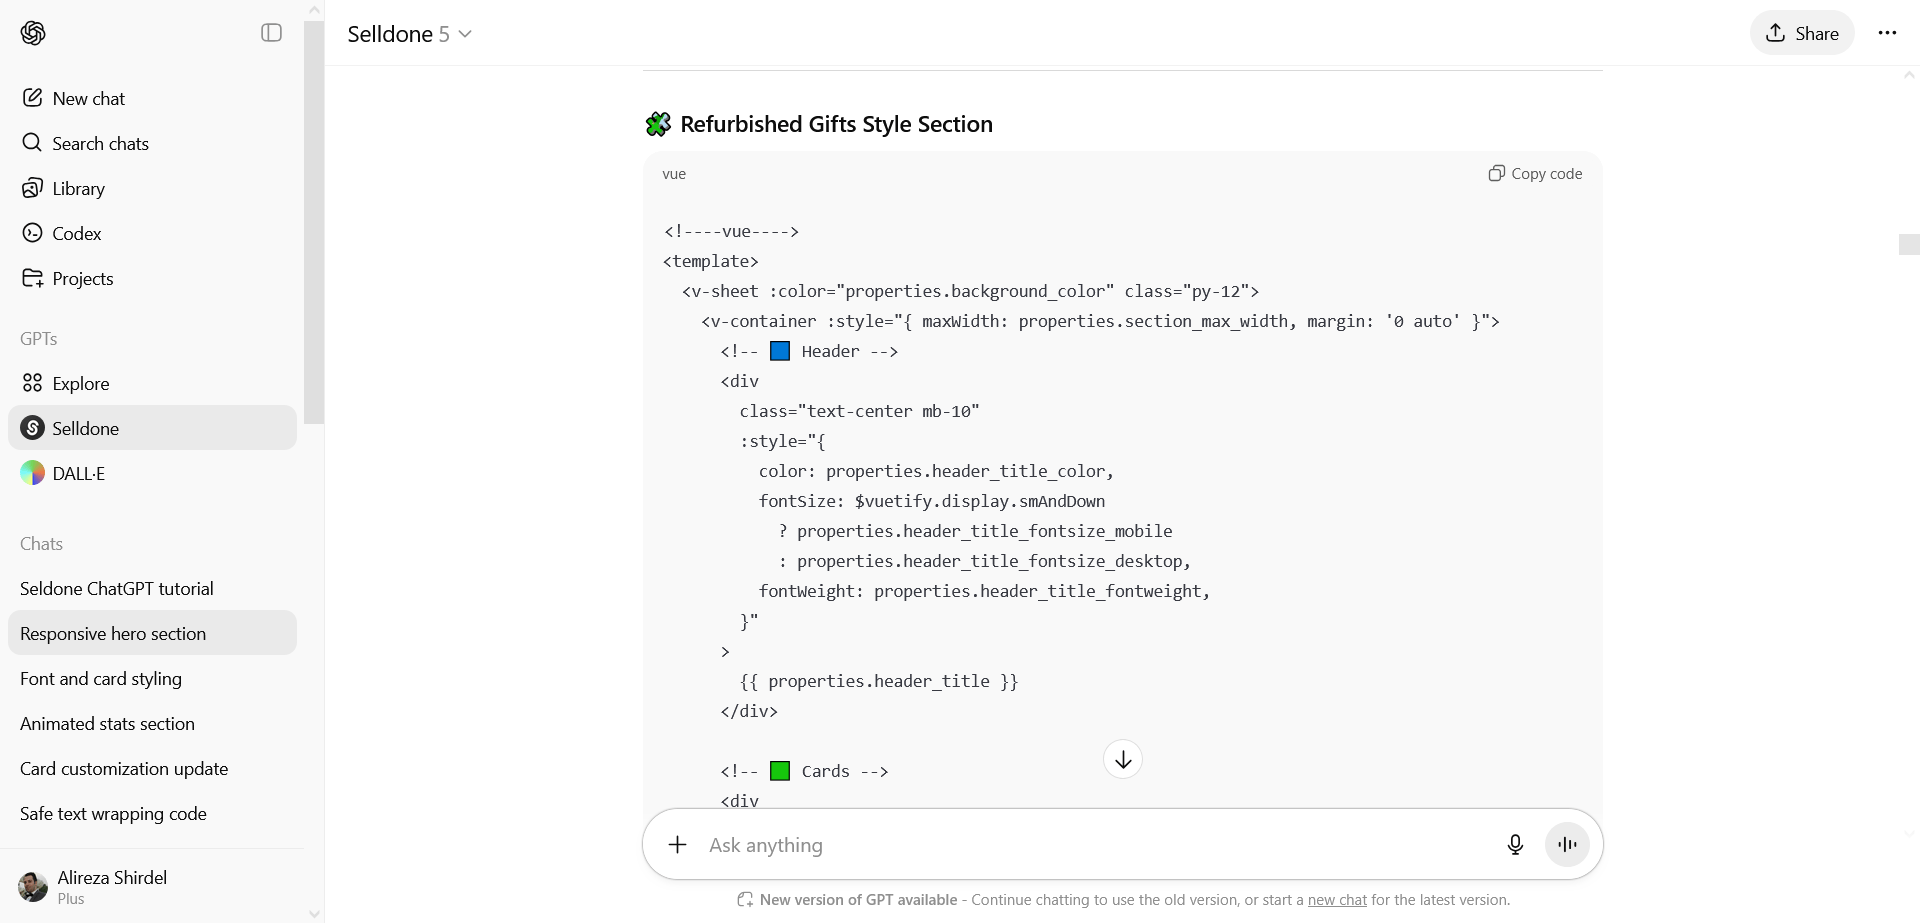
Now, copy the code and paste it into the code editor and press Apply:
Important Note: The default mode of the code editor is HTML. You must switch to the Vue option — otherwise, you’ll end up with a blank result.
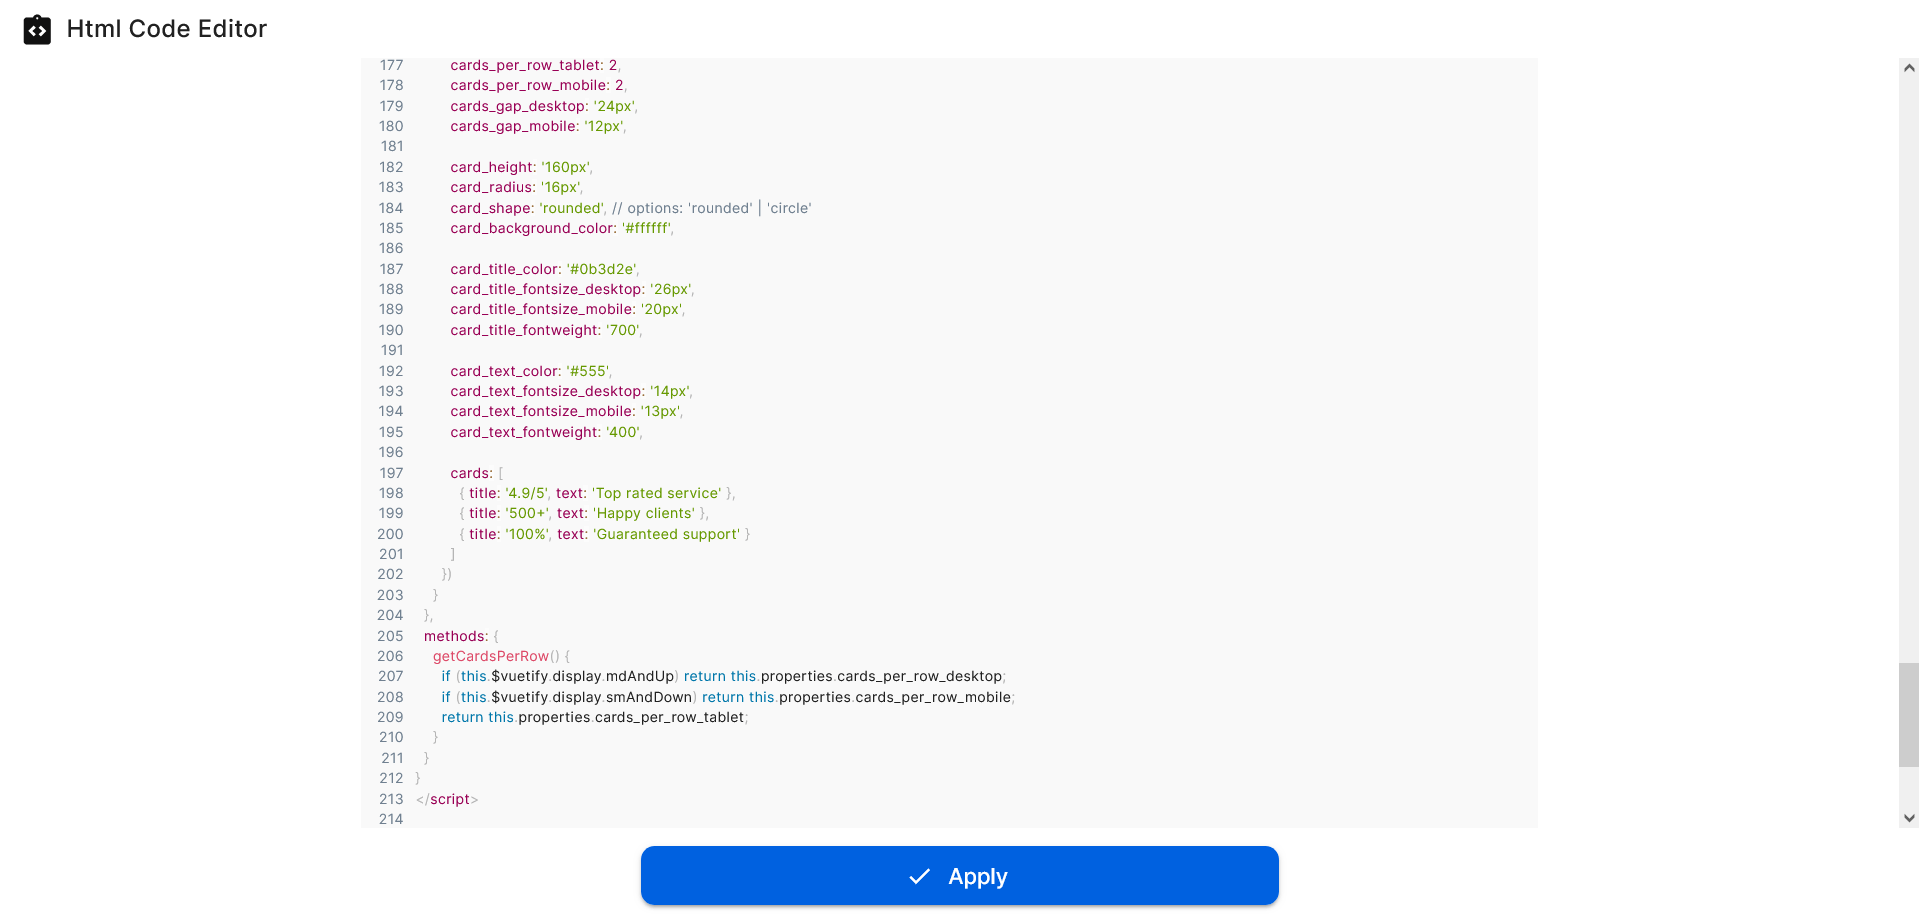
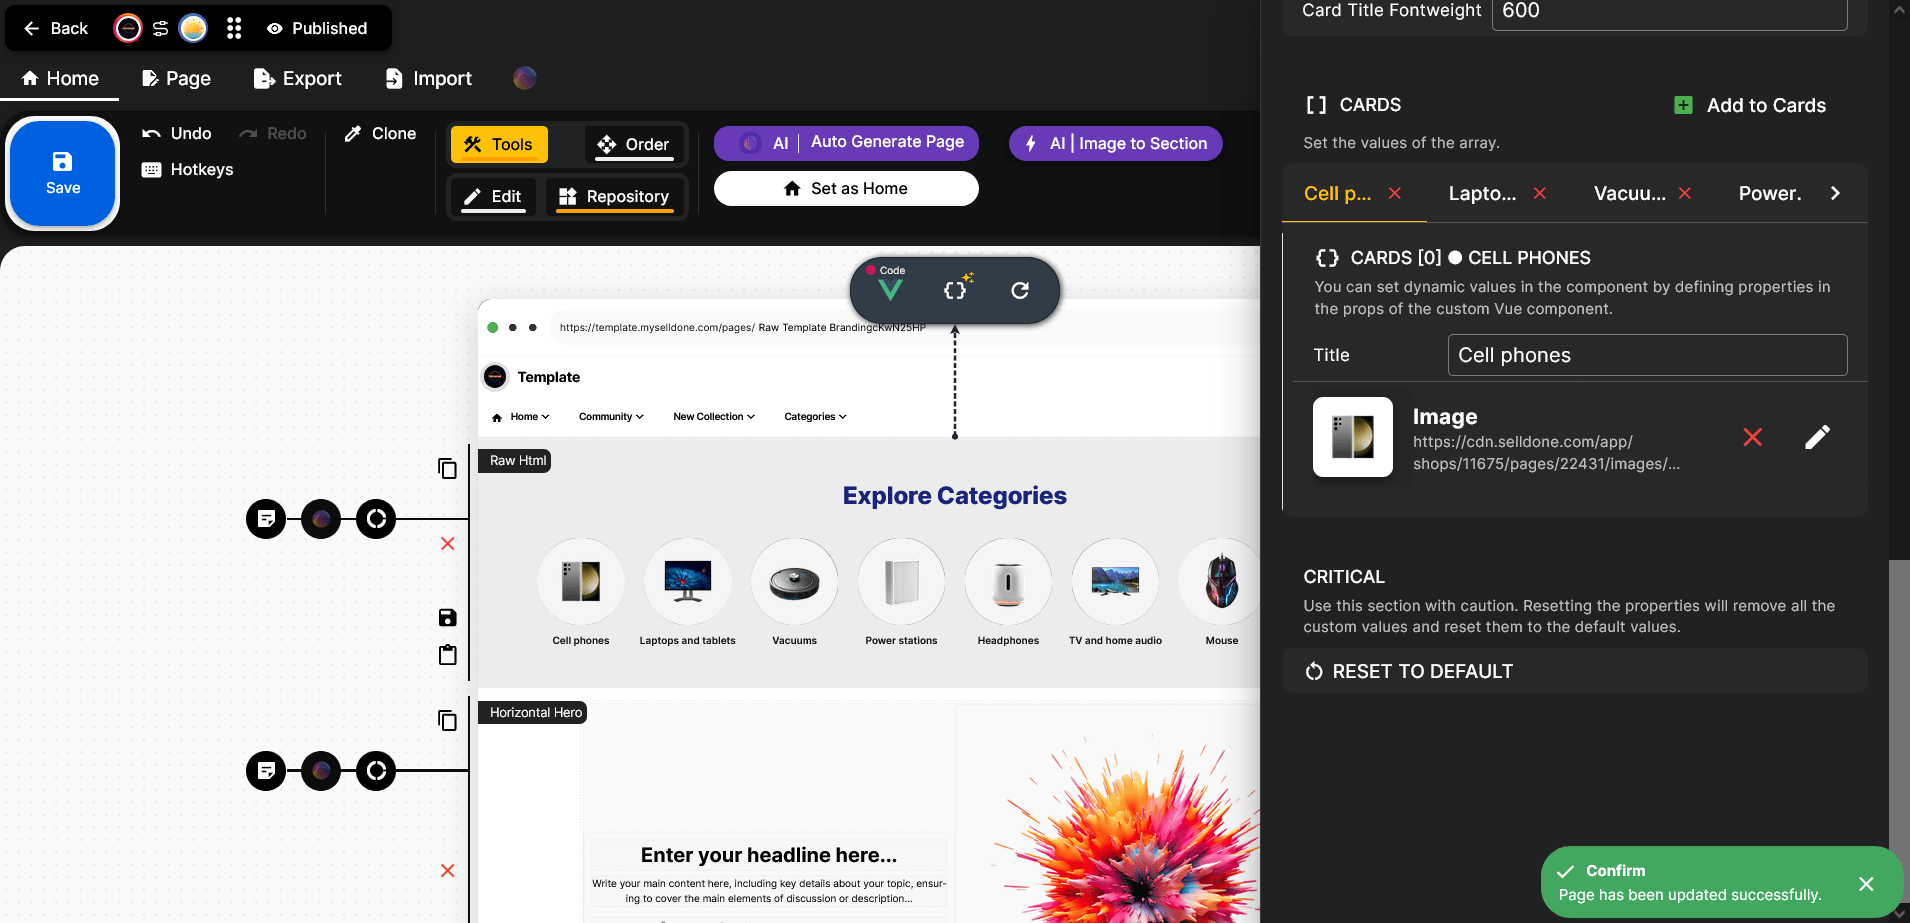
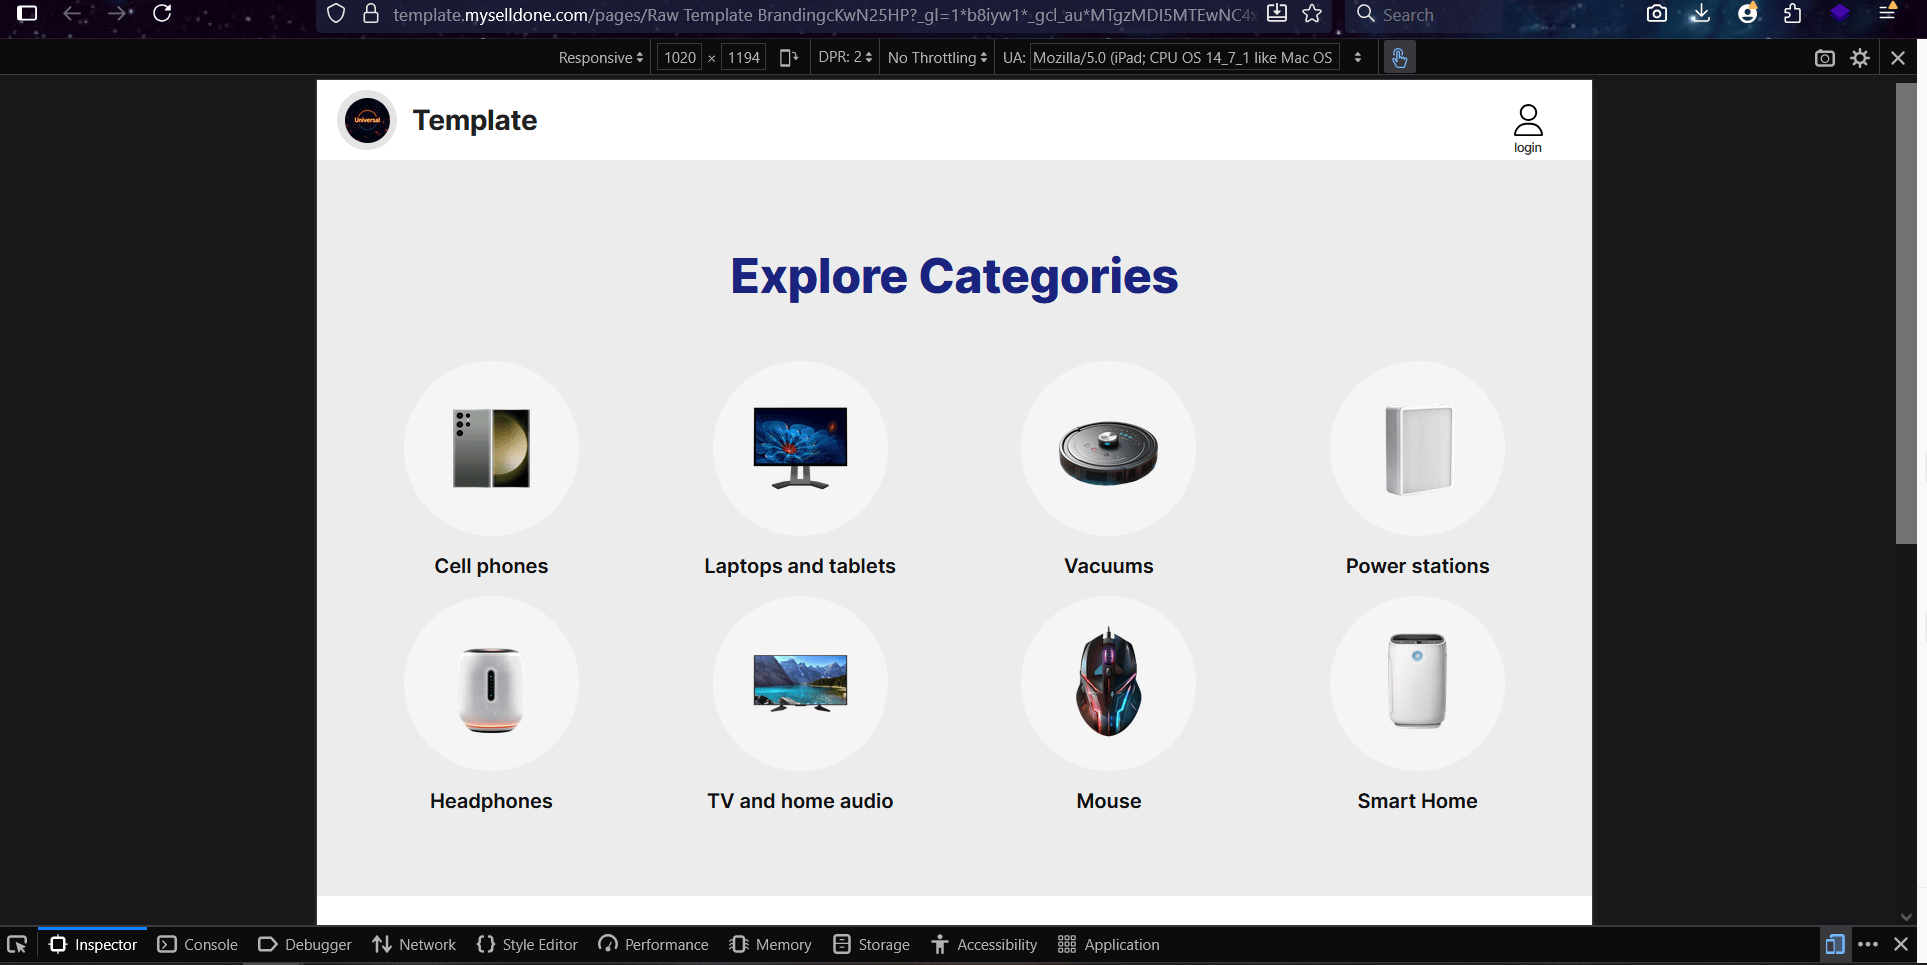
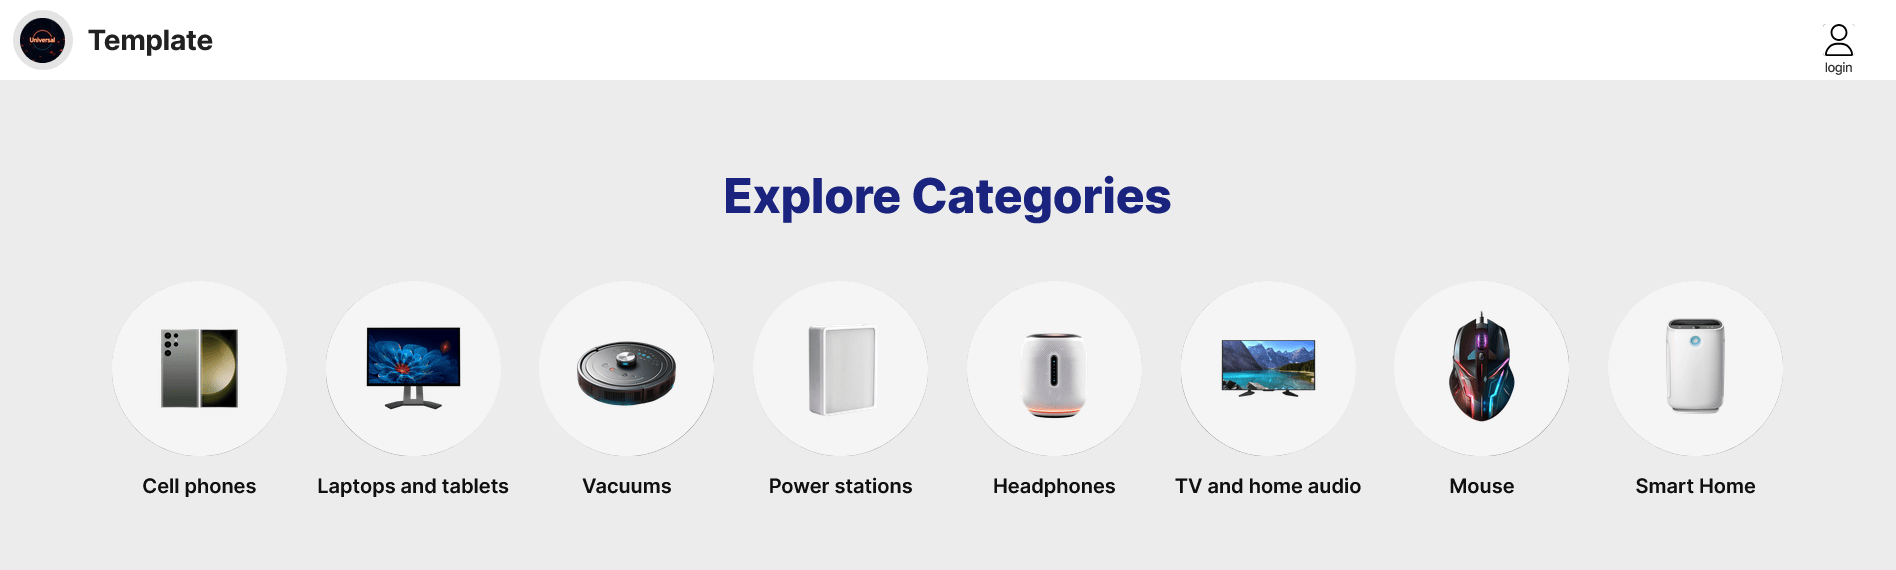
Now you see the first correct version of ChatGPT-generated section.
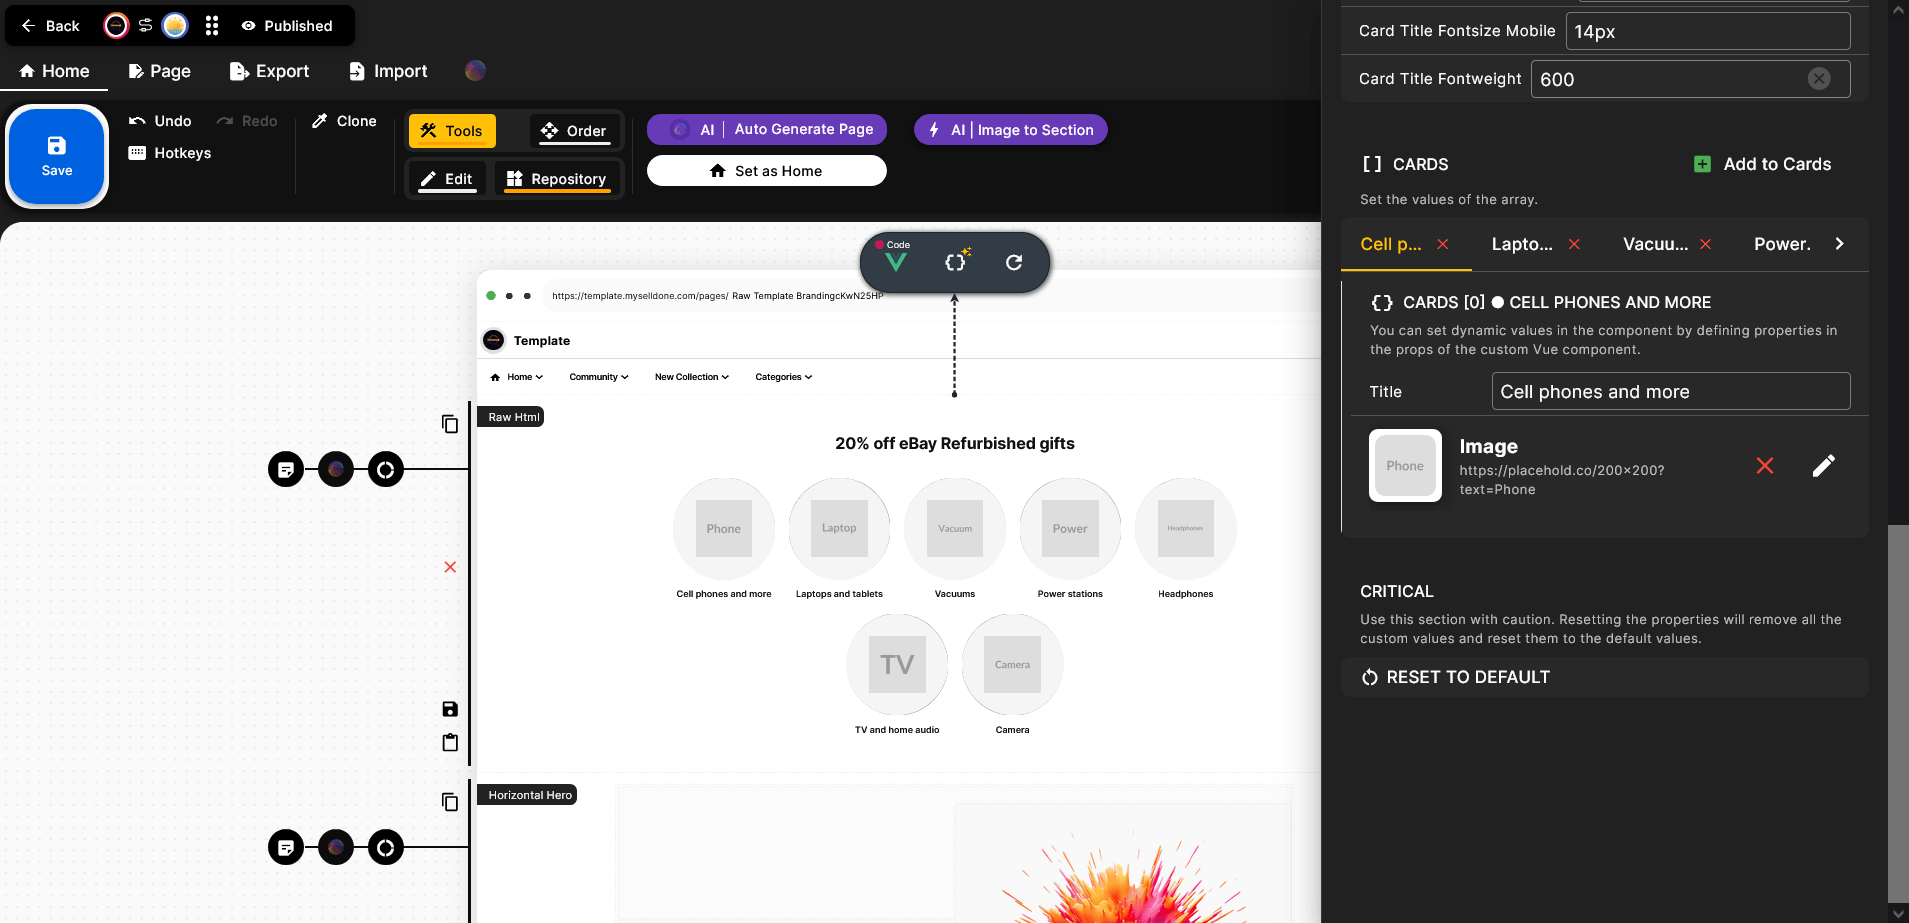
Press the second item in the toolbar (as mentioned earlier) to open the Properties menu for adjustments. As you can see, there are many settings available to help you tailor this section to your business.
RESET TO DEFAULT option:
Sometimes, when you paste an updated version of the code, you might not see any visible changes. This can happen if the edits are fundamental. In such cases, you’ll need to click the Reset to Default option. Please note that using this option will remove all your customized settings, including new texts, colors, font sizes, and even uploaded images — it’s basically a factory reset 🙂.
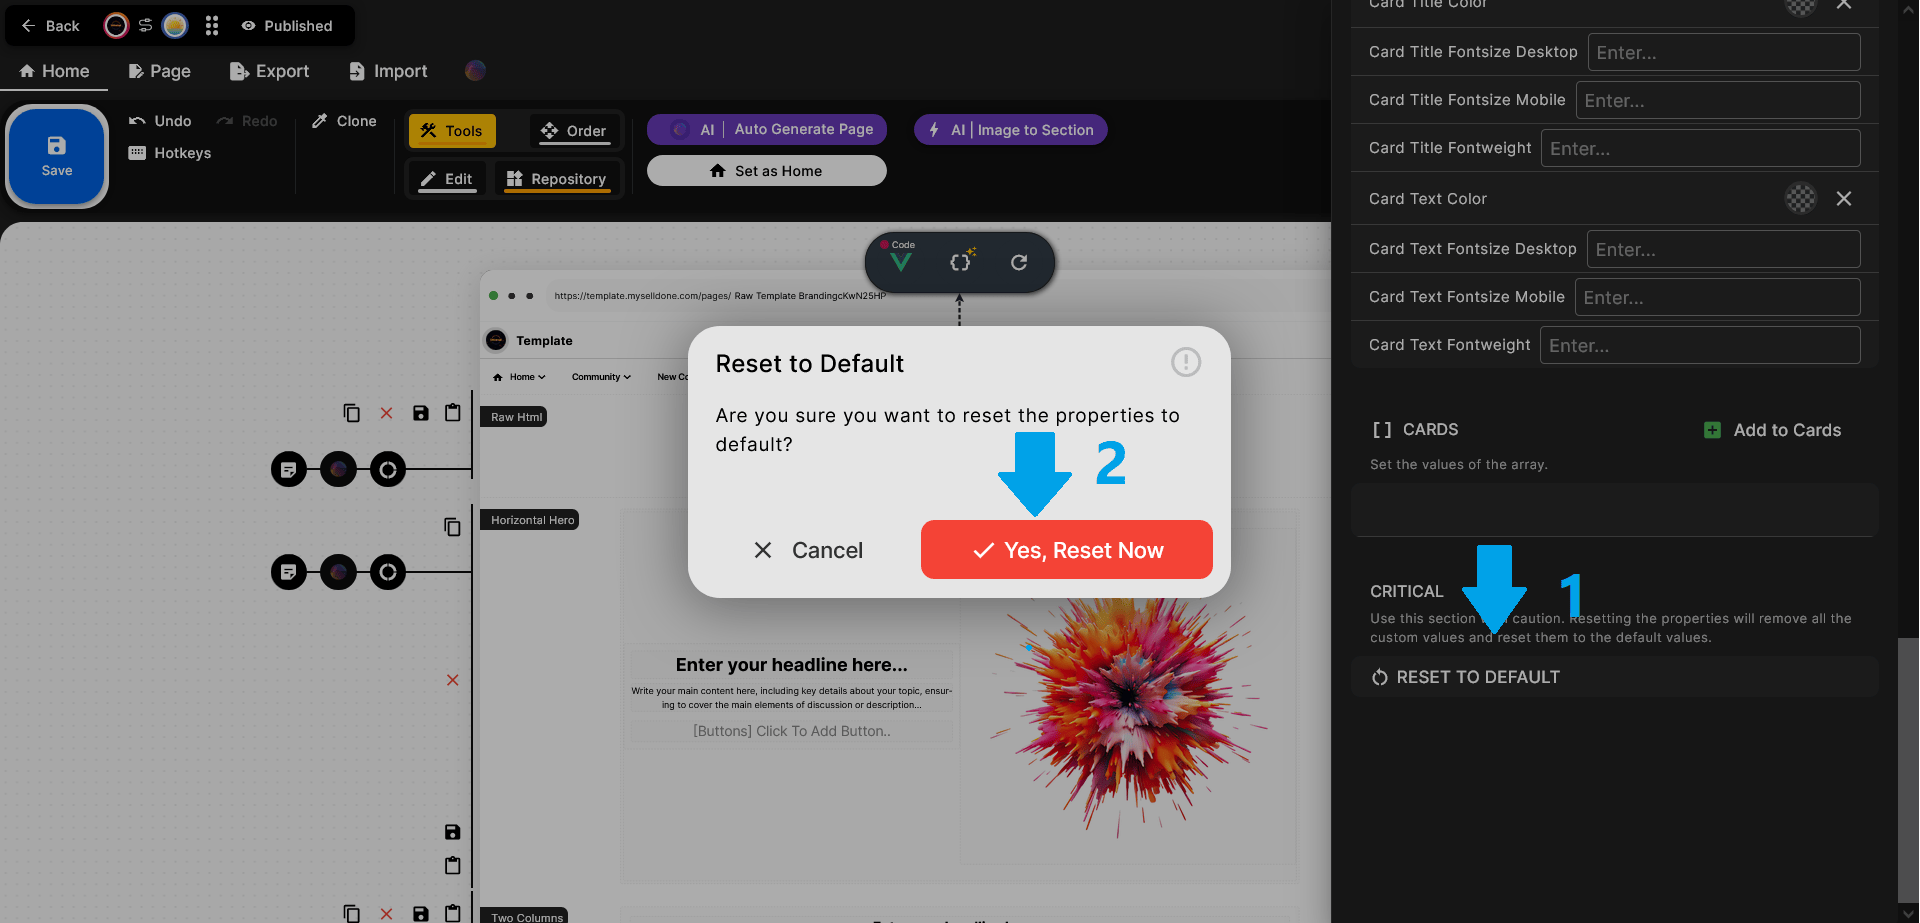
So, use this option only when your changes are not being applied properly.
Step 5 – Adjust the Section
ChatGPT, based on what it has learned from other users who have used this method to build sections, now generates more comprehensive layouts — so you don’t need to request every element one by one. This is the real benefit of chatting more and more with it: the longer and clearer your conversation, the better ChatGPT understands your design preferences and delivers more complete, accurate results.
The default generated code is already quite responsive, but you can still adjust details such as font sizes, font weights, section or card heights, widths, and other visual elements based on your preferences.
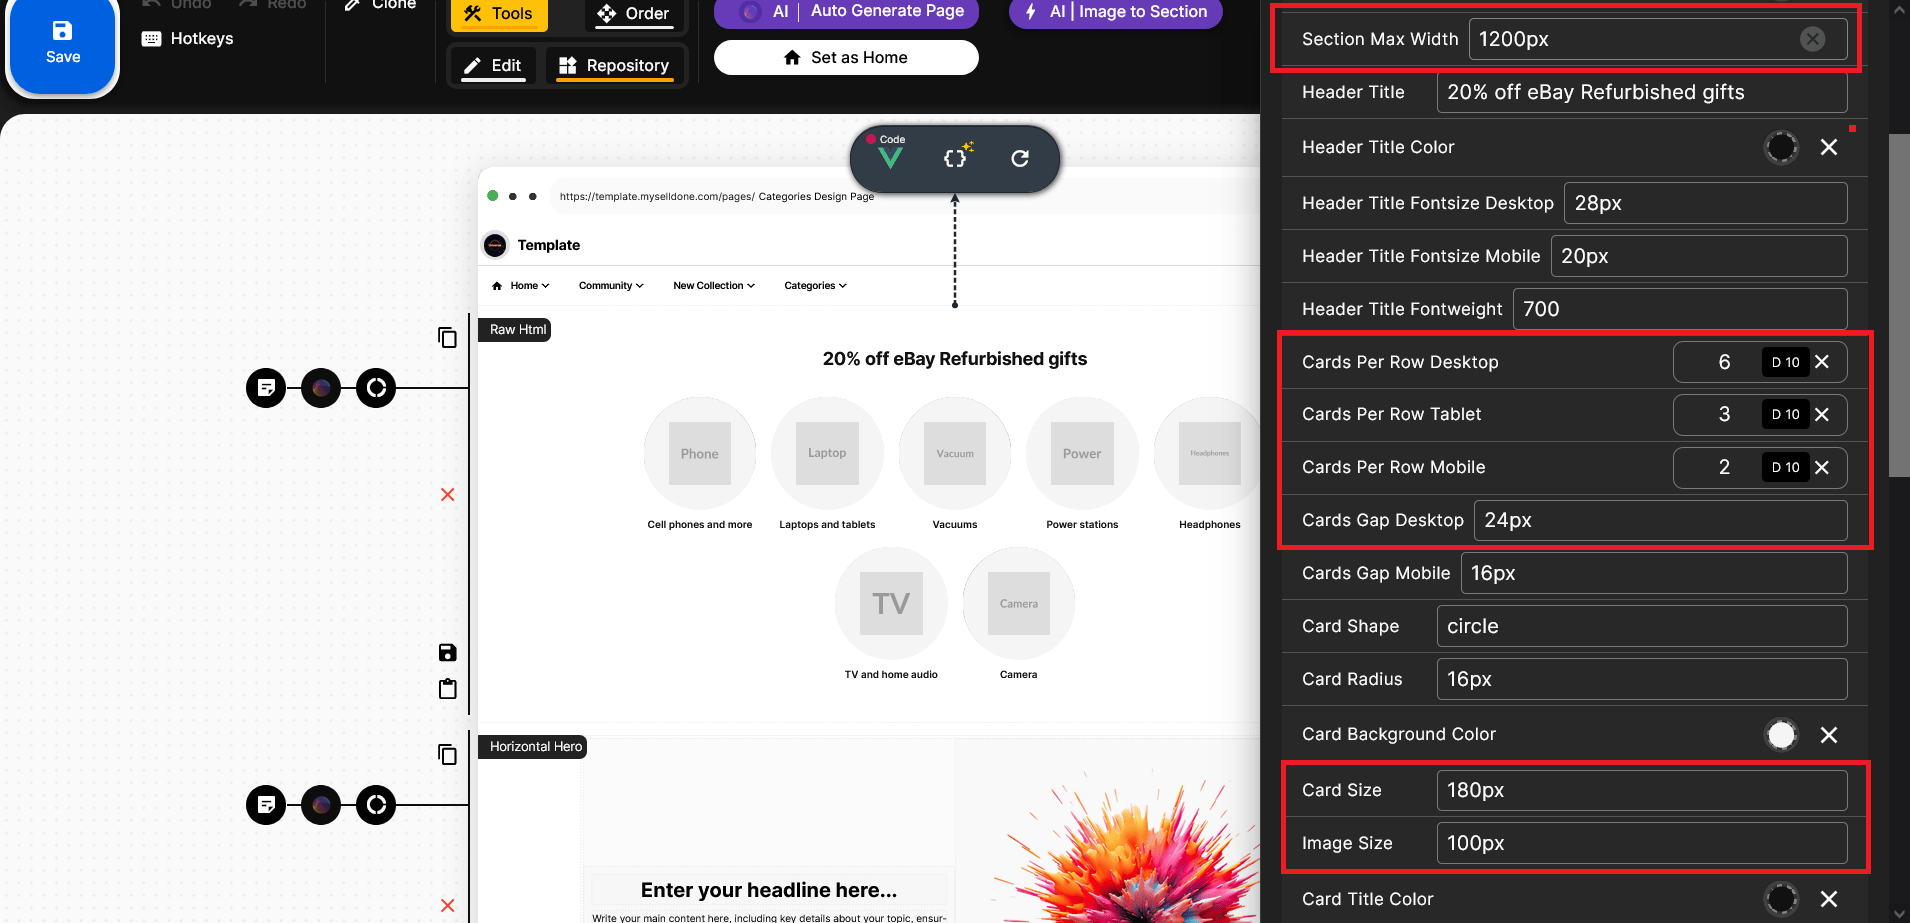
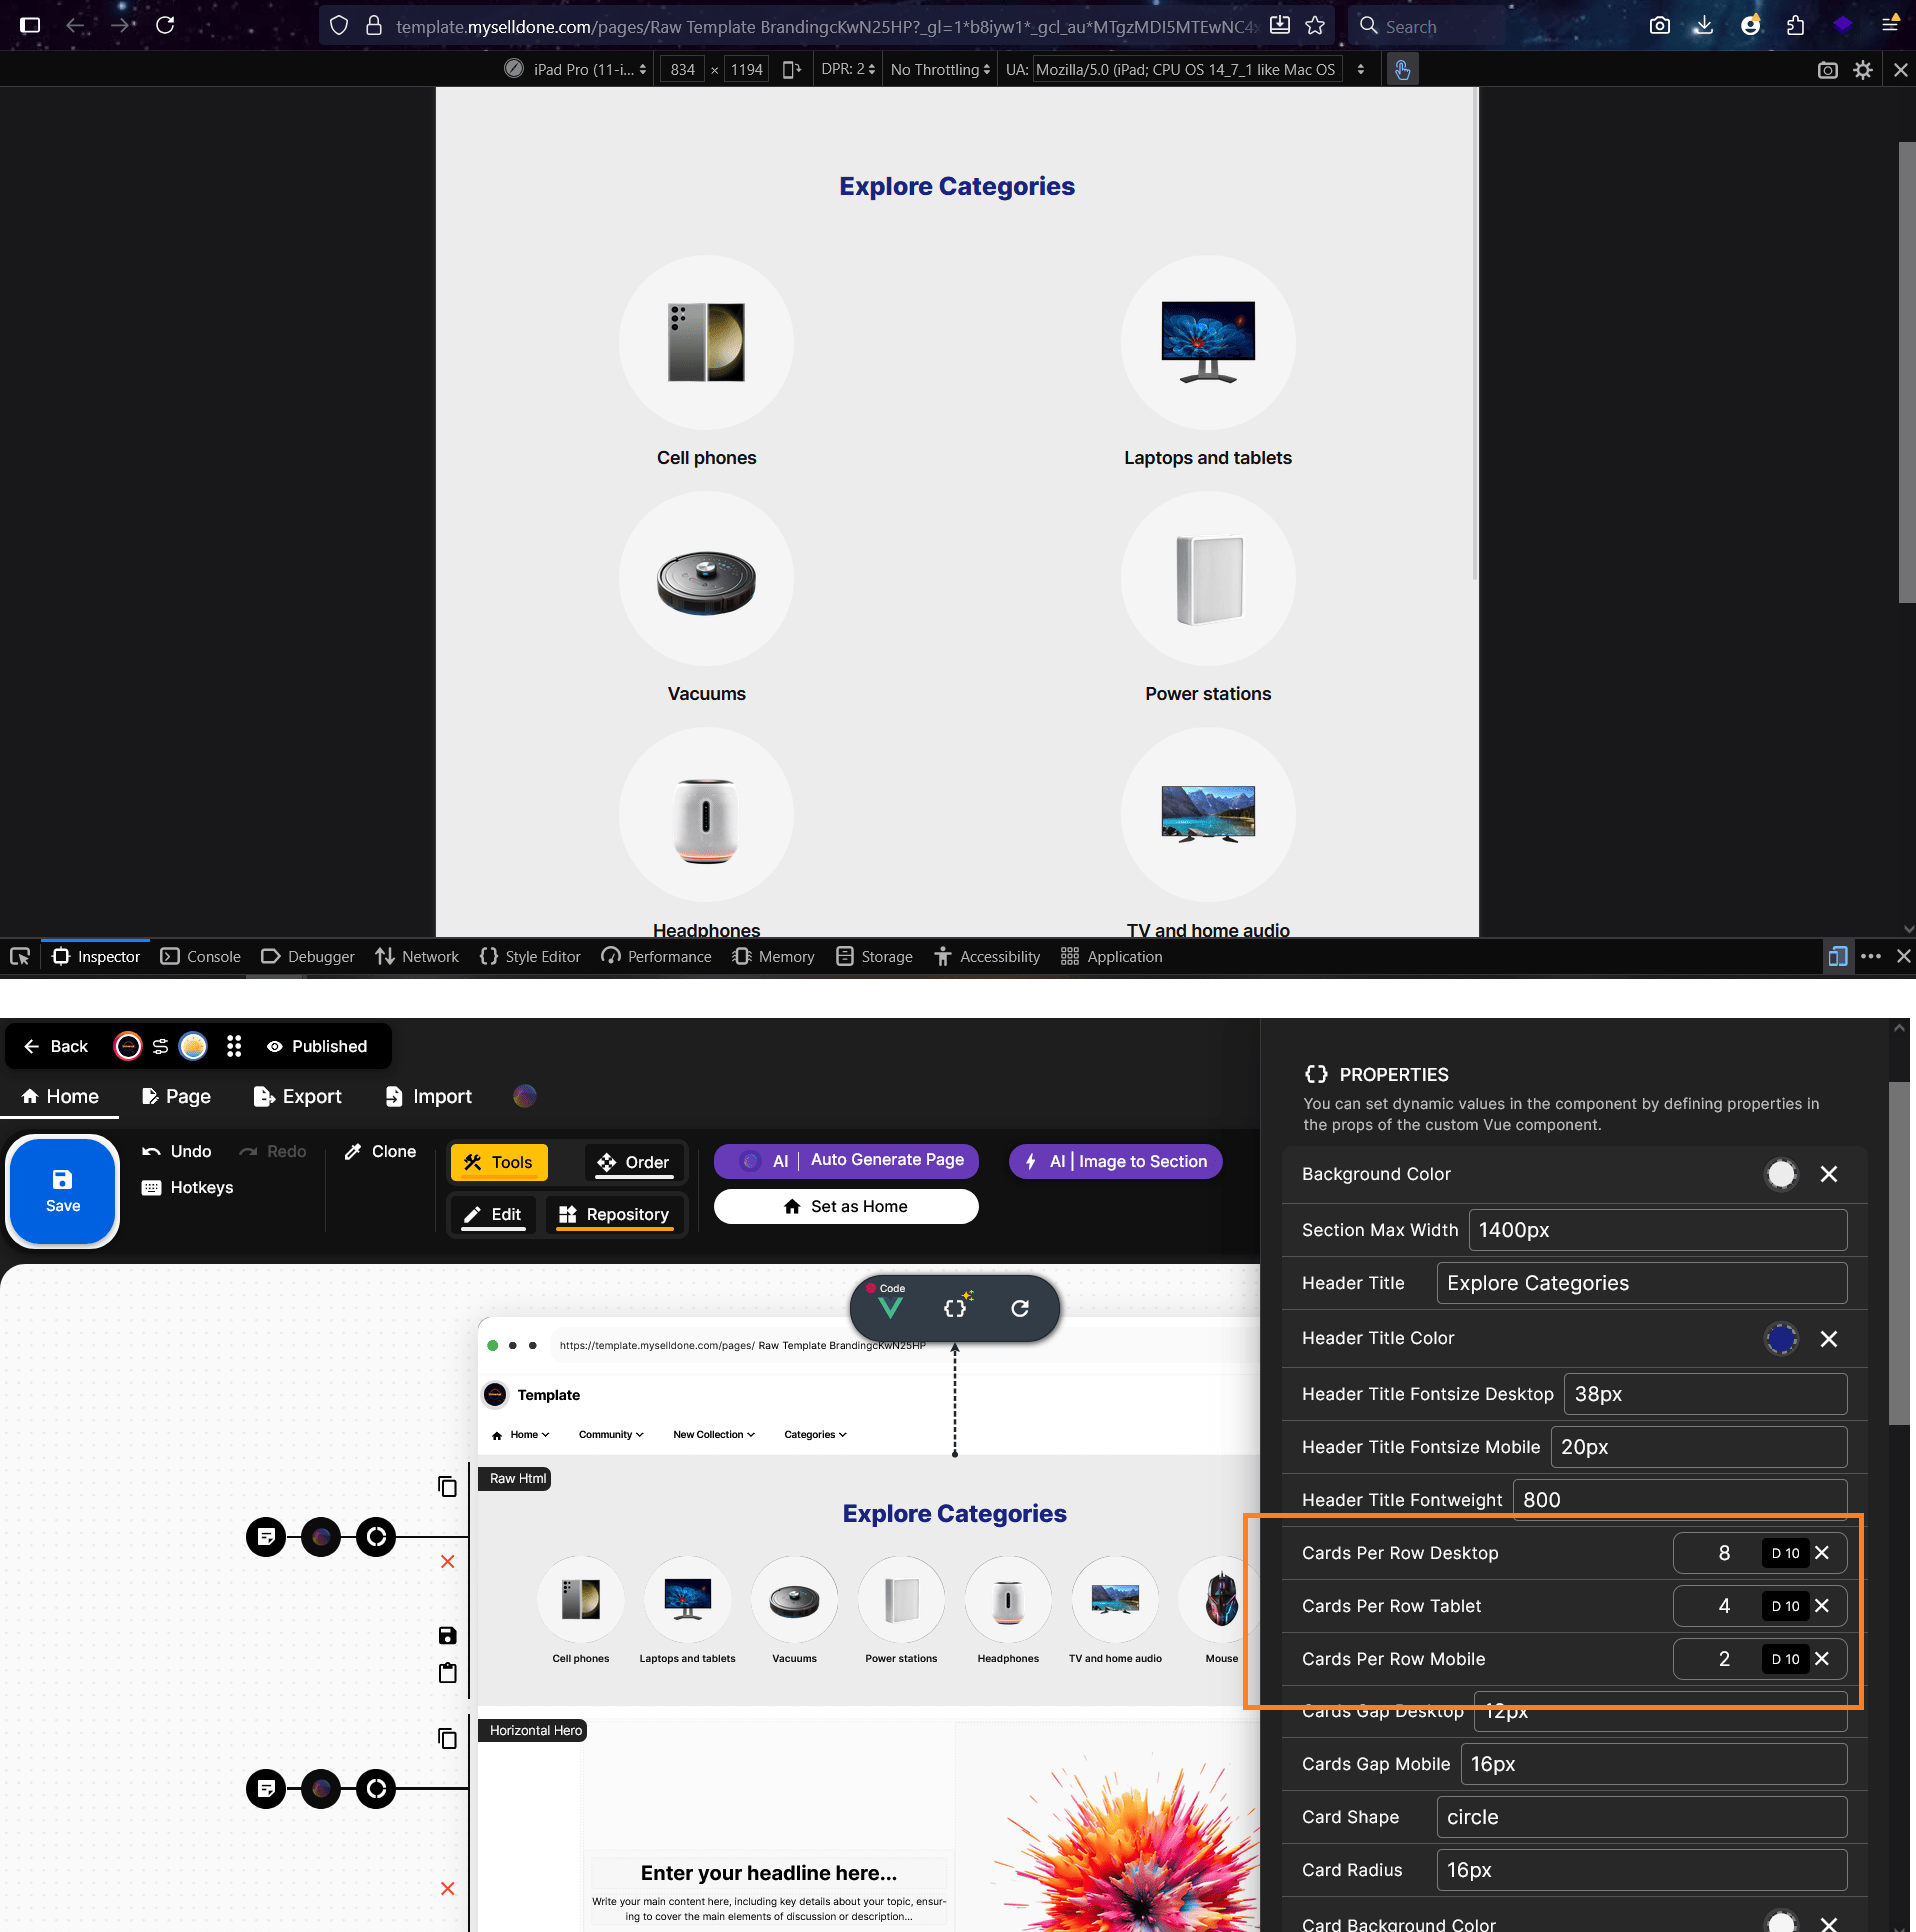
Here, for example, you can set Selldone to display 8 cards per row on large desktop screens, 4 cards on tablets, and 2 cards on mobile devices.
Let’s see how ChatGPT interprets and applies these adjustments — we may need to make a few more edits or requests in the next steps.
In this case, you should change the Section Max Width to 1400px for a better layout. You can also adjust the cards per row to 8, 4, and 2 for desktop, tablet, and mobile sizes respectively.
To refine the spacing, try reducing the Cards Gap (Desktop) to around 12px. In addition, you can decrease the card height from 180px to 160px, or adjust the image size to fit your design.
It’s important to remember that you can easily customize the look and feel by experimenting with these settings — just play with the numbers and find what best matches your style.
To better visualize the result, you can upload your own images. We recommend using images with transparent backgrounds, so the Card Background Color option applies evenly to all of them — giving your section a cleaner and more professional look.
After uploading your images, editing the texts, and finalizing everything, click the Save button — or press Ctrl + S on Windows to save instantly.
Now it’s time to open the Live Page and see your section in action.
To view it live, you can use the Live Preview option or click the button next to it that displays your landing page name — this will open the page in buyer view, just as your visitors will see it. However, I don’t recommend using Live Preview to check the final version, as it doesn’t fully reflect the page’s responsiveness across different devices — something we’ll discuss in more detail below.

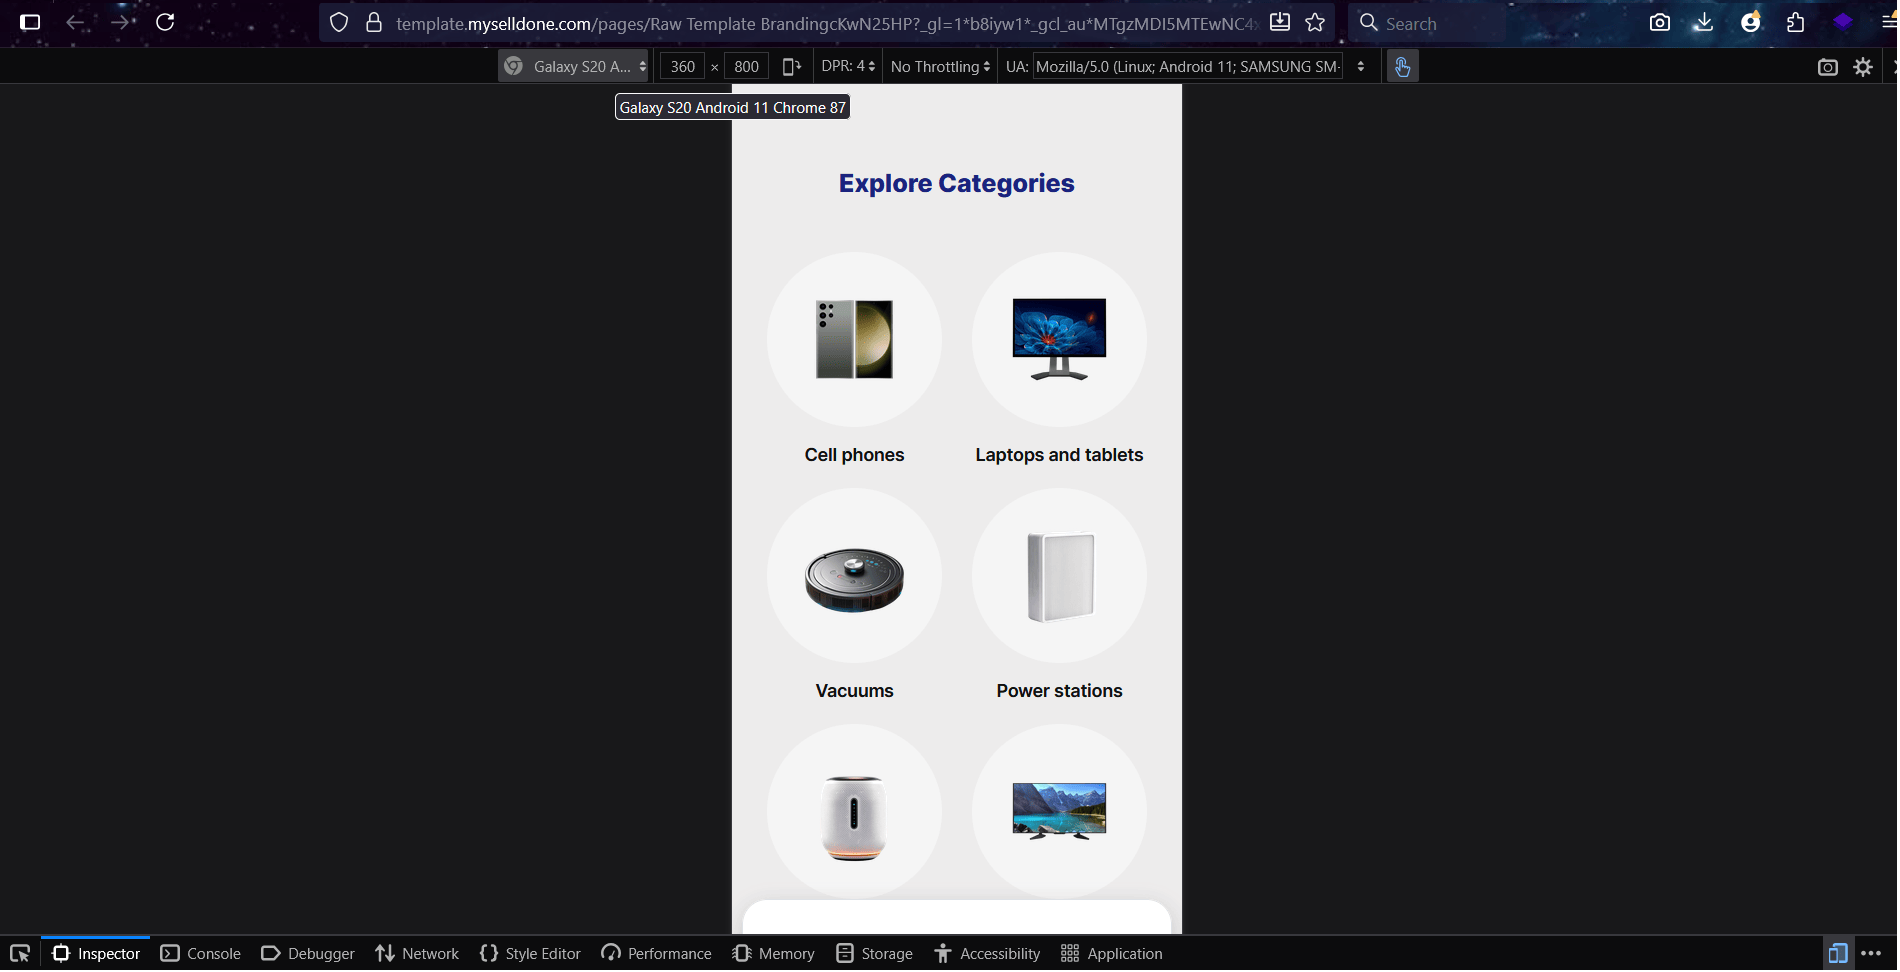
This is the result of the code. Now we need to test it across different screen sizes to make sure everything works properly.
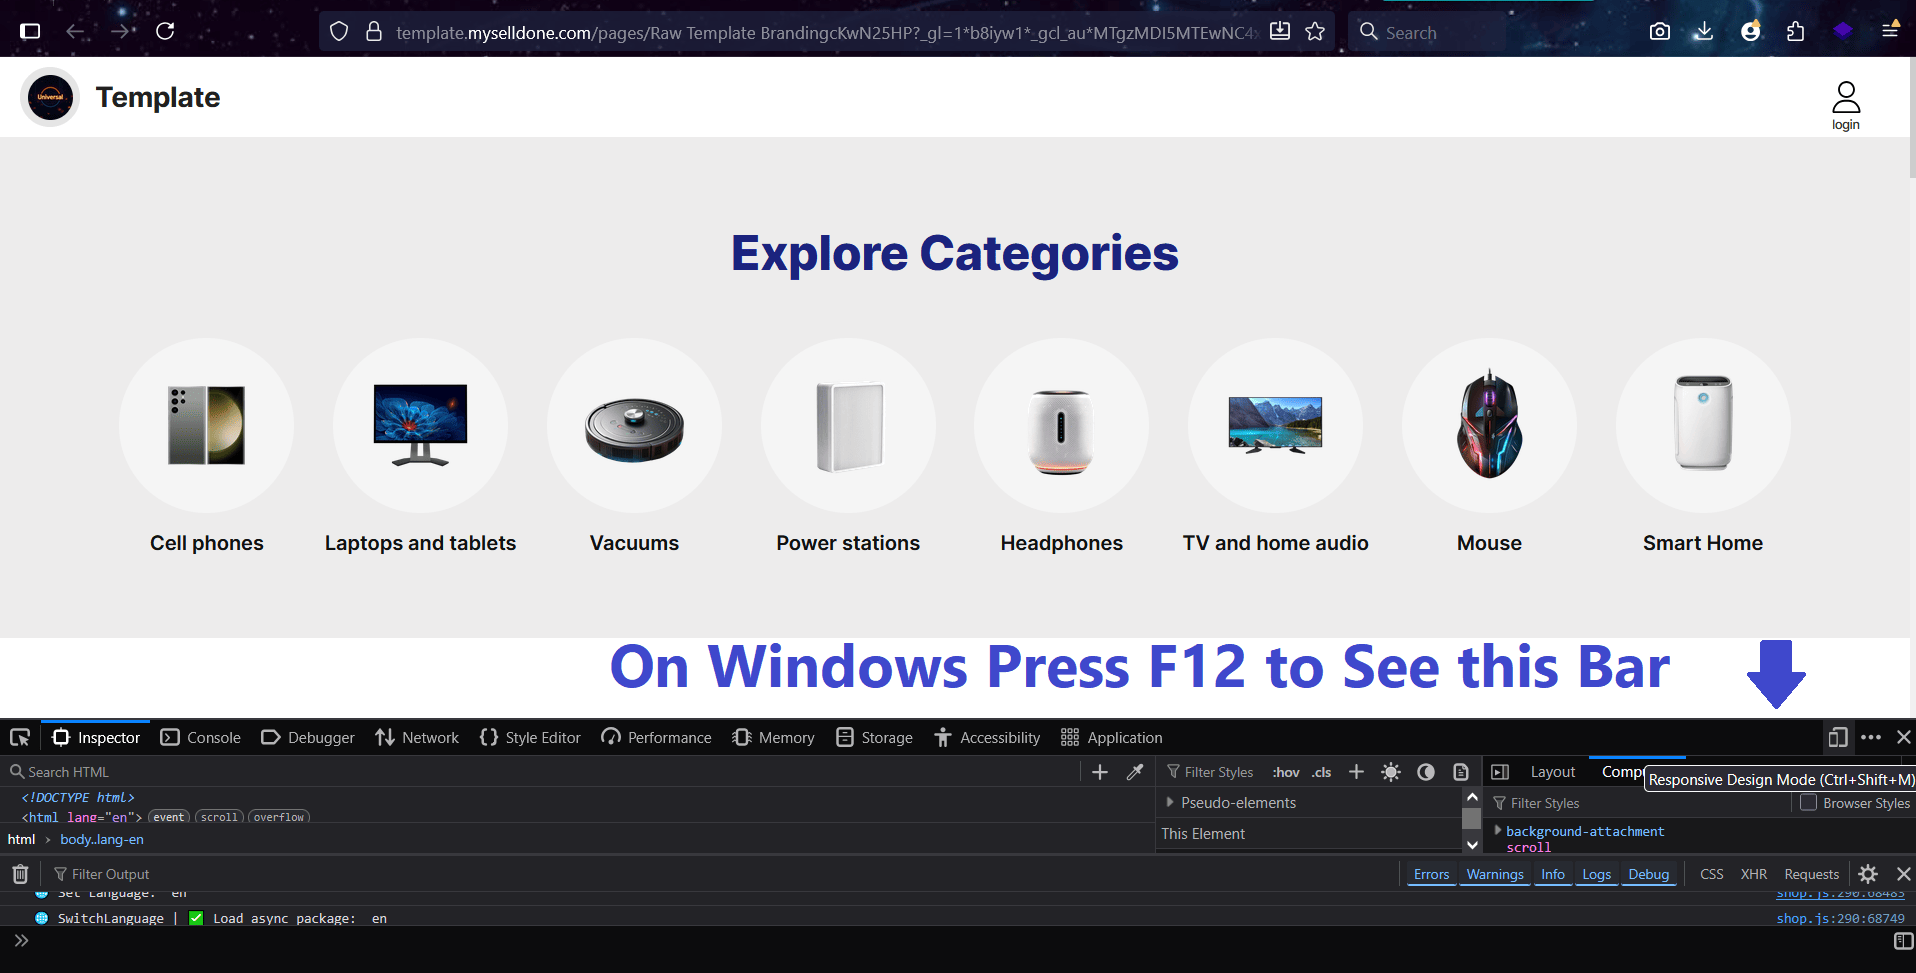
To open the Web Developer Tools in Windows browsers, press F12.
This tool allows you to preview the page in various screen sizes — without needing to test it separately on mobile, tablet, laptop, or other devices.
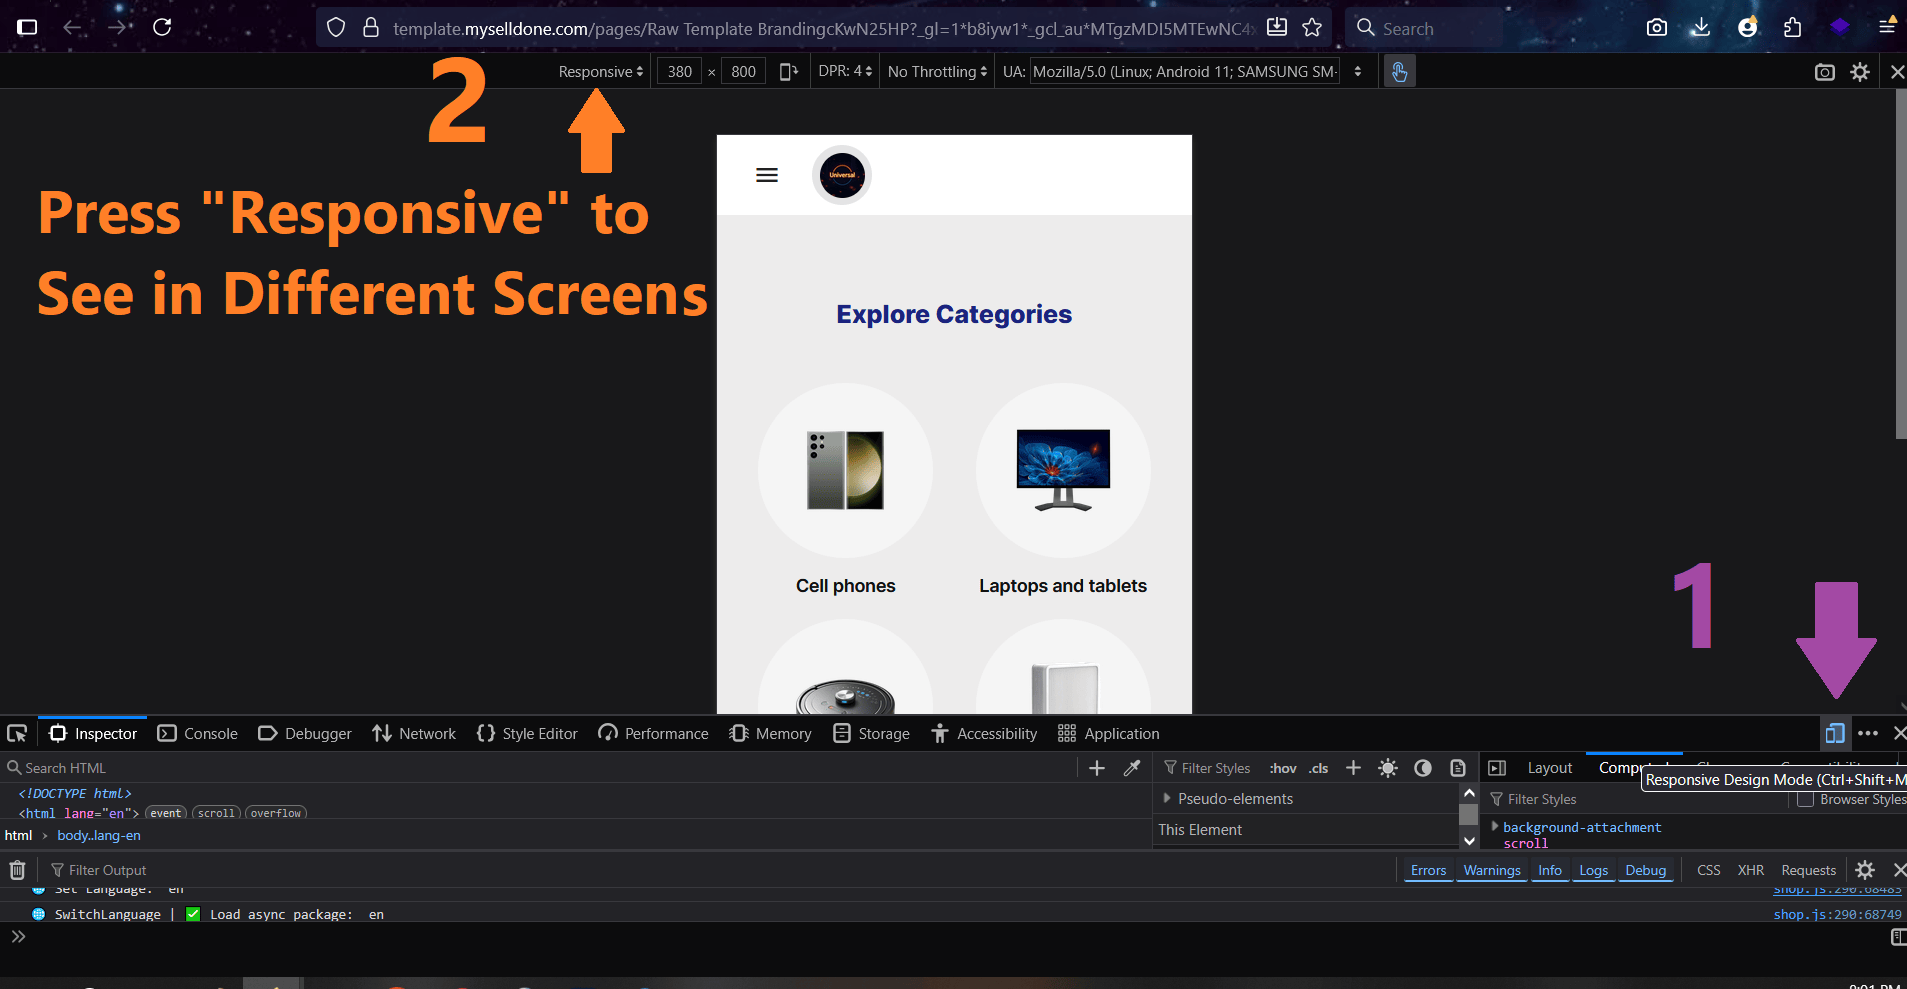
Now, from the top menu, select Responsive to preview how your section looks on different screen sizes.
As you can see, the mobile version looks clean and fully responsive.
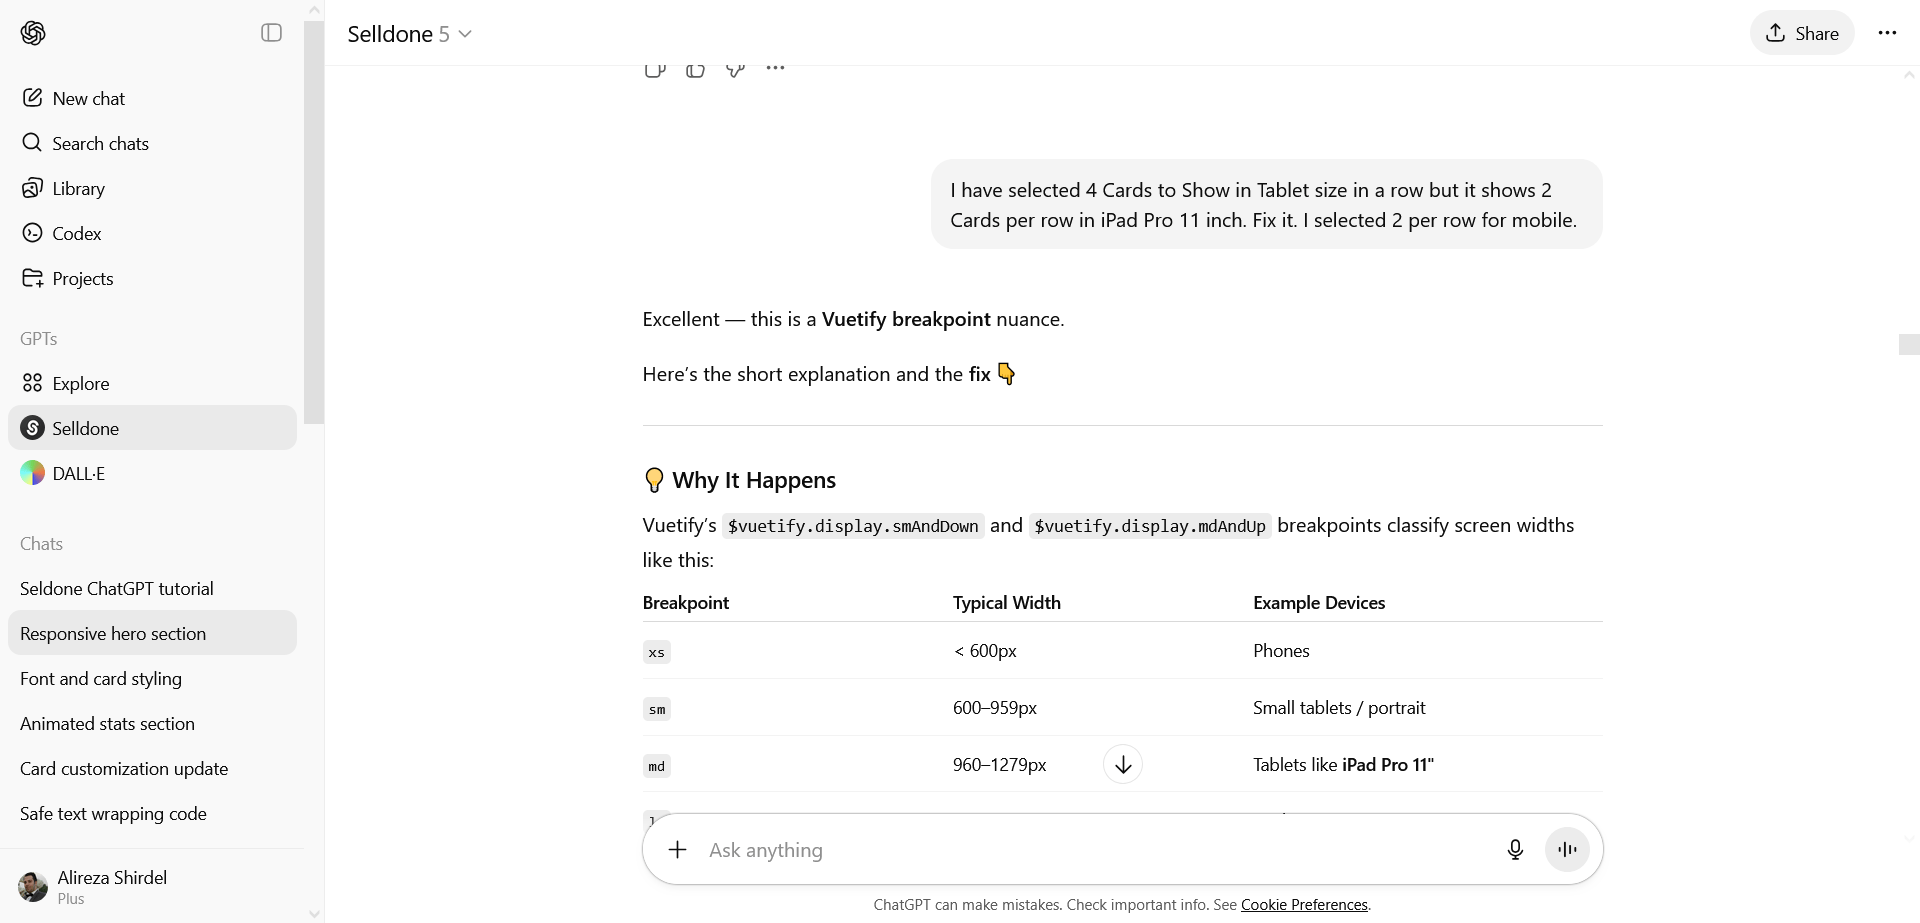
In tablet view — specifically on the iPad Pro 11-inch — our settings (4 cards per row on tablet) aren’t being applied, and it’s showing only 2. We need to ask ChatGPT to fix this issue and recode.
Step 6 – Iterate and Refine
Don’t stop at the first version — this is where the real creativity happens. You can keep chatting with ChatGPT to adjust details like:
• Make the section responsive on all screens.
• Add hover animation.
• Use gradient buttons.
Each round updates your section instantly.
💡 Pro Tip: The more you chat and describe what you want, the better ChatGPT understands your design style. Over time, it learns your preferences and produces more accurate, higher-quality results.
Here, you should clearly explain the issue to help ChatGPT understand it better.
Remember, it can’t read your mind — you need to describe the problem in detail, just like in this example comment:
I have selected 4 Cards to Show in Tablet size in a row but it shows 2 Cards per row in iPad Pro 11 inch. Fix it. I selected 2 per row for mobile.
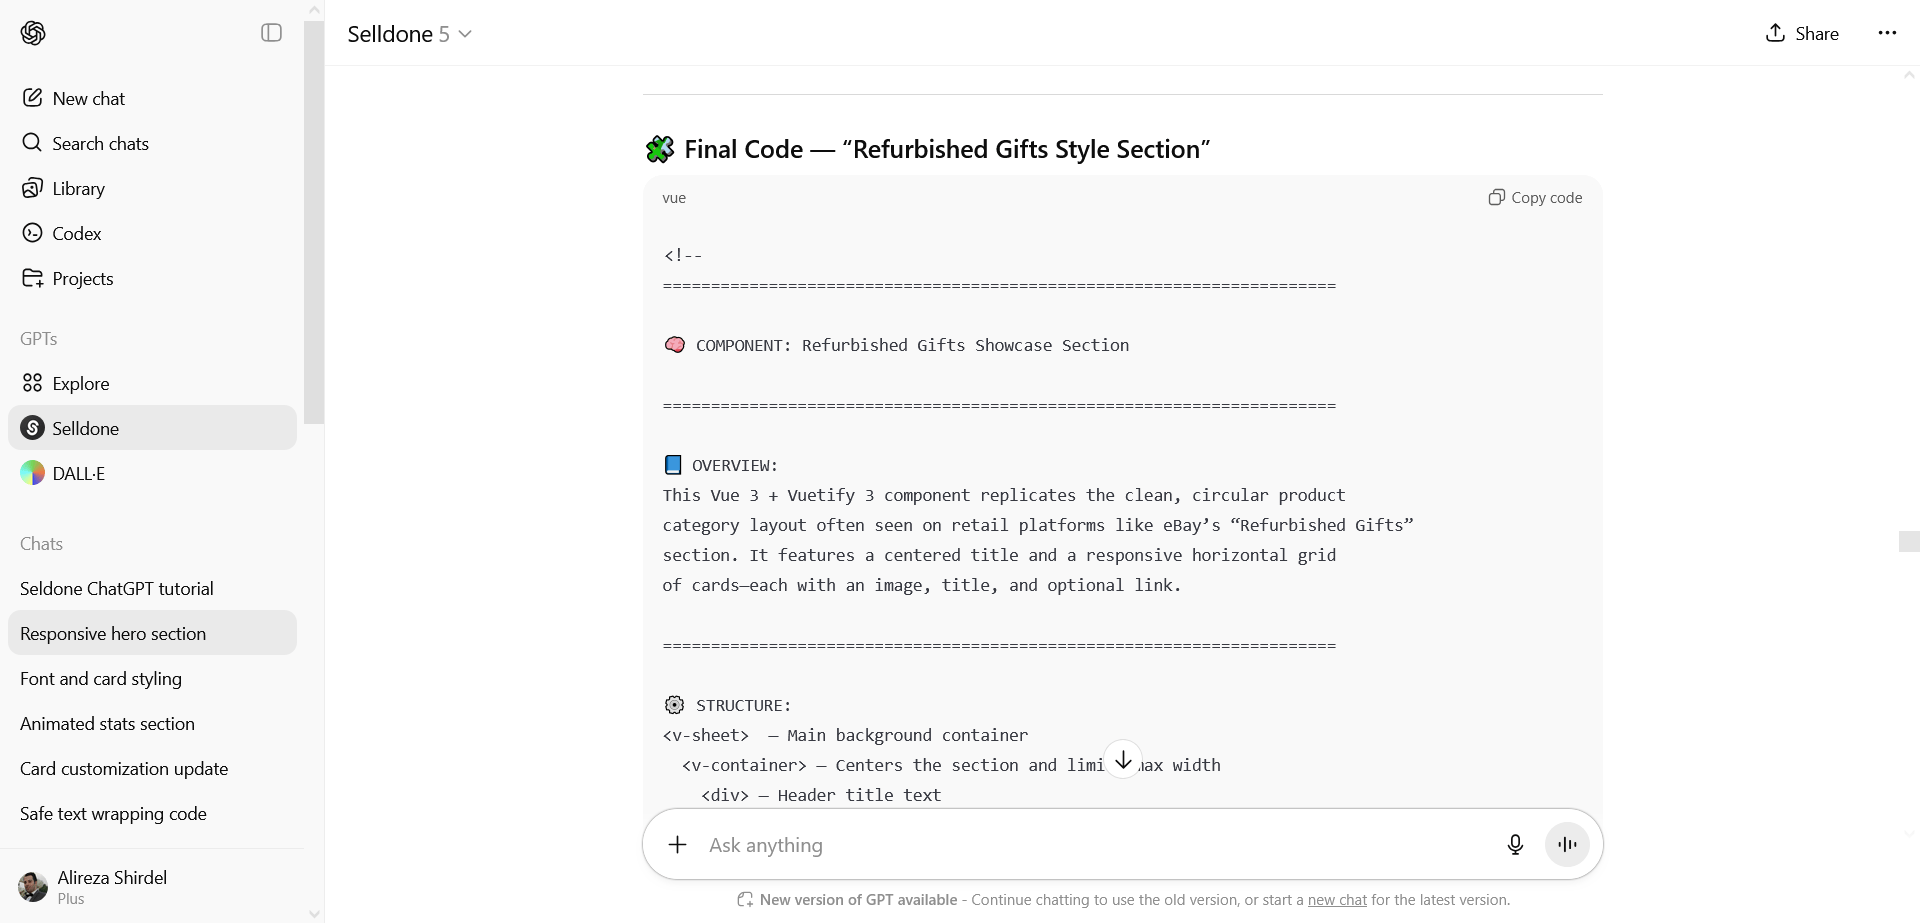
When ChatGPT replies to your request, it sometimes provides only the specific code modifications that you need to manually replace or add, like the image below.
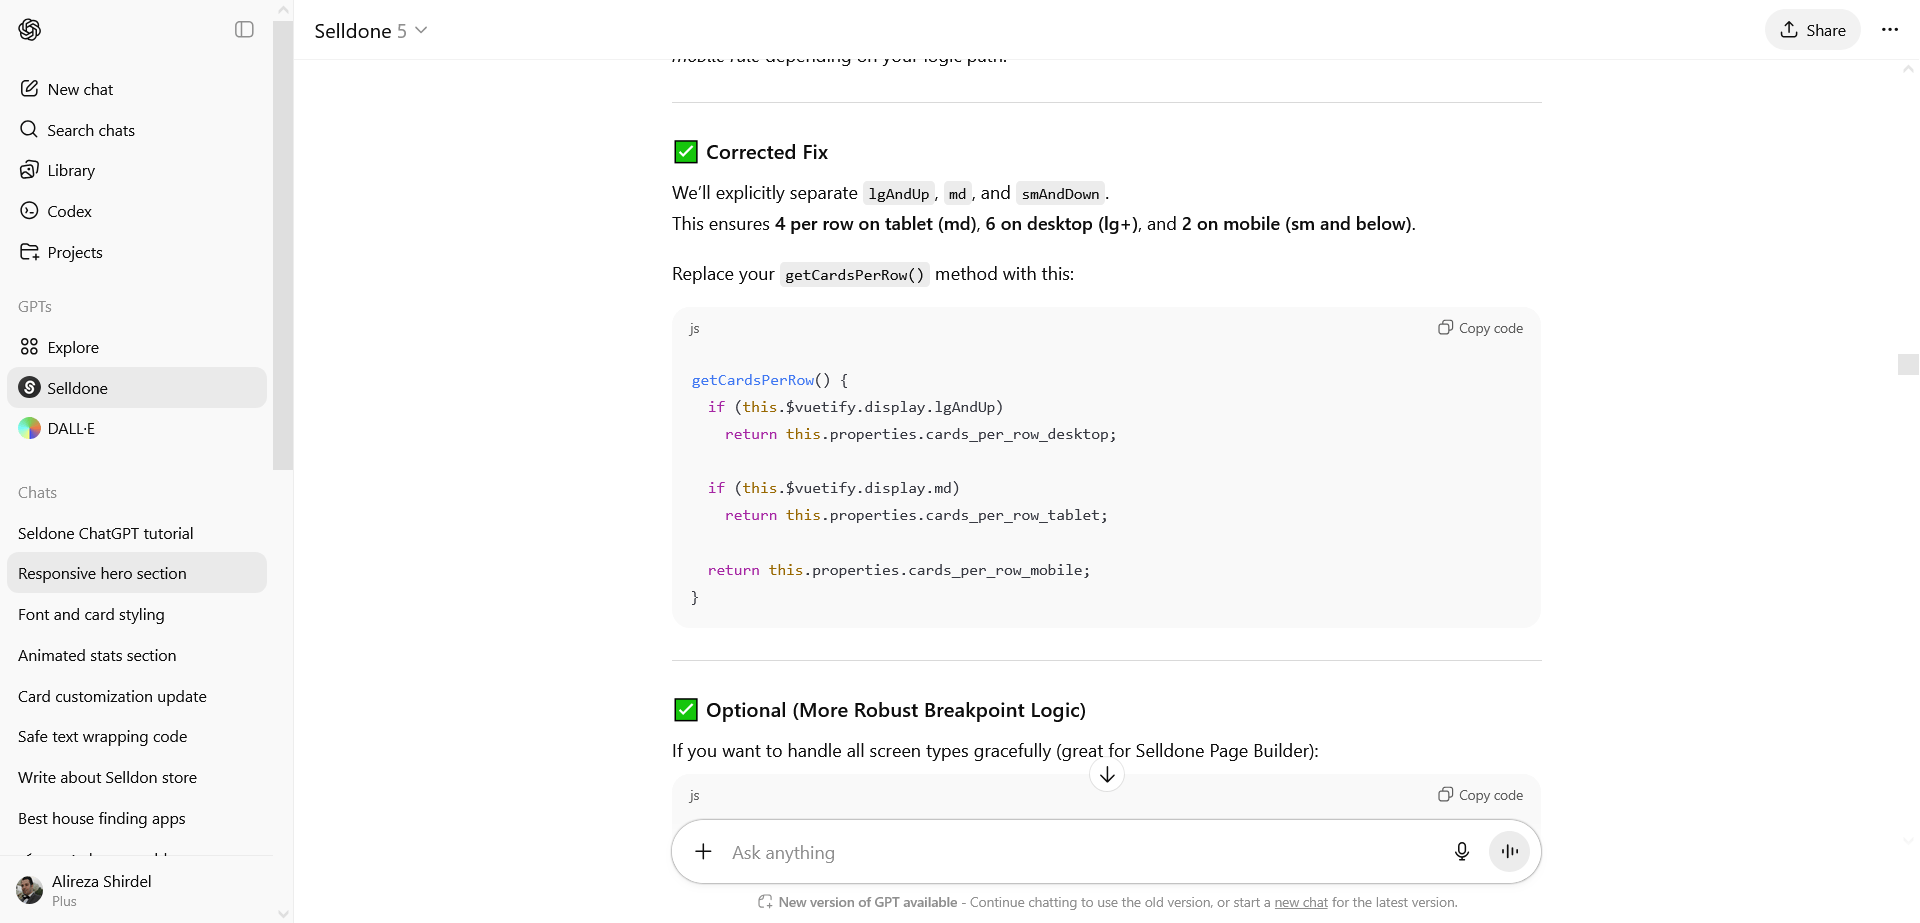
To make things easier, simply ask it to “Send the full code.”
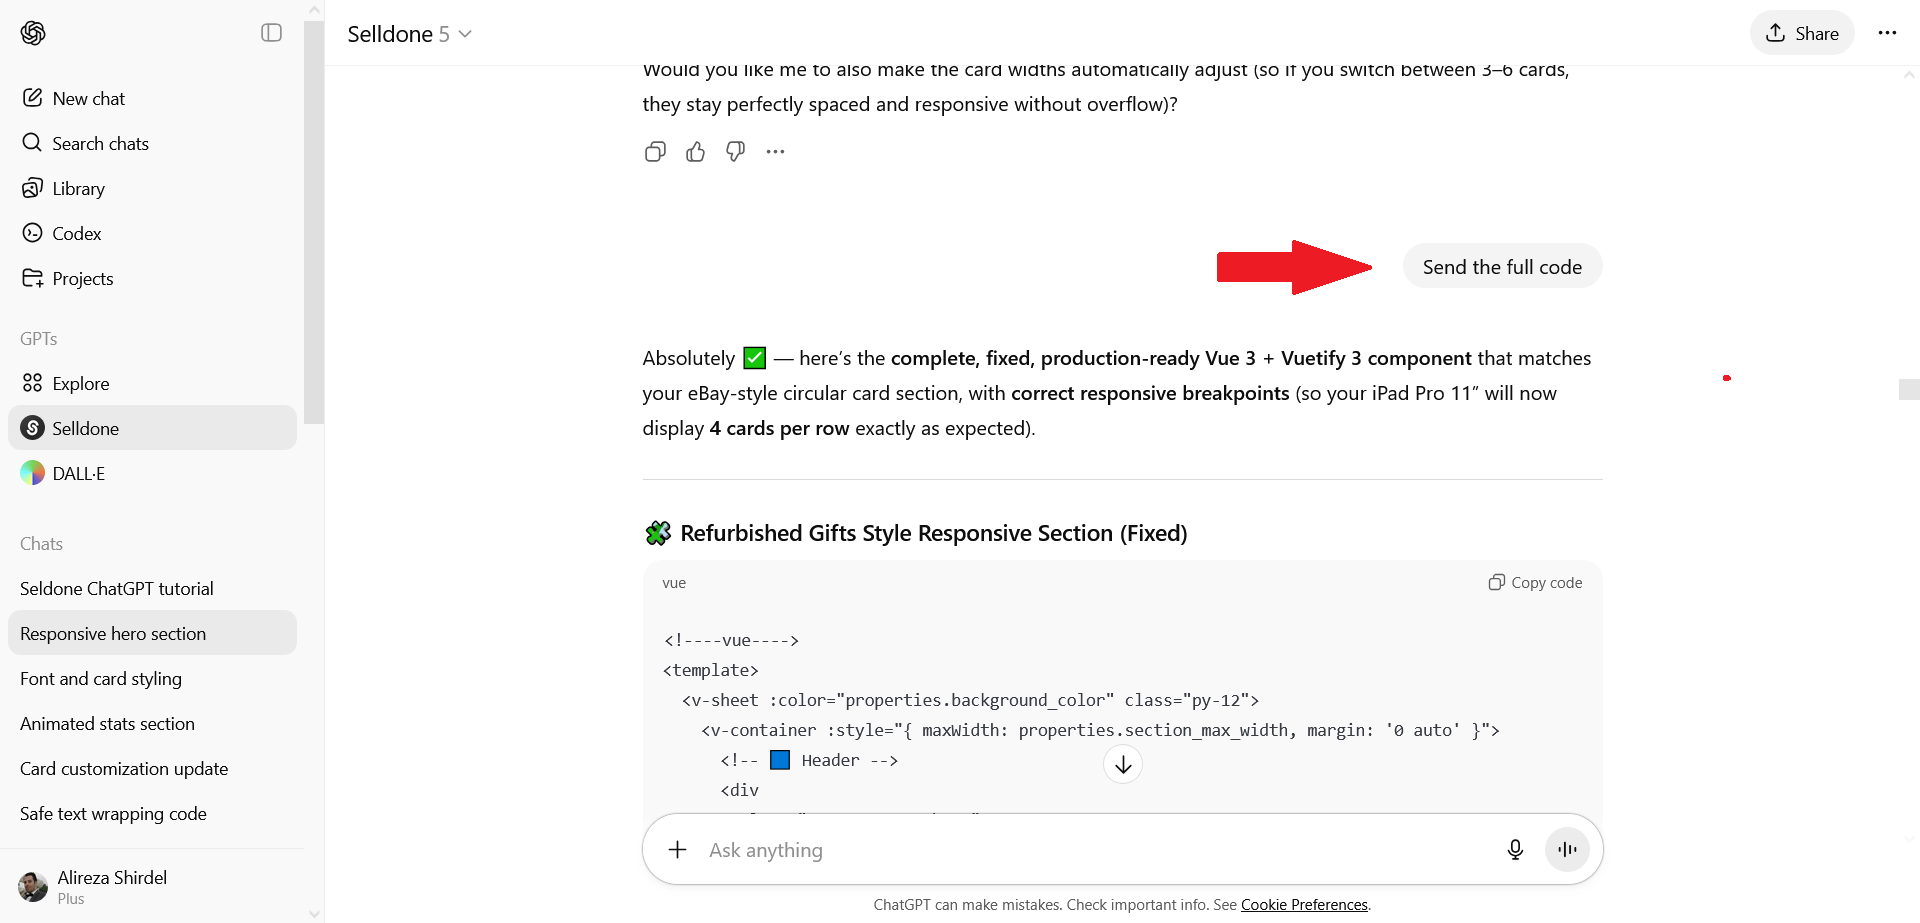
Often, at the end of its message, ChatGPT recommends additional settings you might have overlooked — like in this case, where it suggests adding links to the cards, which is essential for our section.
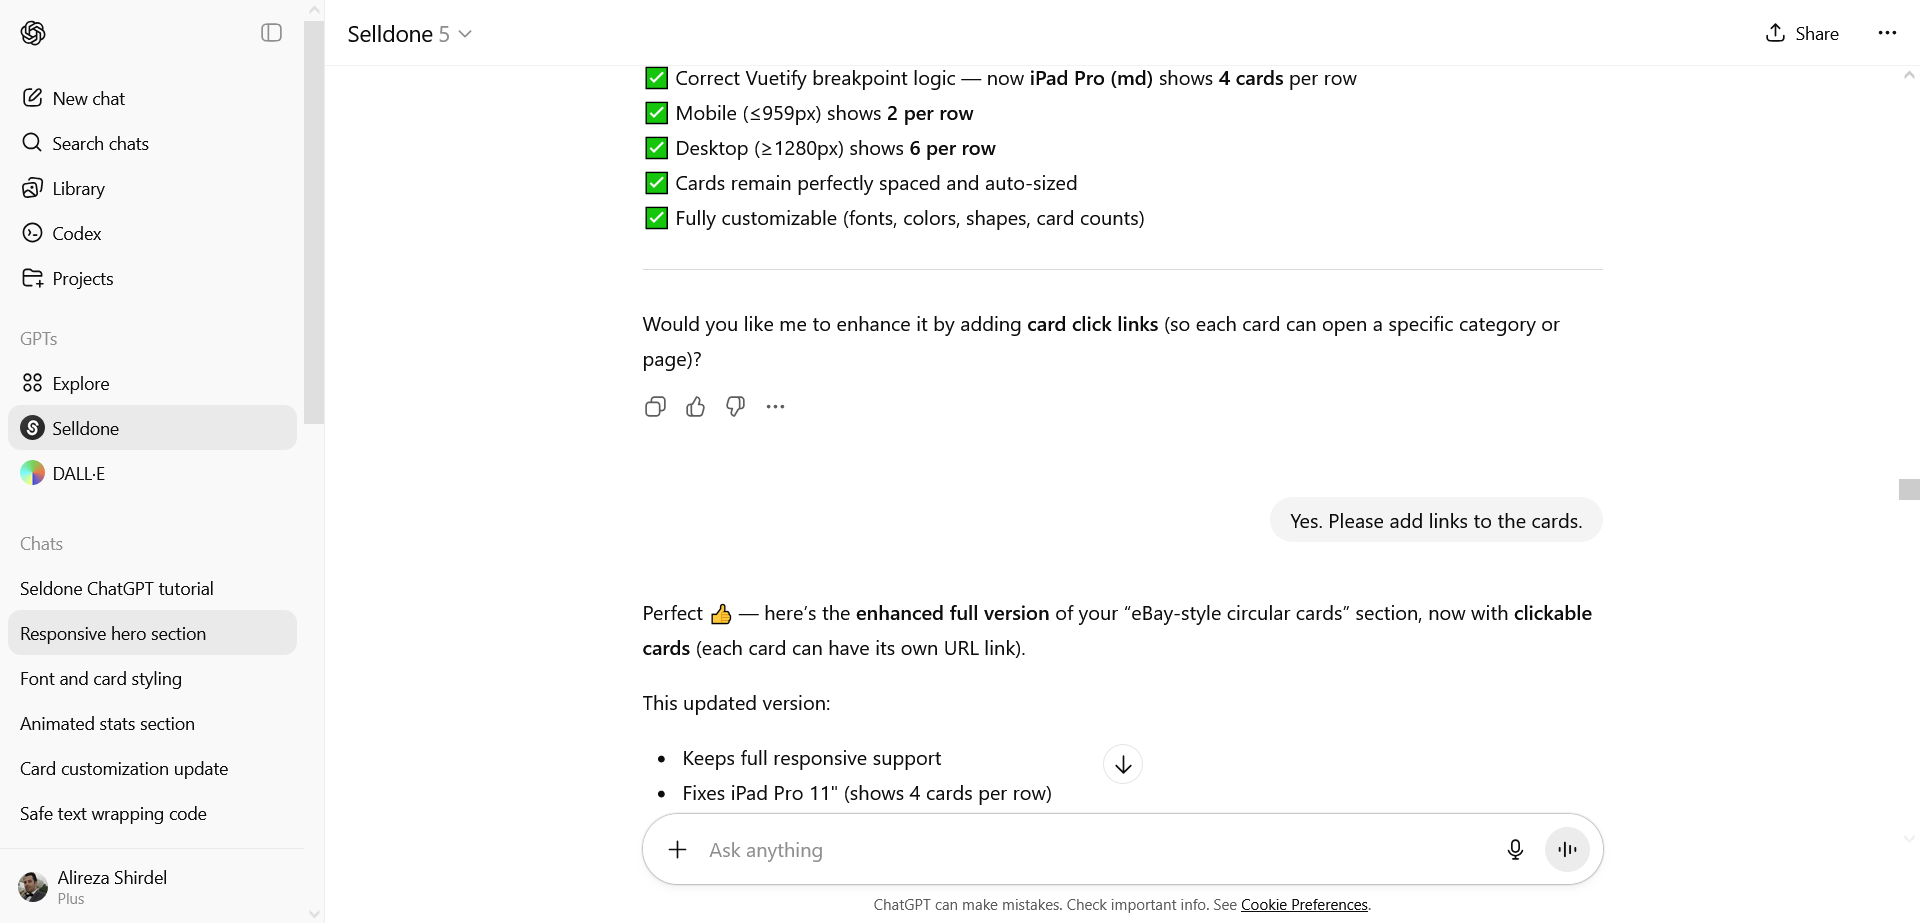
Almost done! Copy and paste the updated code into the editor, save your changes, and view it in Live Mode to ensure everything looks correct.
As you can see, it now perfectly displays 4 cards per row in the tablet version.
Step 7 – Finalize the Code and Save the Section
When your design is ready, it’s a good idea to provide ChatGPT with a detailed description of the section’s structure and requirements. Use the following prompt to generate the final code:
Add a conceptual description block above the <template> that summarizes the overall structure, behavior, and design details then give the full final code.
ChatGPT will generate the full final code starting with this structure, which you can also use as a base for future sections.
In order to save the section:
From the left side of the section, click on the Save icon 💾
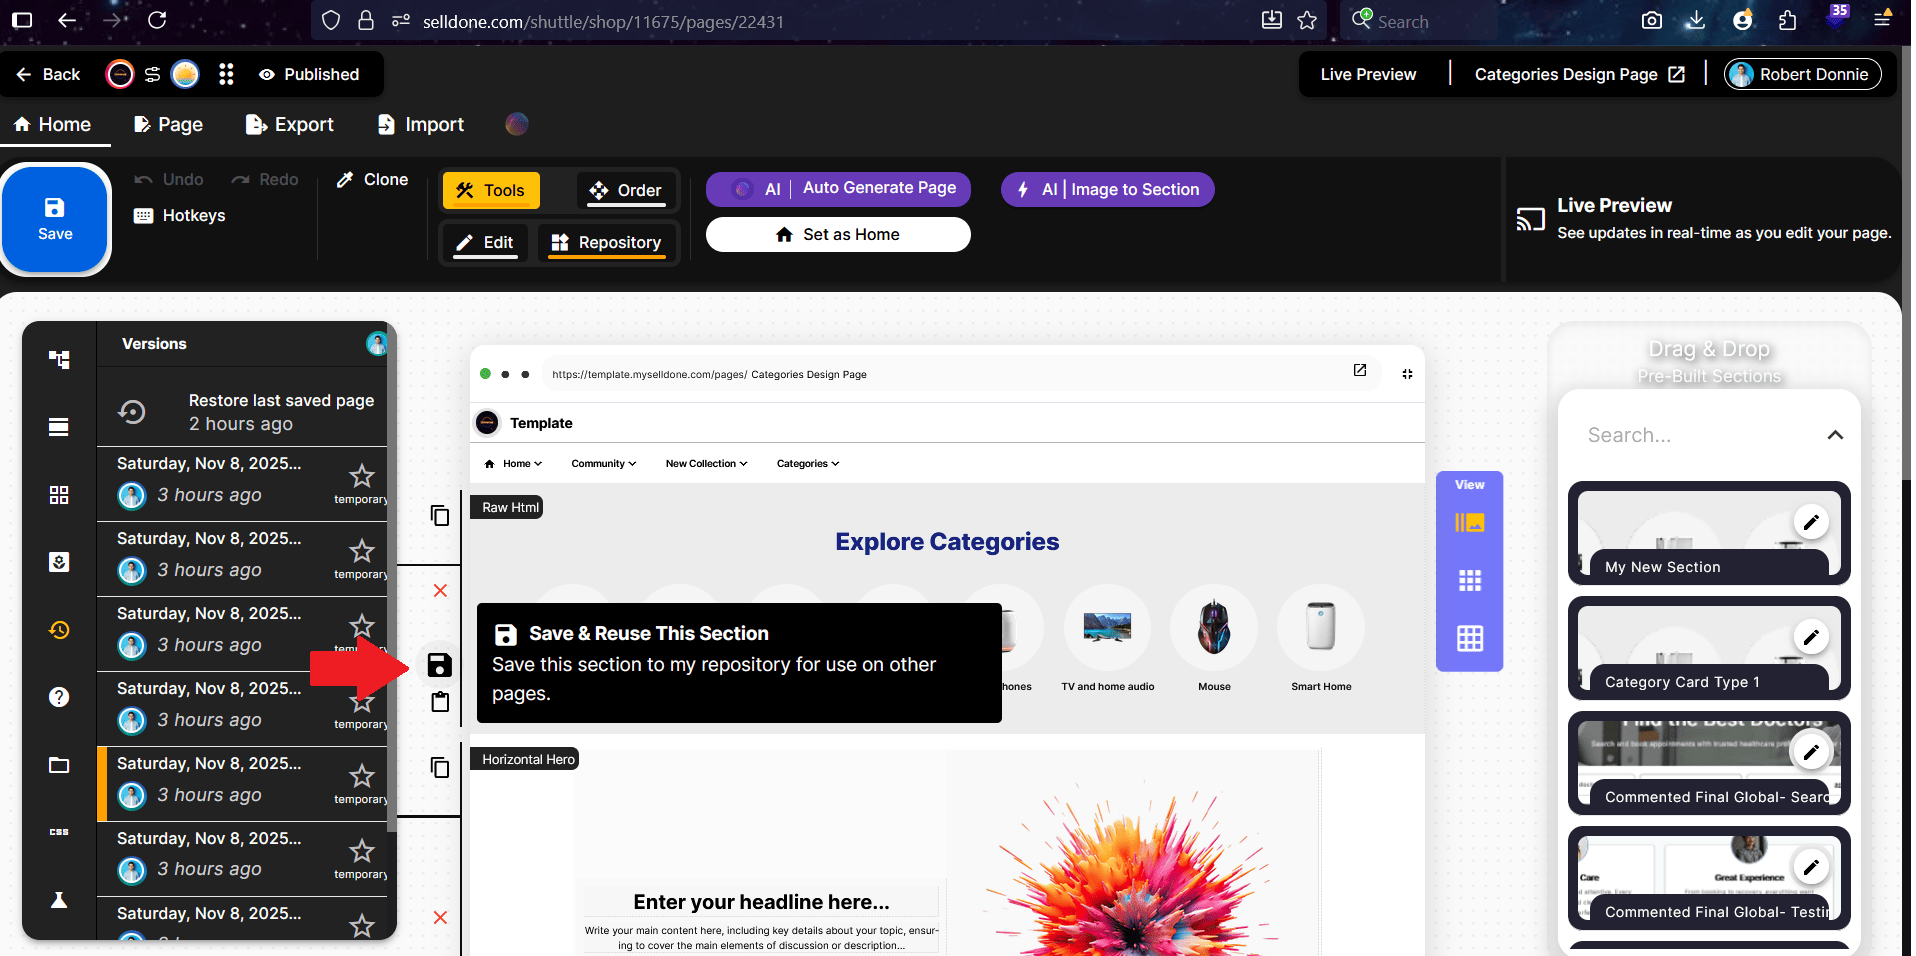
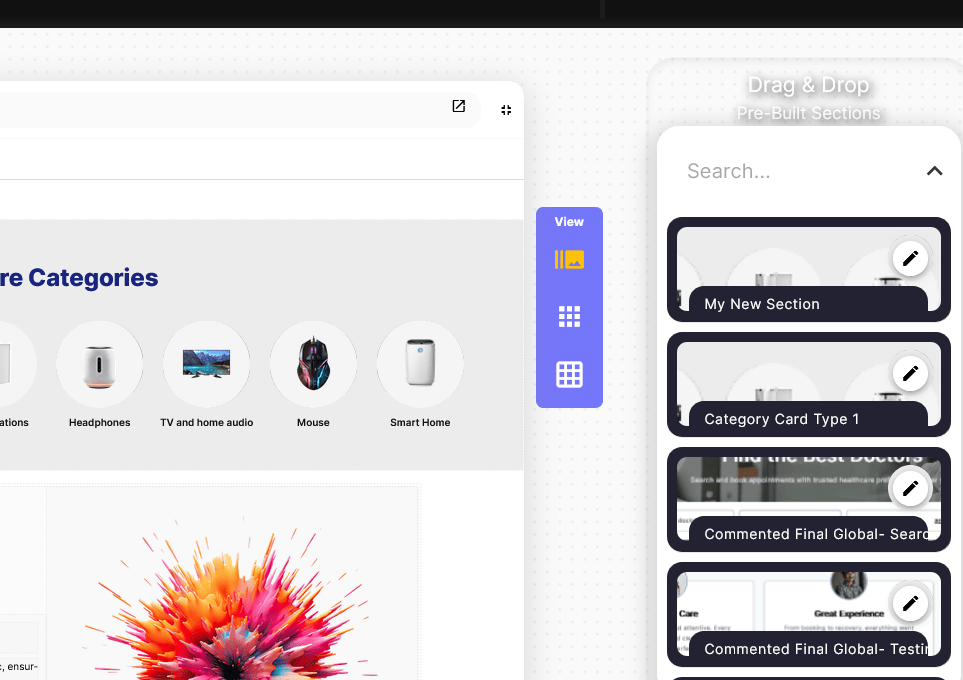
Enter a general, easy-to-remember title so you can find it more easily later. For example, Categories Cards Type 1
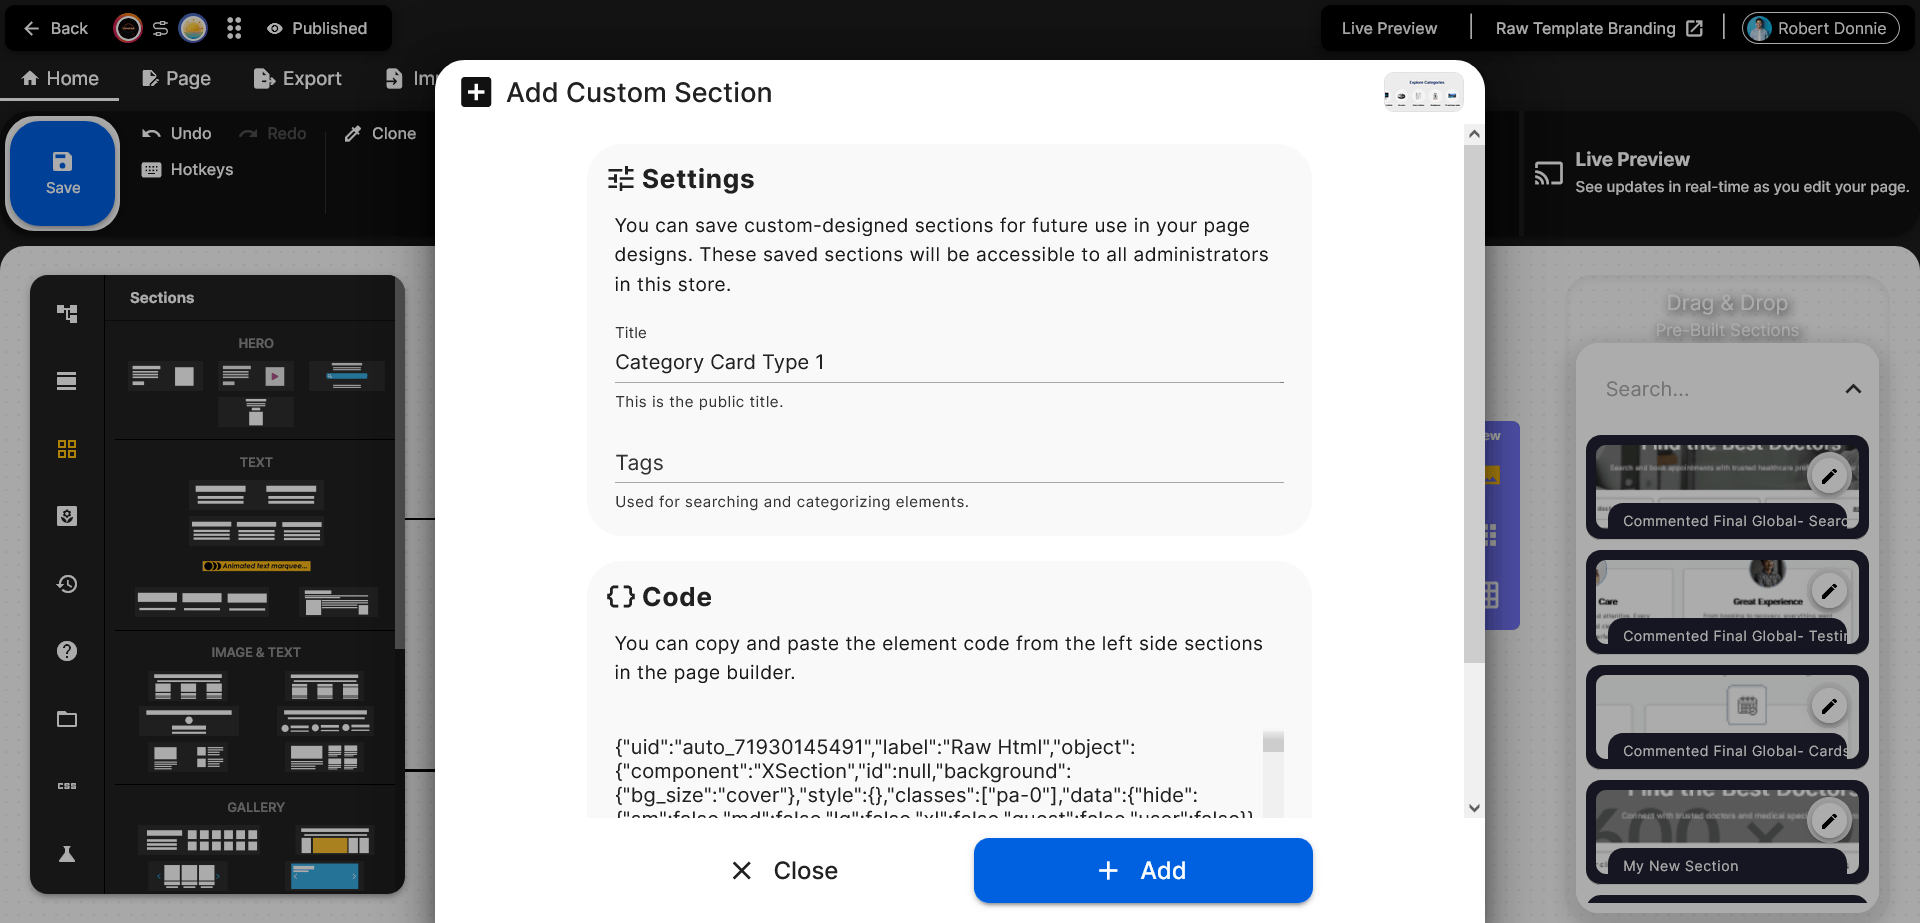
- This saved section will be added to the right-side menu of the Page Builder. If the menu disappears, simply click the Repository option in the top menu to enable it again.
To rename this landing page:
Go to the left menu and find the SEO and Settings icons. If you don’t see them, scroll to the very bottom of the menu. Then, open each one and make your changes as needed.
Step 8 – Preview the Live
Now open your site and see your new section live and fully responsive. Resize the browser window or view it on mobile — it automatically adapts to any screen size thanks to Vuetify (Vue 3).
Pro Tips for Better Results
• Use clear, high-quality reference images — the plugin learns structure from visuals.
• Be descriptive in your prompts (“use soft shadows”, “center the CTA”, “add light gradient”).
• Keep iterating — every chat round improves the design and response quality.
• Combine multiple sections to create an entire landing page.
• Remember: Selldone uses Vuetify (Vue 3), ensuring clean, flexible, production-ready layouts.
• Always test responsiveness in the Selldone live preview before publishing.
Conclusion
With the Selldone Plugin in ChatGPT, creating professional landing sections is faster and easier than ever. Start from an image (like our eBay reference), refine your design through conversation, and bring your ideas to life directly inside Selldone’s Page Builder.
It’s smart, visual, and fun. So grab your favorite design, open ChatGPT, and let Selldone help you build something amazing today!
👉 Try it now: Selldone ChatGPT Landing Builder Plugin
OR use this video tutorial if you prefer learning by watching:
Make Your Business Online By The Best No—Code & No—Plugin Solution In The Market.
30 Day Money-Back Guarantee
Create Your E-commerce Store Start now — it's freeSay goodbye to your low online sales rate!